Overview
The OneSignal Drag and Drop Email Builder allows you to visually design emails exactly as they will appear in your users’ inboxes. It consists of three core components:- Settings – global configurations that apply across your message
- Rows – structural containers to layout content horizontally
- Content – individual blocks such as images, text, and buttons
- Details on Subject, Preheader Text, and Advanced Settings
- Dynamic content
- AB testing
- Templates
- Unsubscribe links
Import your own templates
Already have email templates? You can add them to your OneSignal app with the following options:- Email Template forwarding
- Create Template API
- Copy-paste your HTML into the HTML Editor
Settings
Settings control the foundational style and layout of your message. These settings cascade down to rows and content blocks unless explicitly overridden.
Image shows settings for the builder
| Design Settings | Description |
|---|---|
| Content area width | Width of the email in pixels. Default is 600px. |
| Content area alignment | Align content to the left or center. |
| Background color | Background color behind the content area. |
| Content area background color | Background color within the content area. |
| Default font | Font applied throughout the email unless customized at the row or content level. Custom fonts require HTML. |
| Link color | Color for all hyperlink text. |
| Language | Sets the lang attribute in HTML for accessibility. Defaults to English. |
Rows
Rows are the horizontal building blocks of your email layout. Each row can contain multiple columns and content blocks. Simply drag and drop rows into the email editor to add them.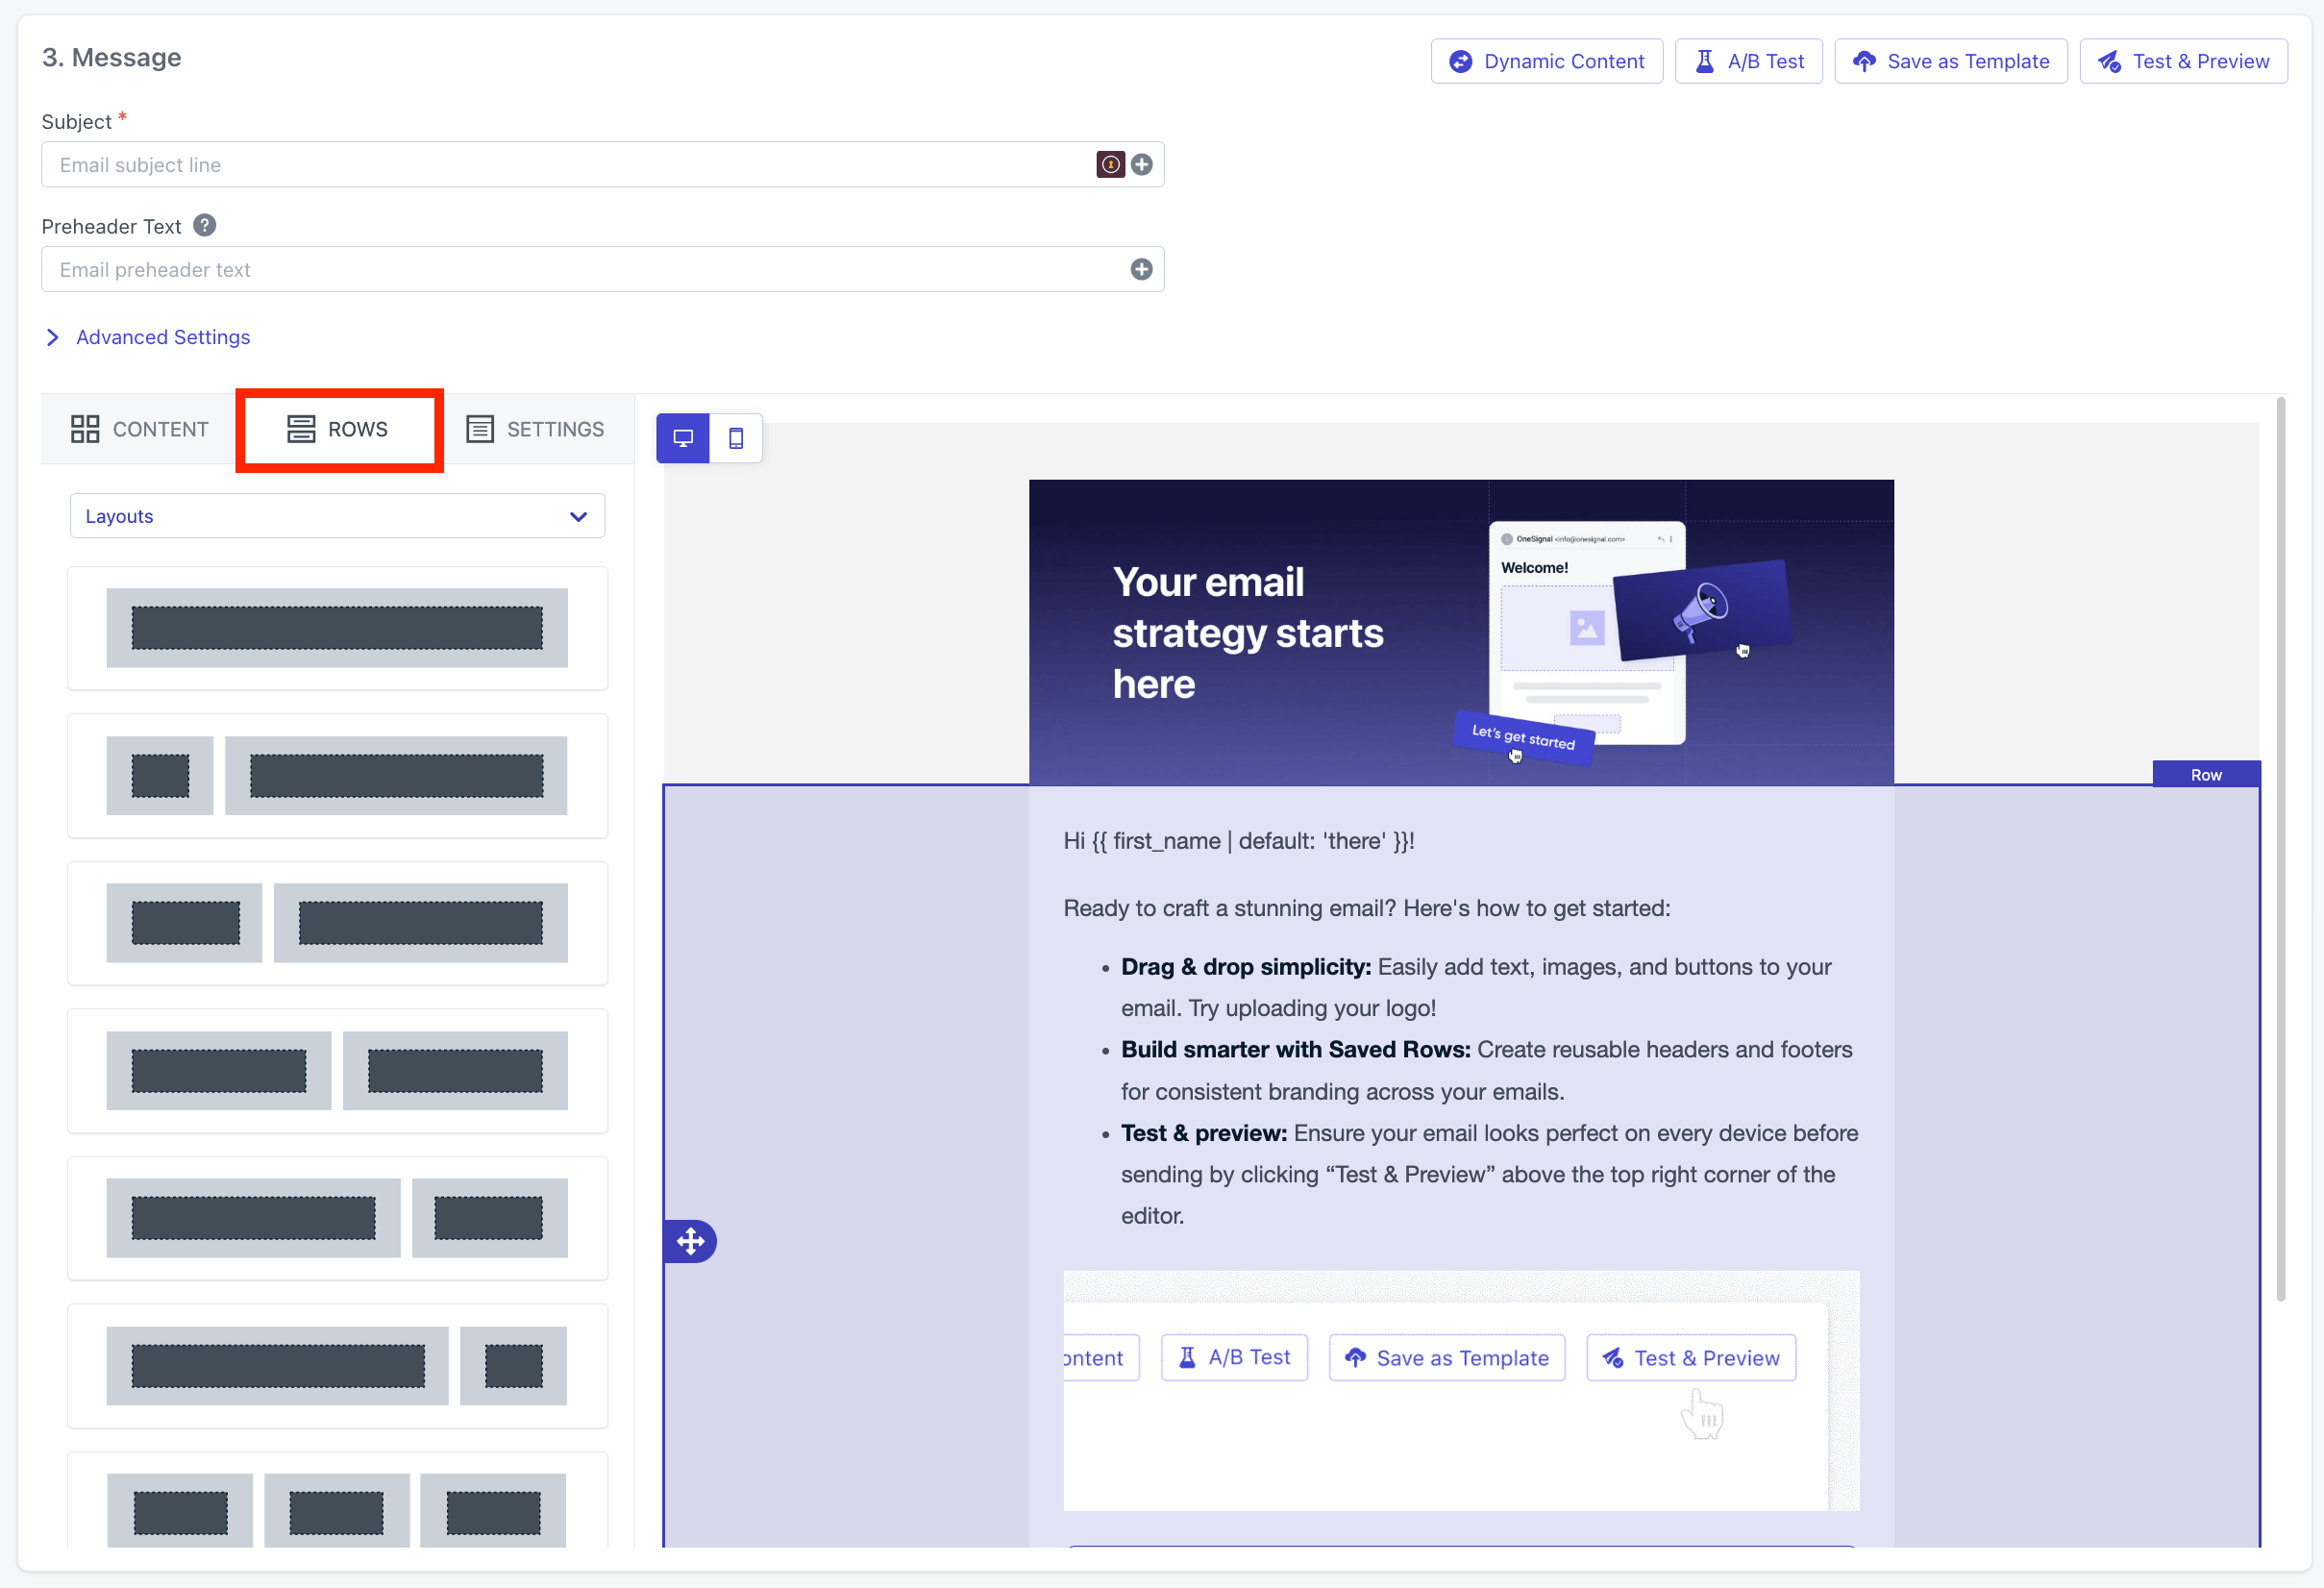
Image shows the ability to use multiple rows
Each row and its columns can override global settings, giving you granular control over design and responsiveness.
Delete & duplicate rows
Select the row and use the delete and duplicate icons.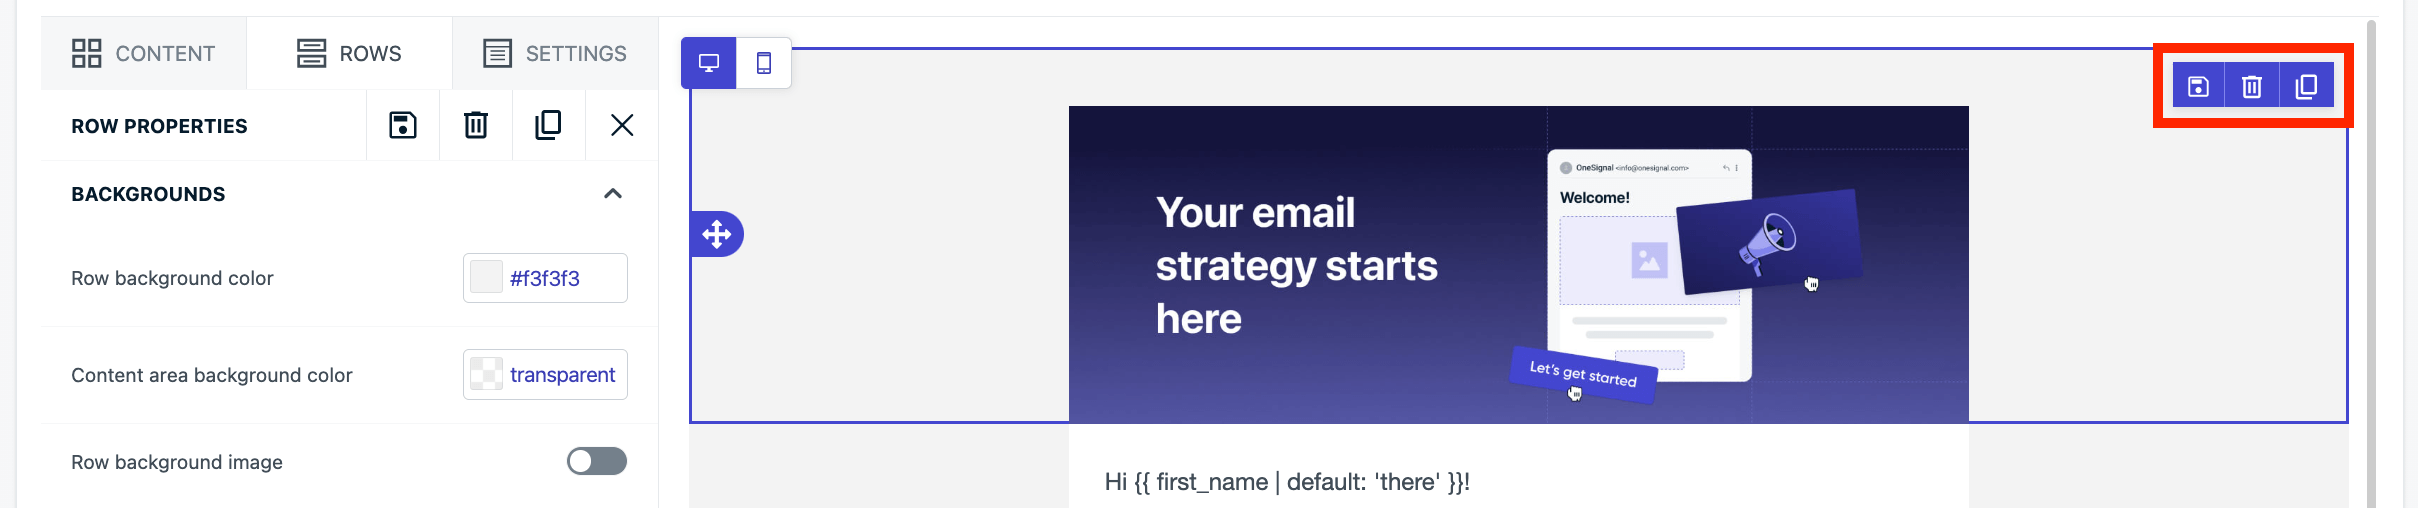
Image shows the ability to delete and duplicate rows
Saved rows
Click the save icon on any row to reuse it across templates. Updates to a saved row can optionally apply to all templates that use it.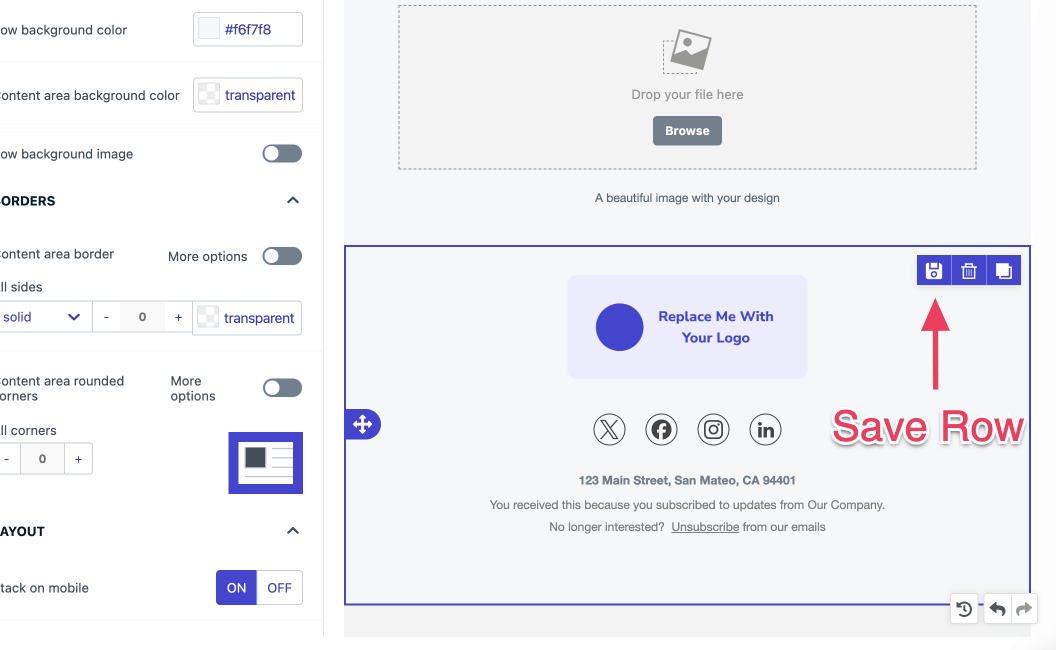
How to save a row
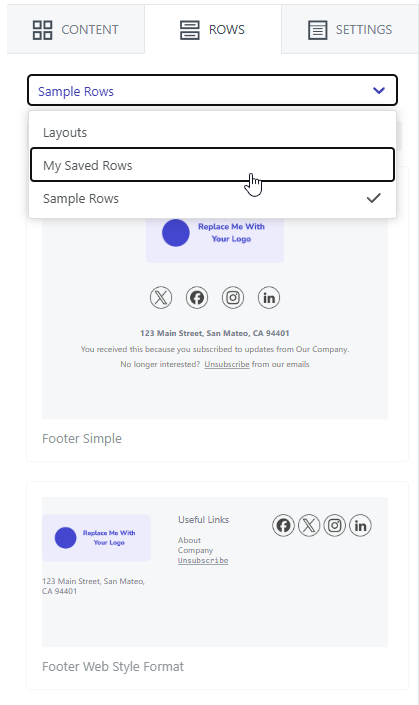
Select saved row
- Empty – blank row templates
- My Saved Rows – rows you’ve saved
- Sample Rows – prebuilt templates by OneSignal
Row properties
Click on a row to edit properties. Make sure you see the word “Row” when hovering over the row. Otherwise, you will select the Content block.| Row Properties | Description |
|---|---|
| Backgrounds | Background color or image behind the content area. Recommended: Set background color in Settings for consistency. If there is no clickable content, consider using an Image Block instead of a row background image. |
| Borders | Border color, width, and style. |
| Layout | Customize or hide the row on mobile vs desktop. |
| Columns | Add, remove, adjust columns within the row add more Content blocks. Adjust the padding specific to the column. |
Content
Content blocks represent the core of your message — images, text, buttons, and more. Drag a content block into a row column and it will adjust to the width. Each block has its own settings like padding, font size, and alignment.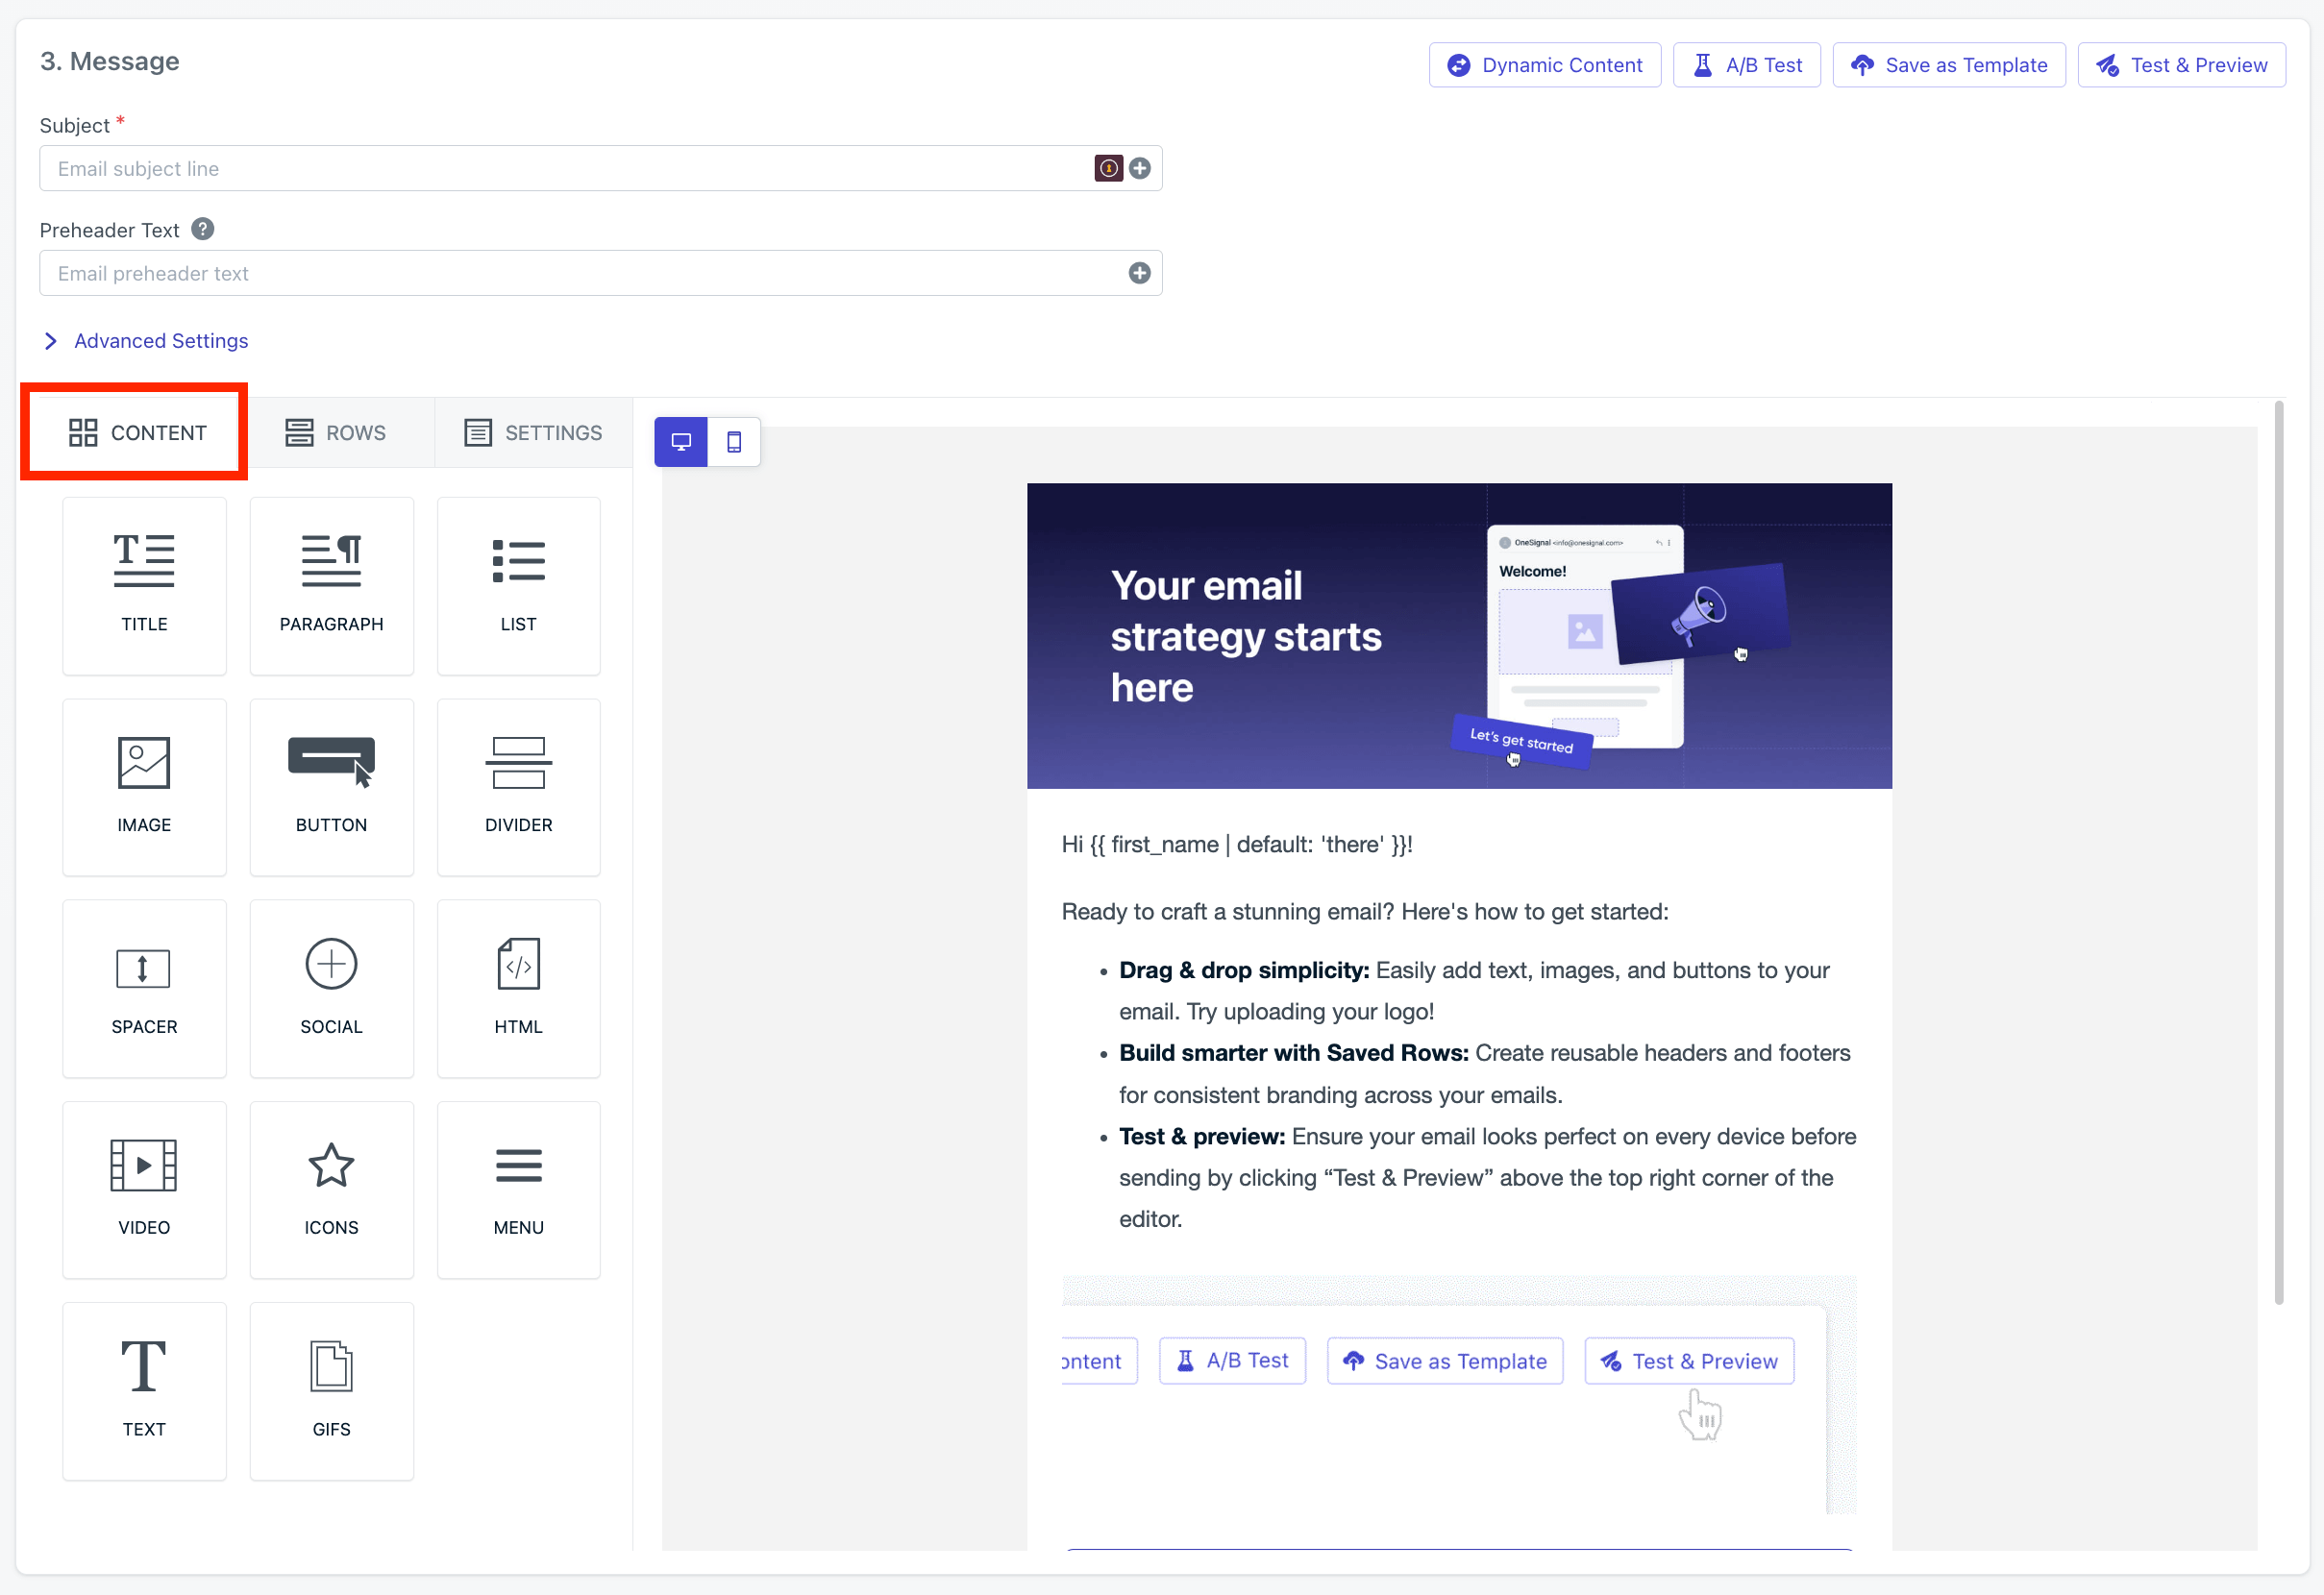
Selecting the drag-and-drop Content blocks to design your email
Images and video
Uploaded images are accessible across your team. Change and apply affects to images like cropping, filtering, and more directly in the editor. URLs to images and videos can be used. Make sure they are available via the provided URL.Links
Link tracking is enabled by default. Multi-link tracking is available. See Links and Deep Linking for more details.Unsubscribe links
All marketing emails should contain an unsubscribe link. Without an unsubscribe link, your emails will have a higher chance of being marked as spam. See Unsubscribe links for more details. OneSignal provides a default unsubscribe link that when used, will unsubscribe the user’s email Subscription. You can also include your own custom unsubscribe URL if desired. Just make sure you correctly manage the email Subscription (details in Create a custom unsubscribe page). Add OneSignal’s default[unsubscribe_url] into your emails via:
- HTML Block:
<a href="[unsubscribe_url]">Unsubscribe</a> - Select your text and use the Special links option in the editor or set
[unsubscribe_url]in the URL field

Adding the unsubscribe link to your email
HTML blocks
Add custom HTML with HTML Blocks. JavaScript is not supported. Inline CSS is recommended. Some email clients strip out class or ID attributes.Custom HTML blocks are the best place to add advanced styling such as dark mode overrides.
See Dark mode styling best practices for guidance.
See Dark mode styling best practices for guidance.
Personalization
Use liquid templating to personalize messages. Example:{{ first_name | default: "there" }}
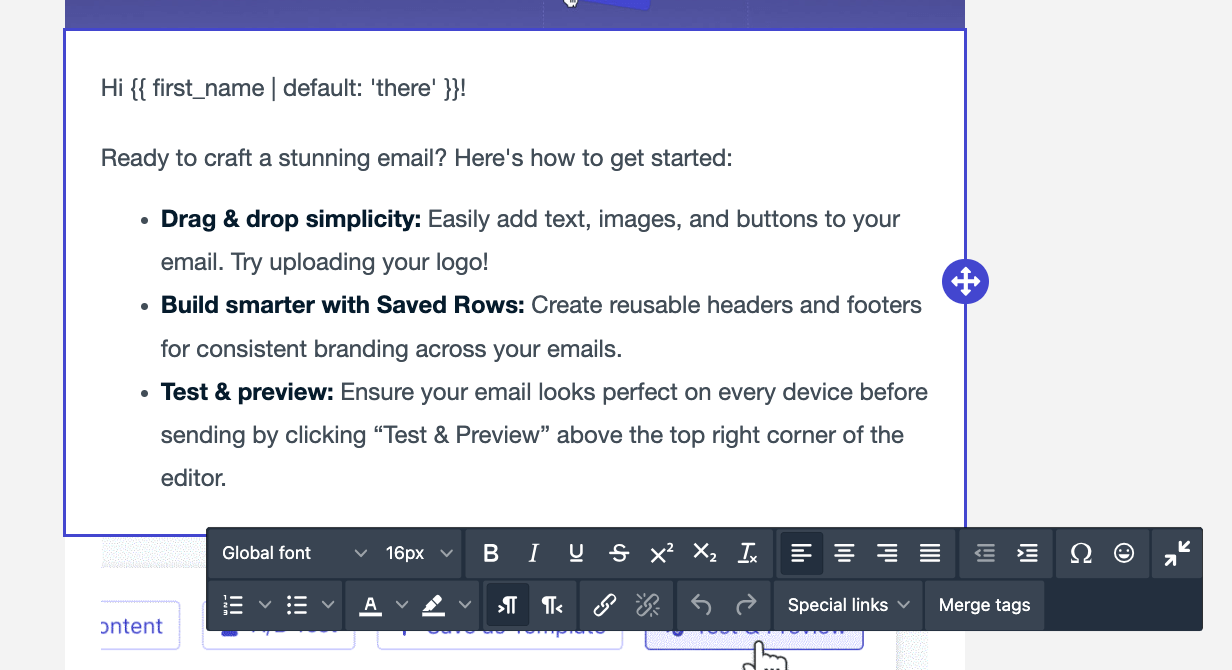
Image shows the use of tag substitution
Emojis
Emojis may render differently across email platforms.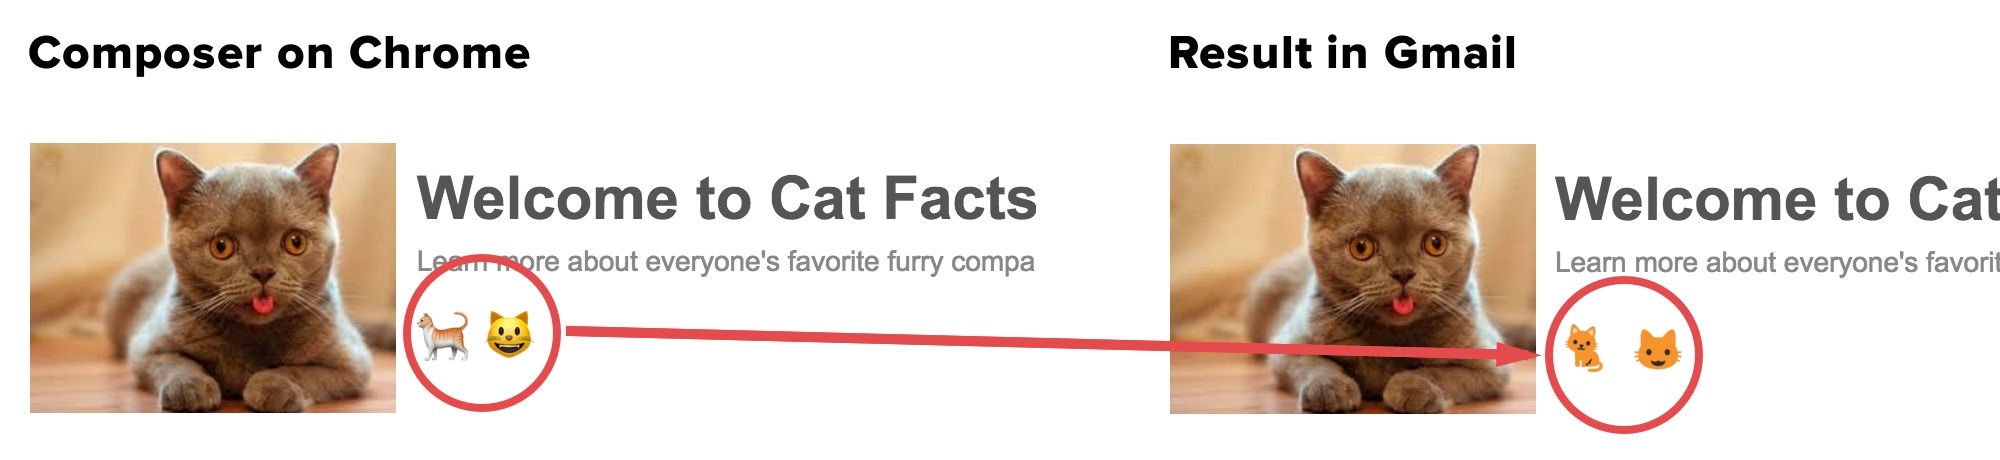
Image shows how emojis render on different email clients
Save your work
You can save your email design as a template for future use.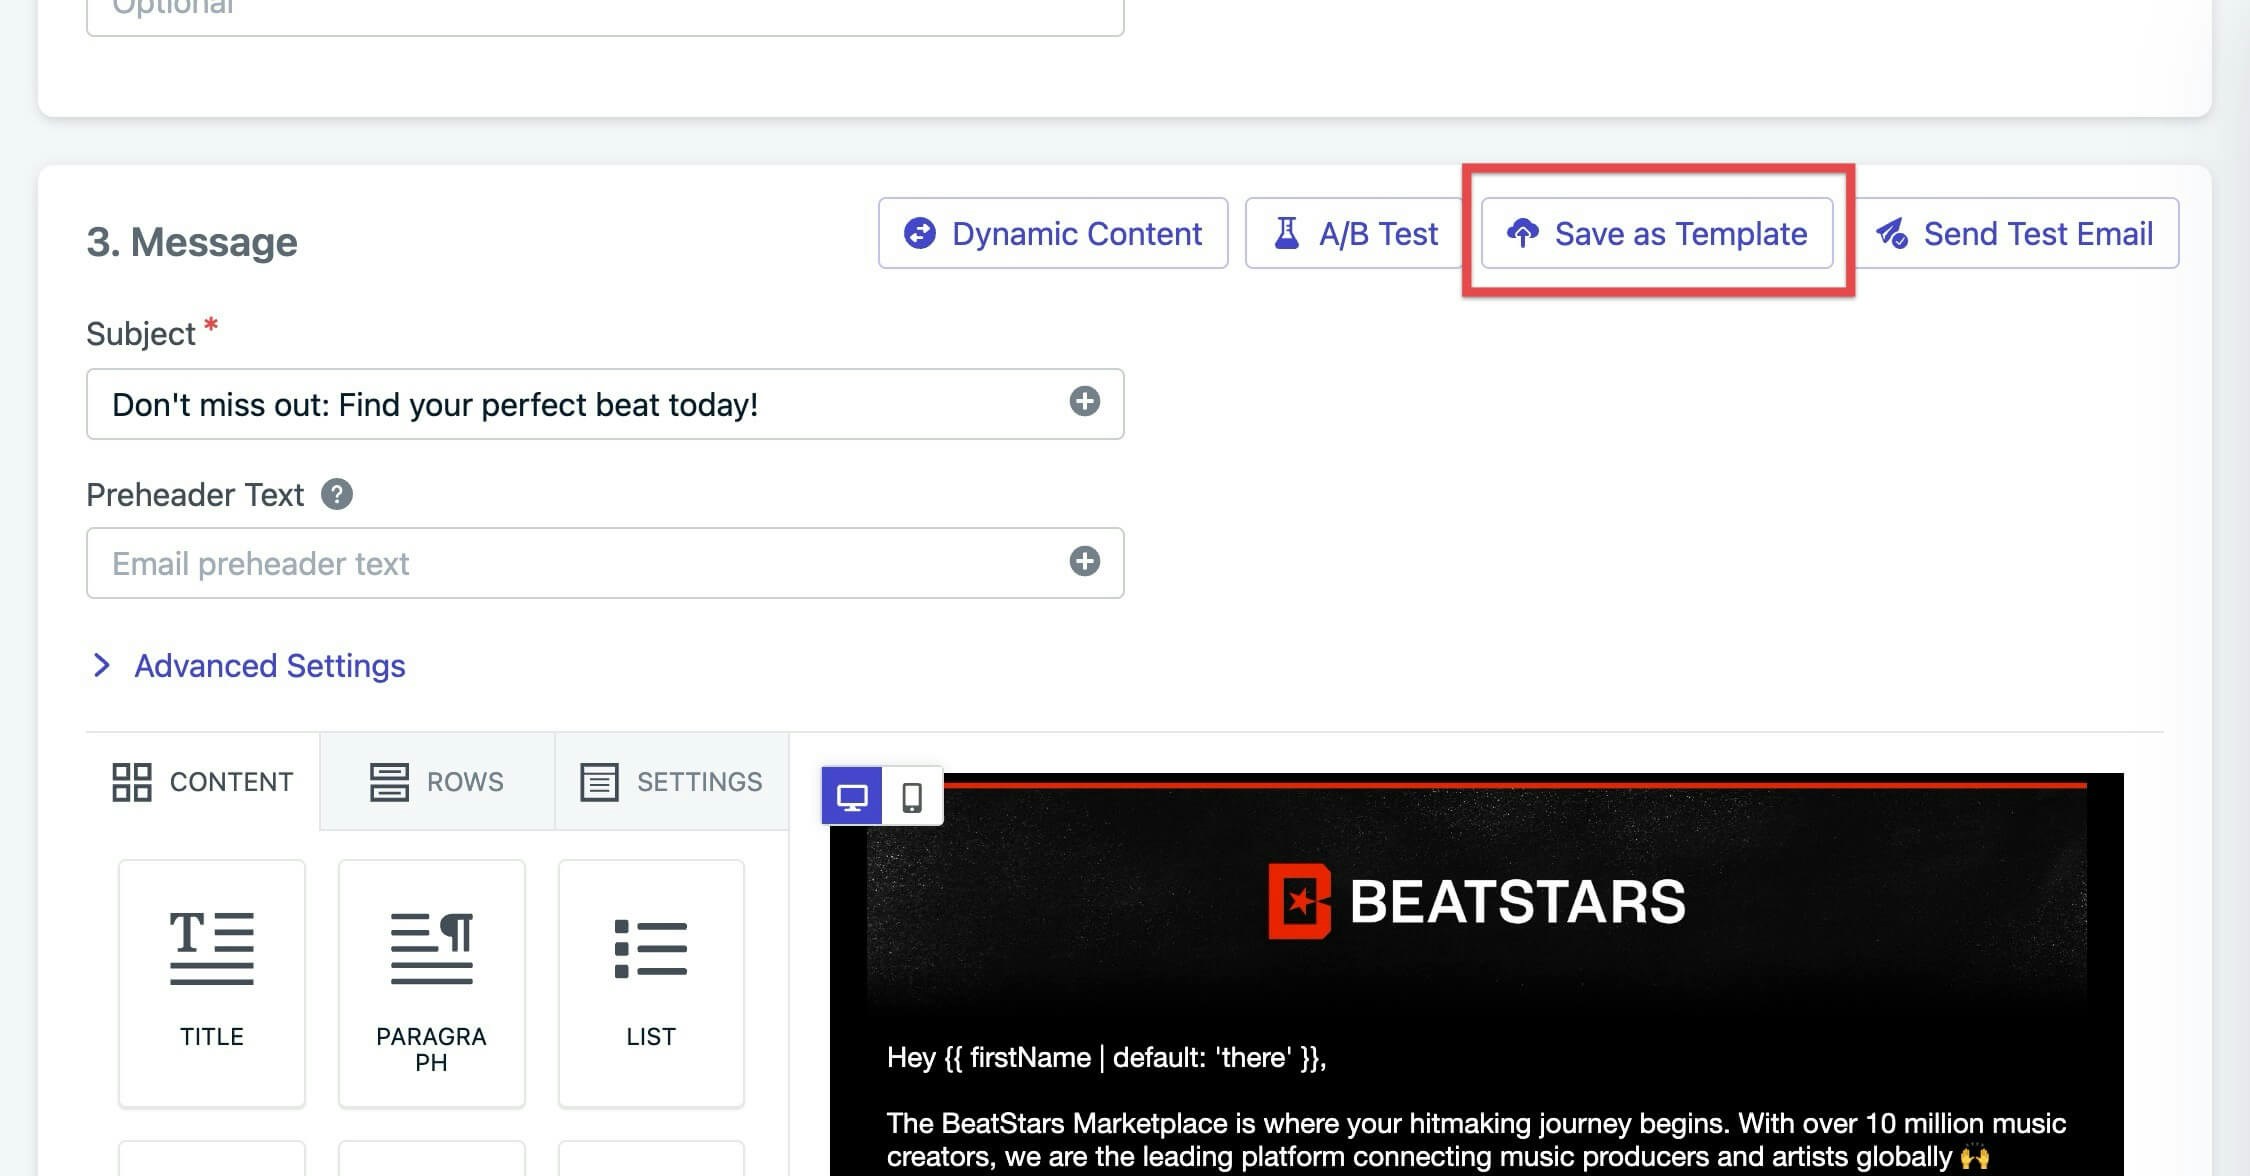
Image shows how to save as a template