Overview
If you have a mobile-friendly website and want to convert it into a downloadable mobile app for the Apple App Store or Google Play Store, Median.co is a powerful solution. It also offers a seamless integration with OneSignal to enable push notifications.Setup
1. Create your app with Median.co
- Follow the Median.co Getting Started Guide.
- Build an app at <https://median.co/app>.
2. Set up OneSignal
- Go to onesignal.com and create an account.
- Configure your OneSignal App and Platform.
Configure your OneSignal app and platform
Required setup for push notifications To start sending push notifications with OneSignal, you must first configure your OneSignal app with all the platforms your support—Apple (APNs), Google (FCM), Huawei (HMS), and/or Amazon (ADM).Step-by-step instructions for configuring your OneSignal app.
Step-by-step instructions for configuring your OneSignal app.
Create or select your app
- To add platforms to an existing app, go to Settings > Push & In-App in the OneSignal dashboard.
- To start fresh, click New App/Website and follow the prompts.

Example shows creating a new app.
Set up and activate a platform
- Choose a clear and recognizable name for your app and organization.
- Select the platform(s) you want to configure (iOS, Android, etc.).
- Click Next: Configure Your Platform.
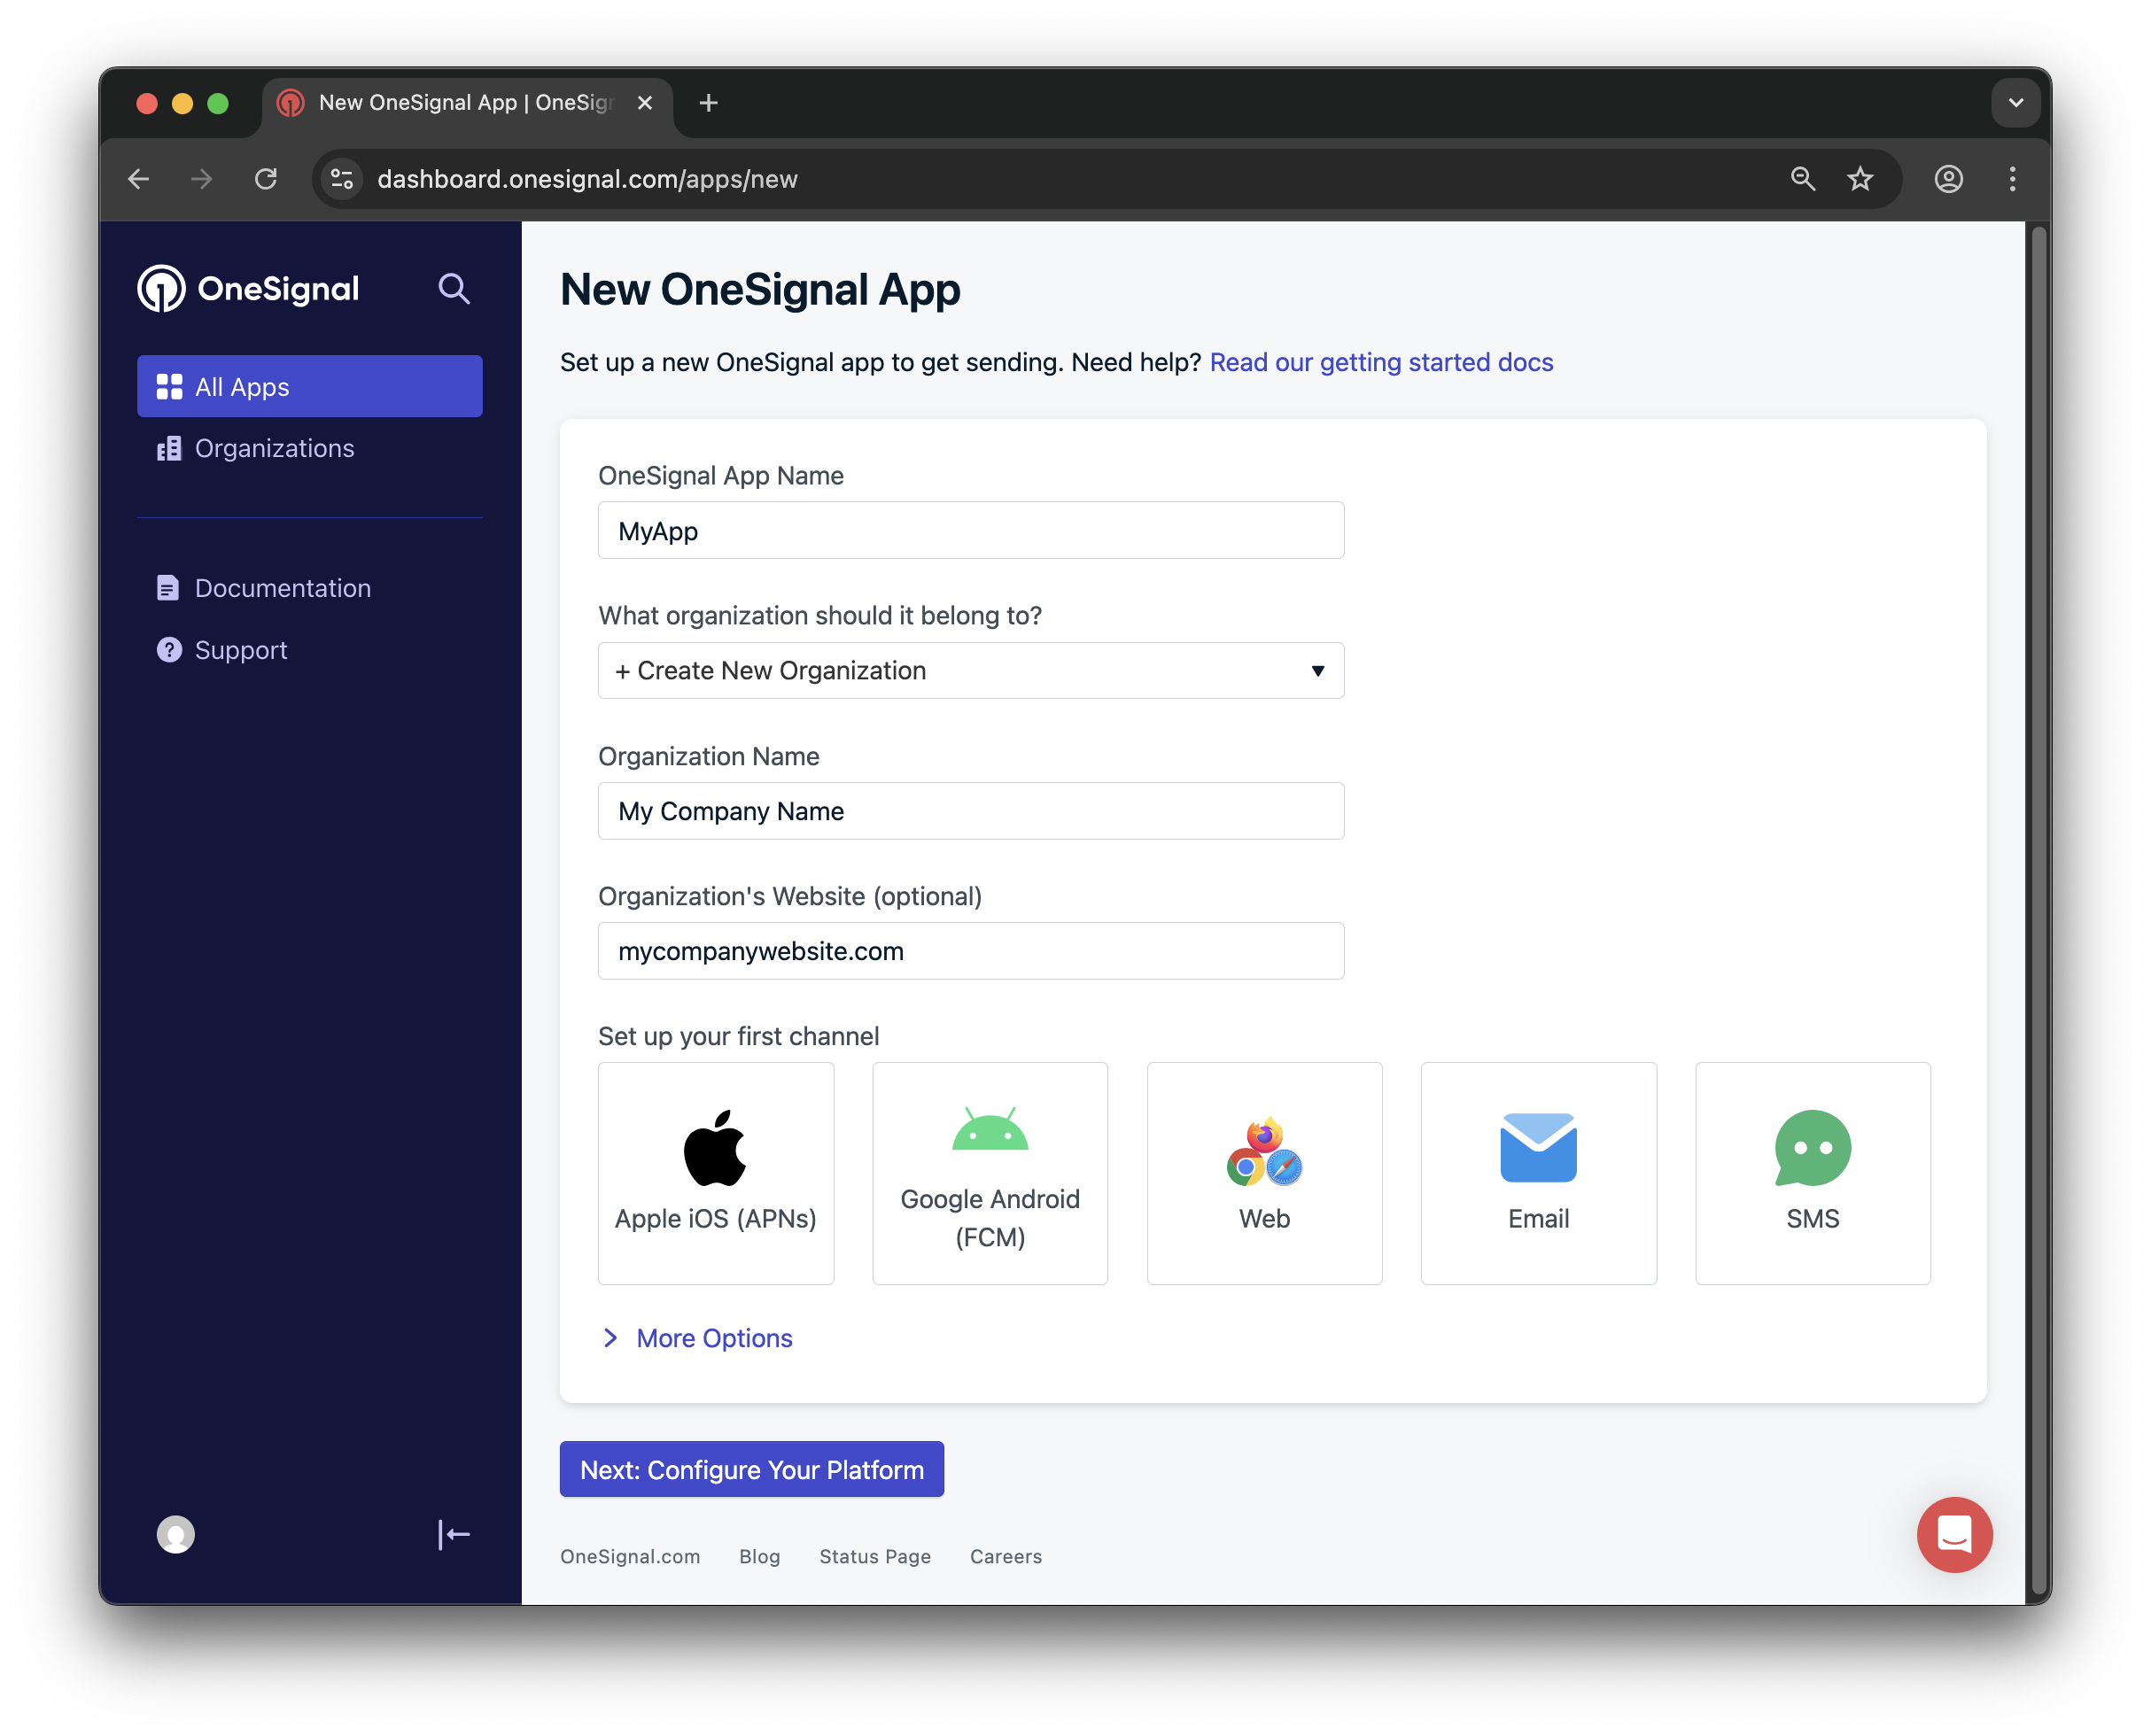
Example setting up your first OneSignal app, org, and channel.
Configure platform credentials
- Android: Set up Firebase Credentials
- iOS: p8 Token (Recommended) or p12 Certificate
- Amazon: Generate API Key
- Huawei: Authorize OneSignal
Choose target SDK
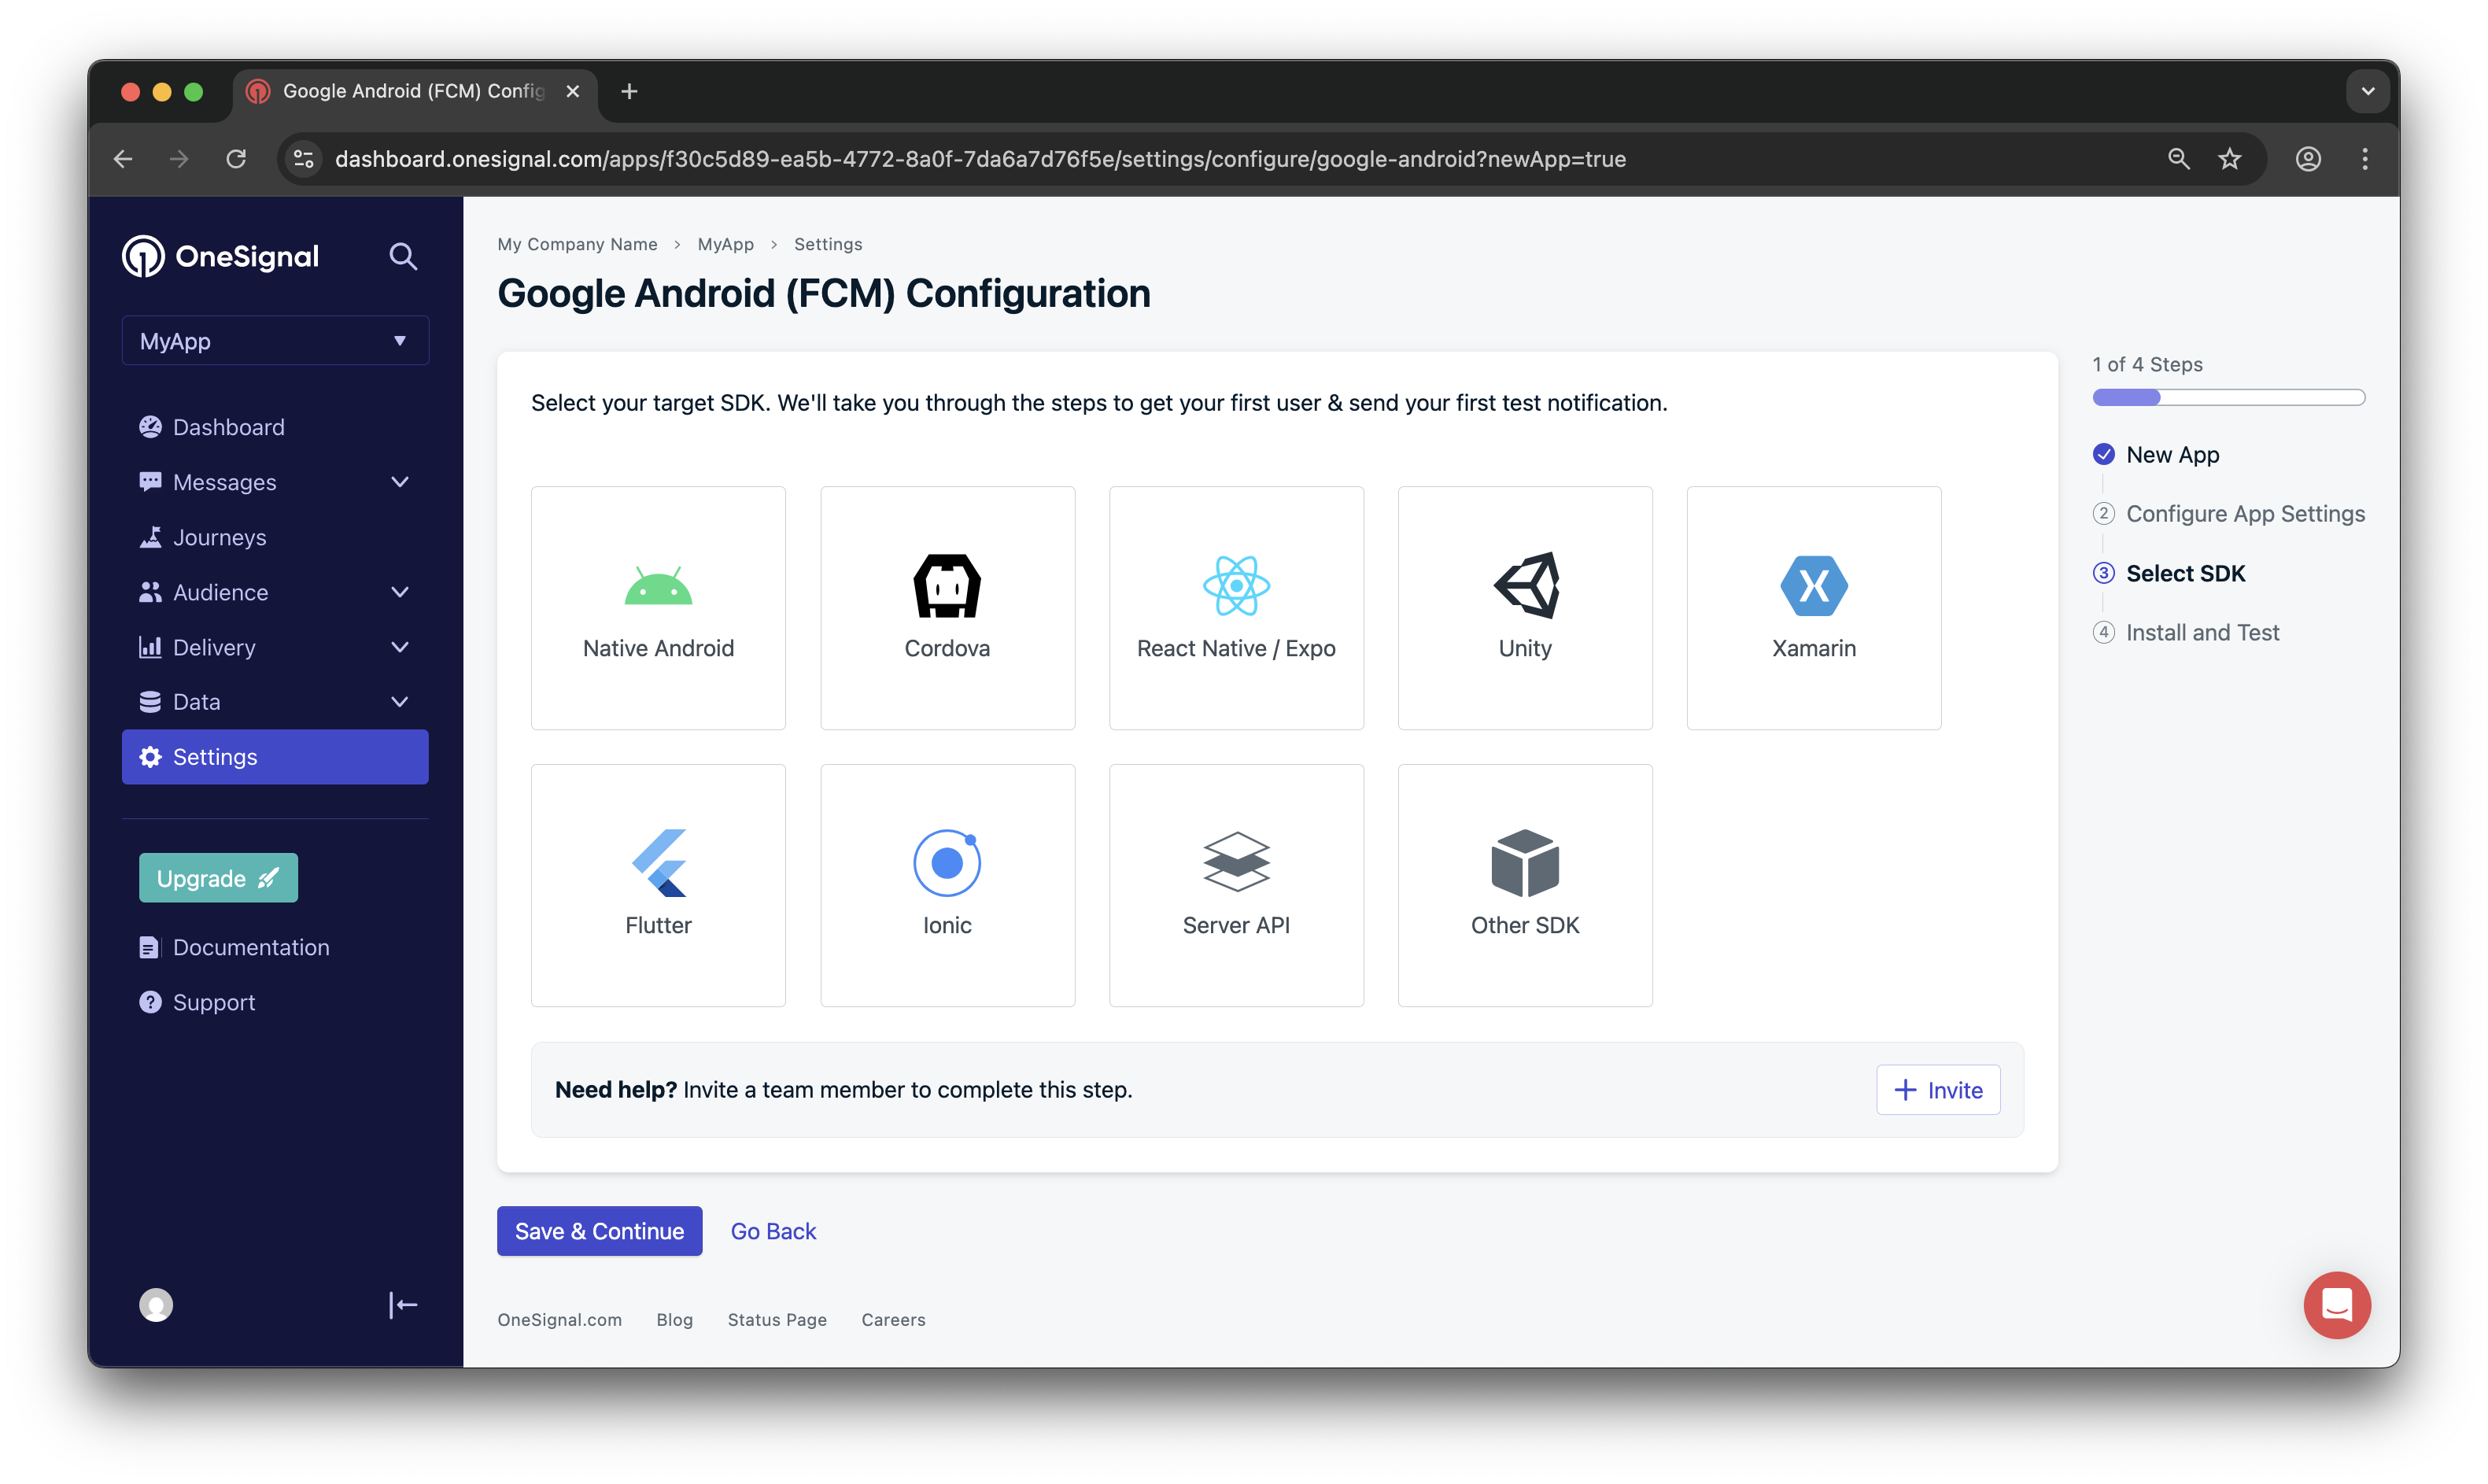
Select which SDK you are using to be navigated to the docs.
Install SDK and save your App ID
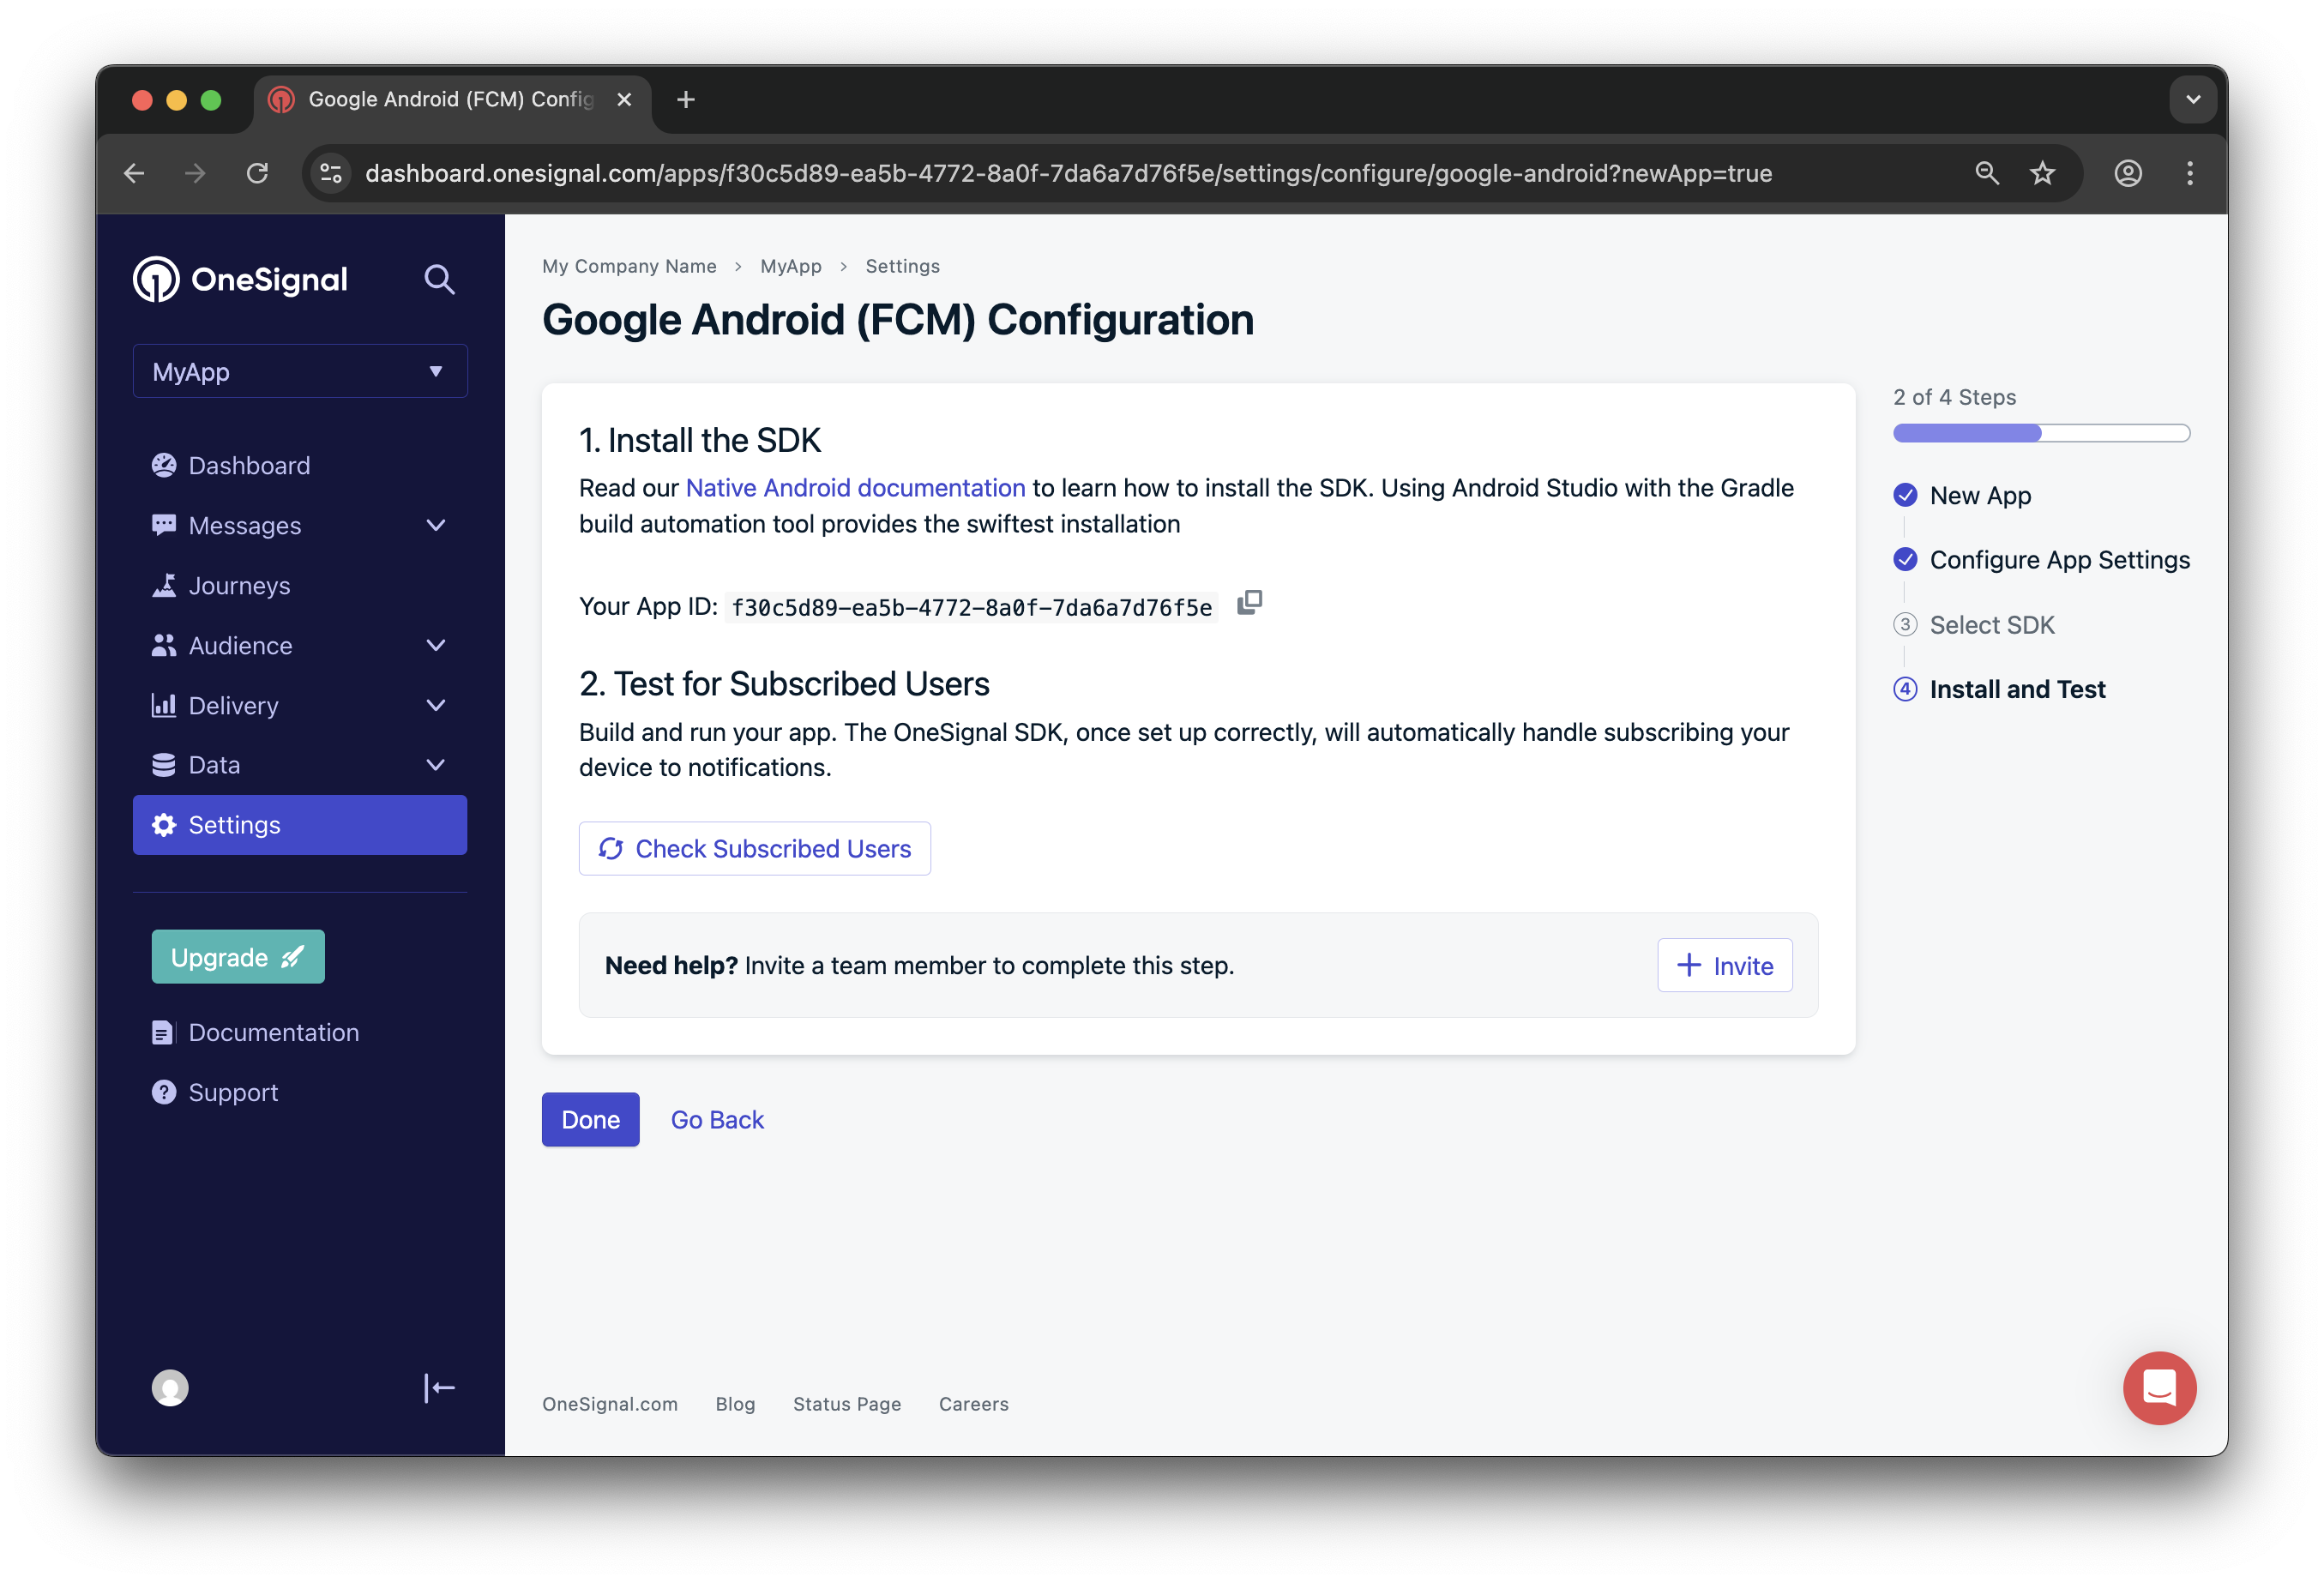
Save your App ID and invite additional team members.
3. Link OneSignal to your Median app
Paste the OneSignal App ID into your Median.co (GoNative) app configuration.Testing the OneSignal SDK integration
This guide helps you verify that your OneSignal SDK integration is working correctly by testing push notifications, subscription registration, and in-app messaging.Check mobile subscriptions
Launch your app on a test device.
requestPermission method during initialization.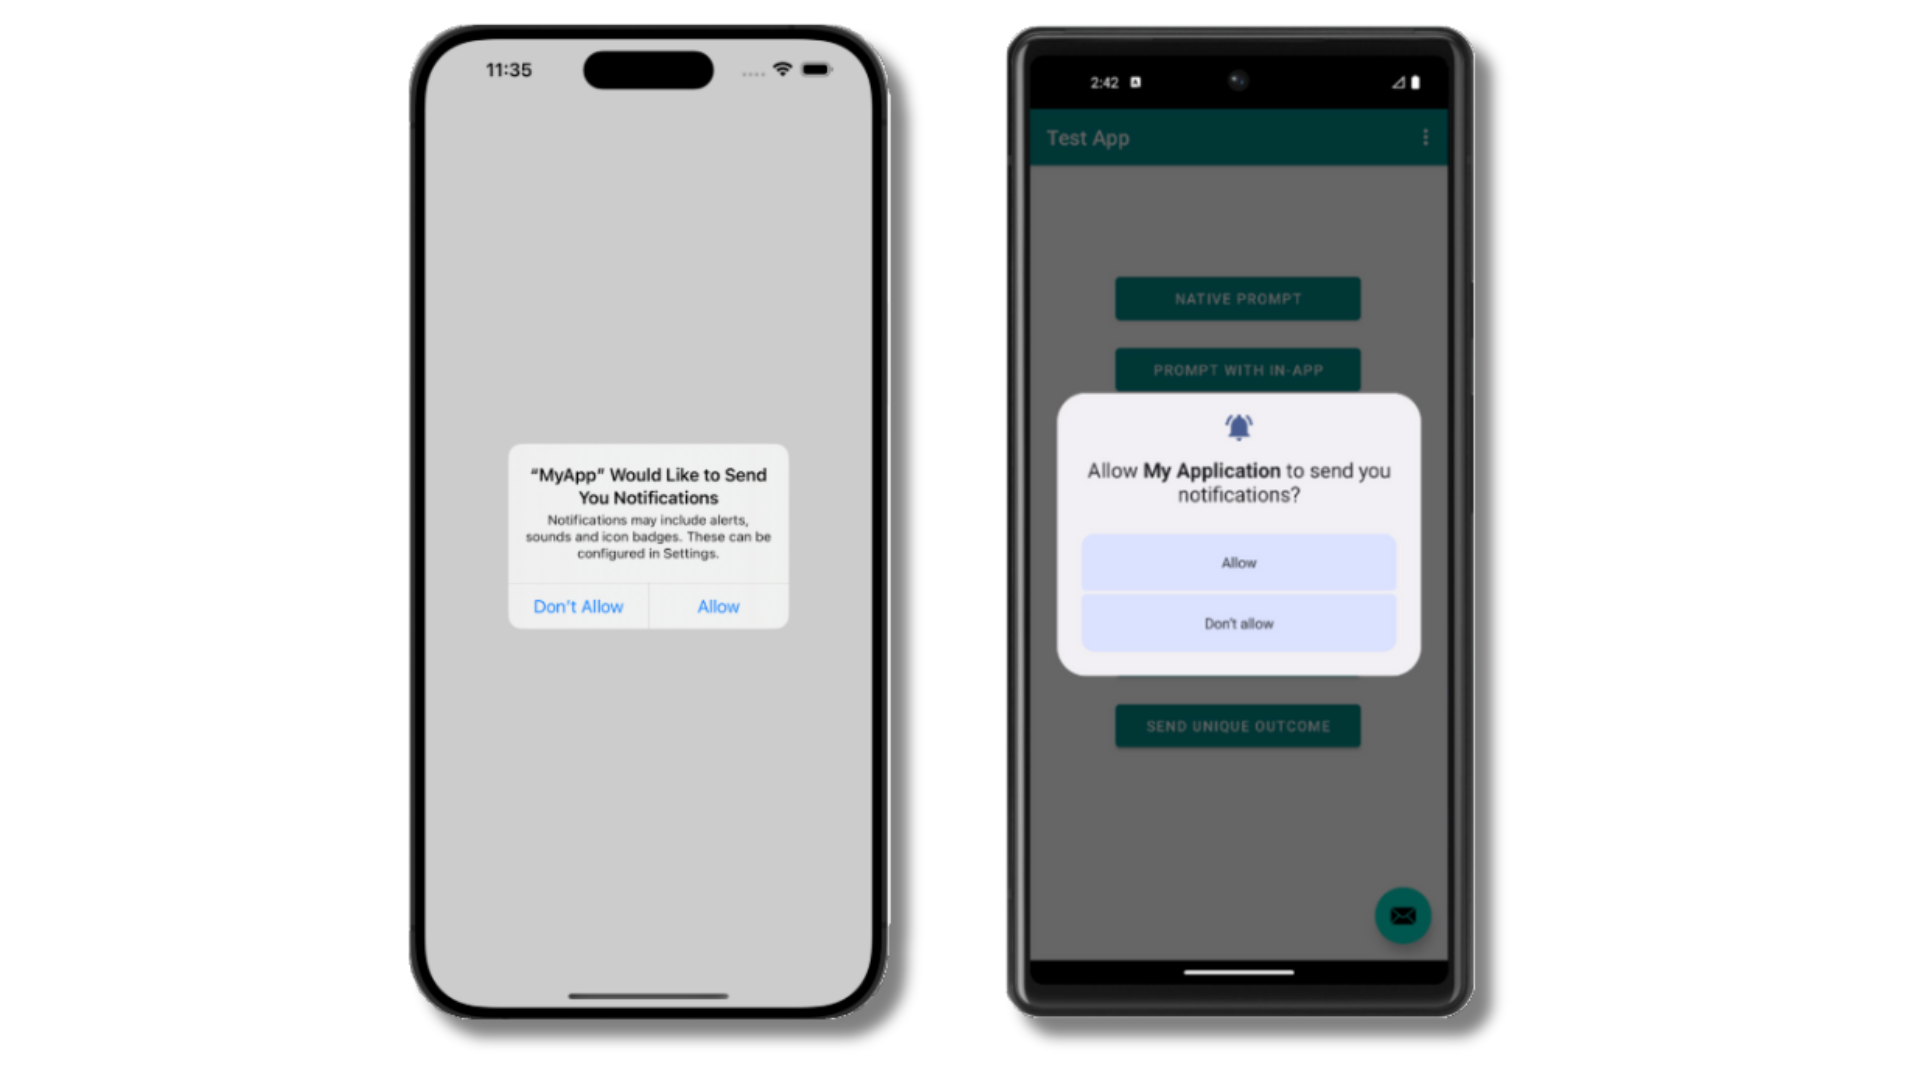
iOS and Android push permission prompts
Check your OneSignal dashboard
- Go to Audience > Subscriptions.
- You should see a new entry with the status “Never Subscribed”.
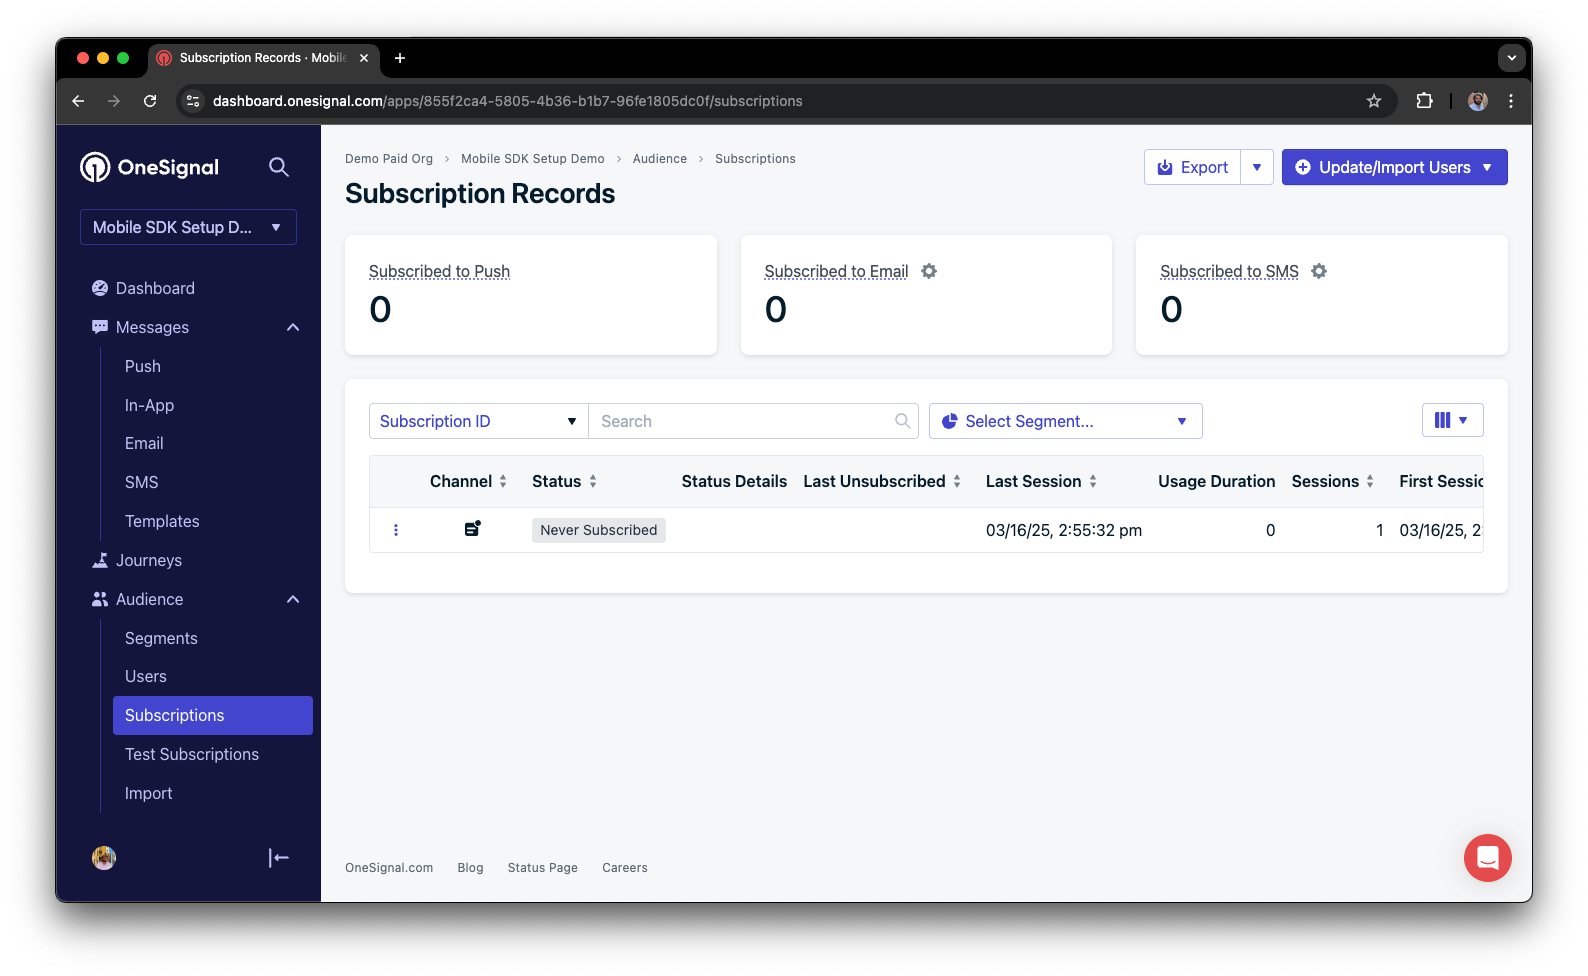
Dashboard showing subscription with 'Never Subscribed' status
Return to the app and tap Allow on the prompt.
Refresh the OneSignal dashboard Subscription's page.
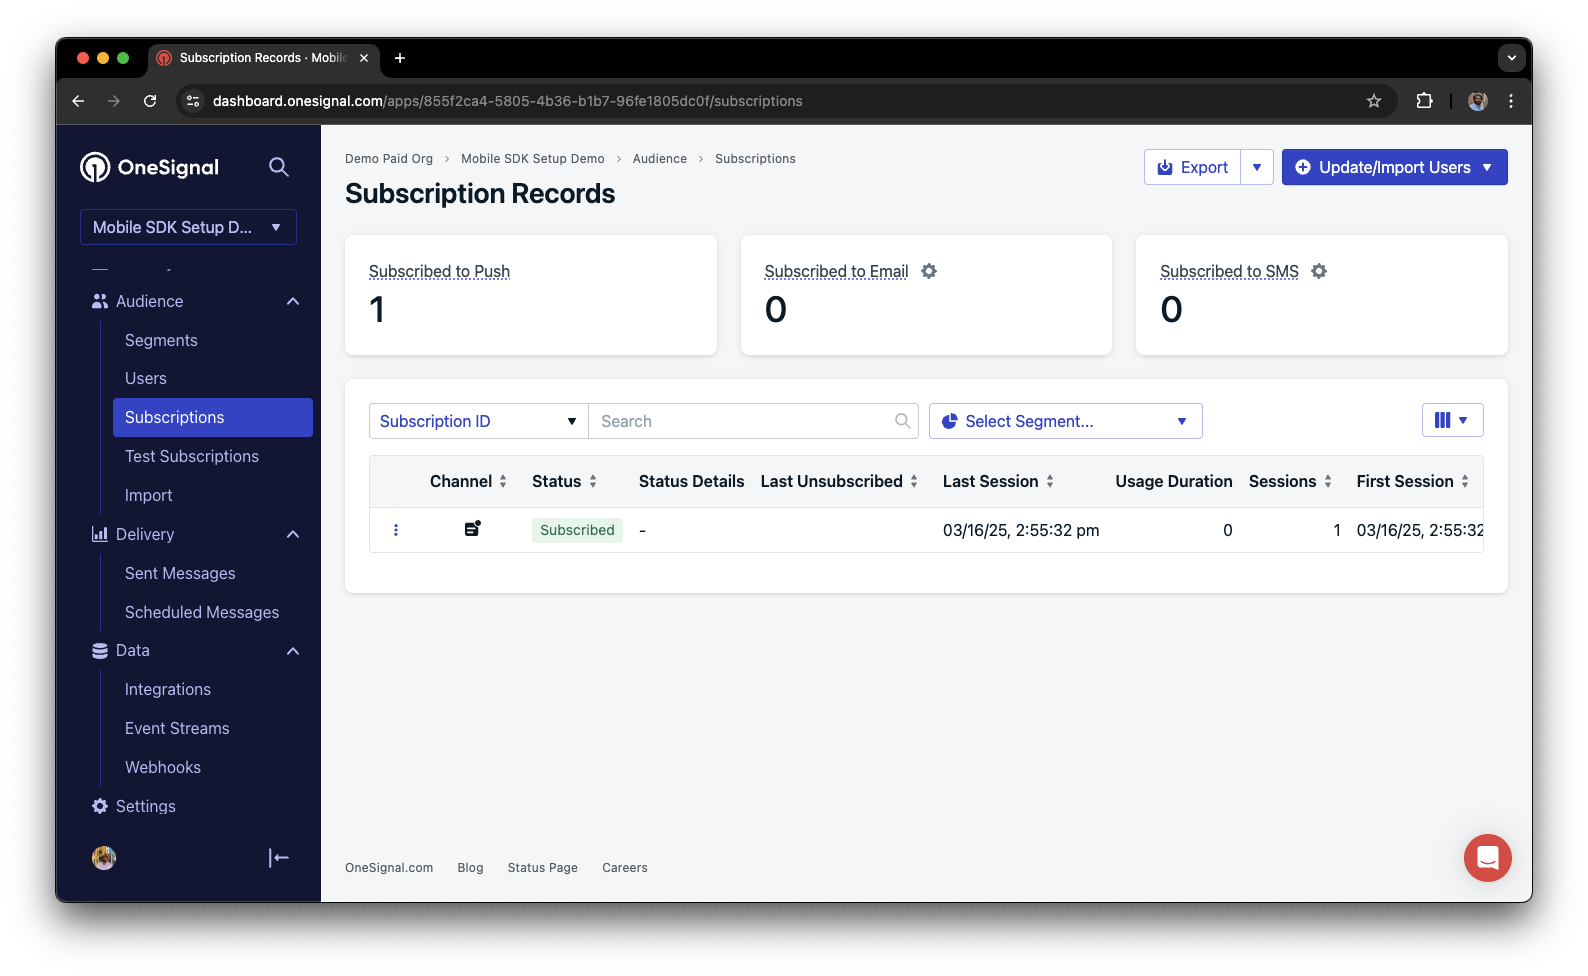
Dashboard showing subscription with 'Subscribed' status
Set up test subscriptions
Test subscriptions are helpful for testing a push notification before sending a message.Add to Test Subscriptions.
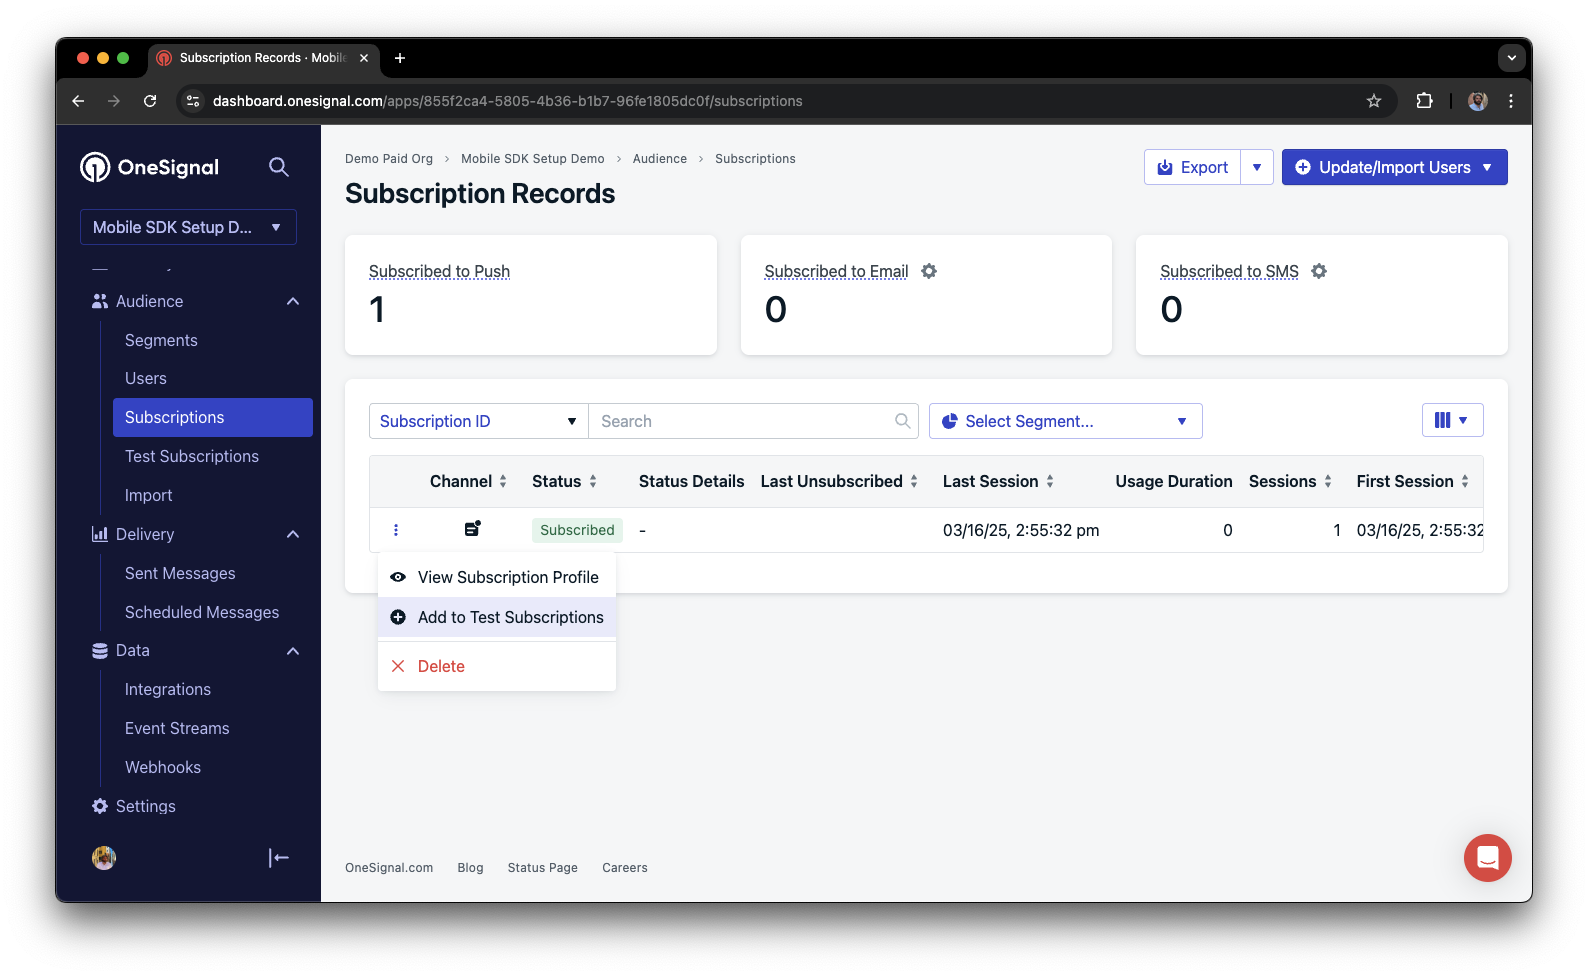
Adding a device to Test Subscriptions
Name your subscription.
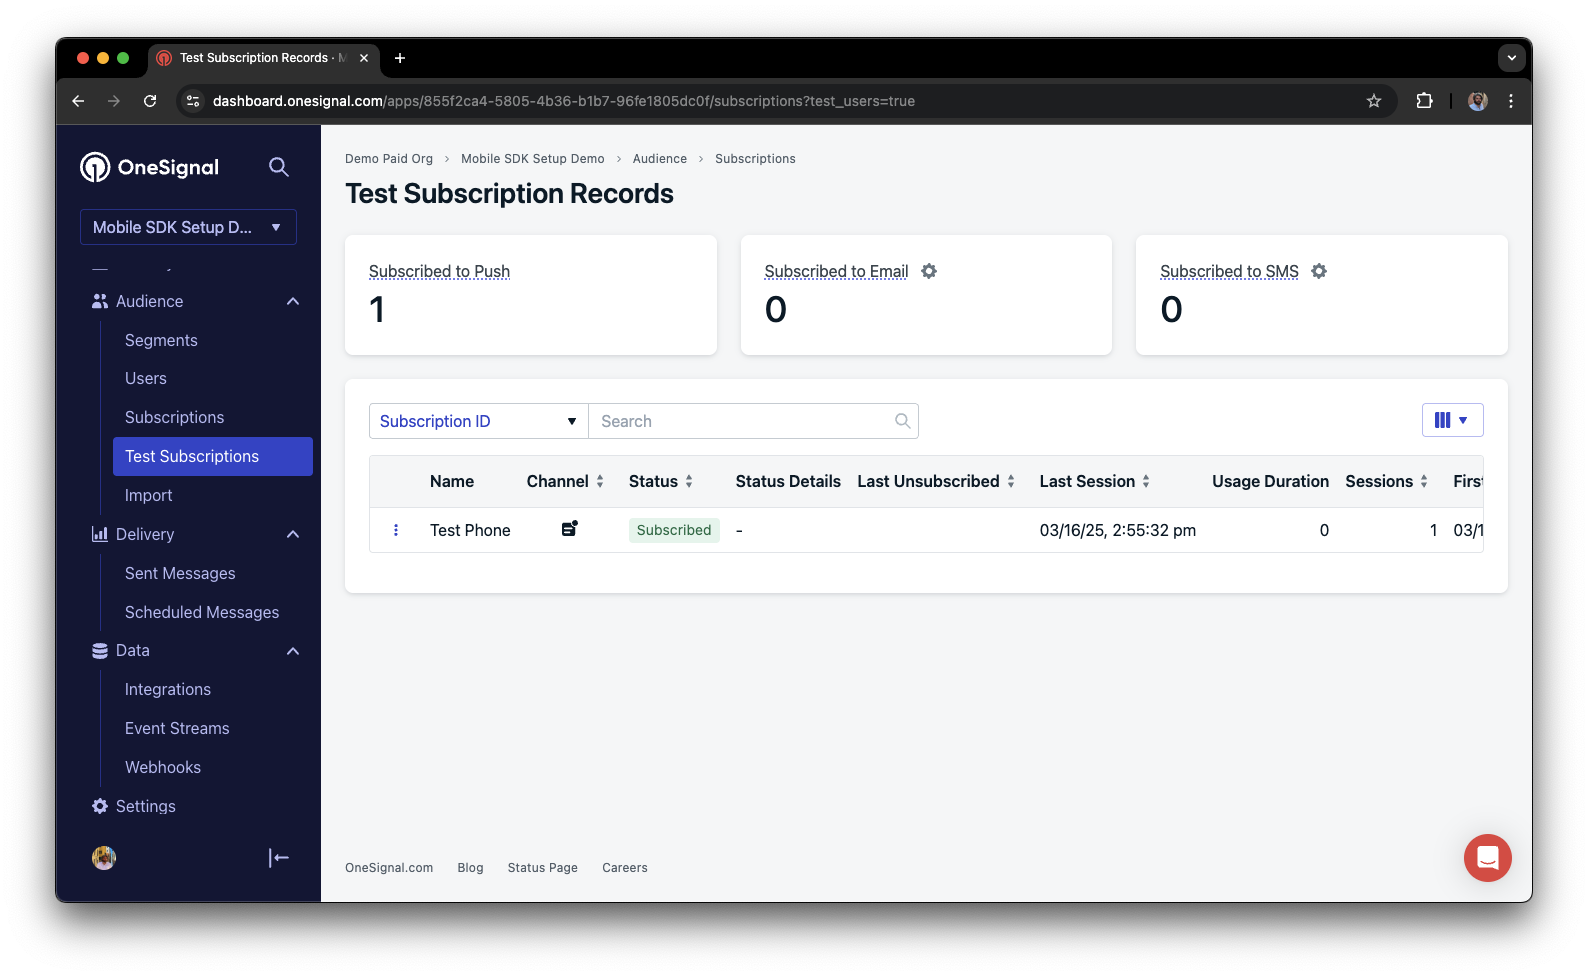
Dashboard showing the 'Name your subscription' field
Create a test users segment.
Name the segment.
Test Users (the name is important because it will be used later).Add the Test Users filter and click Create Segment.
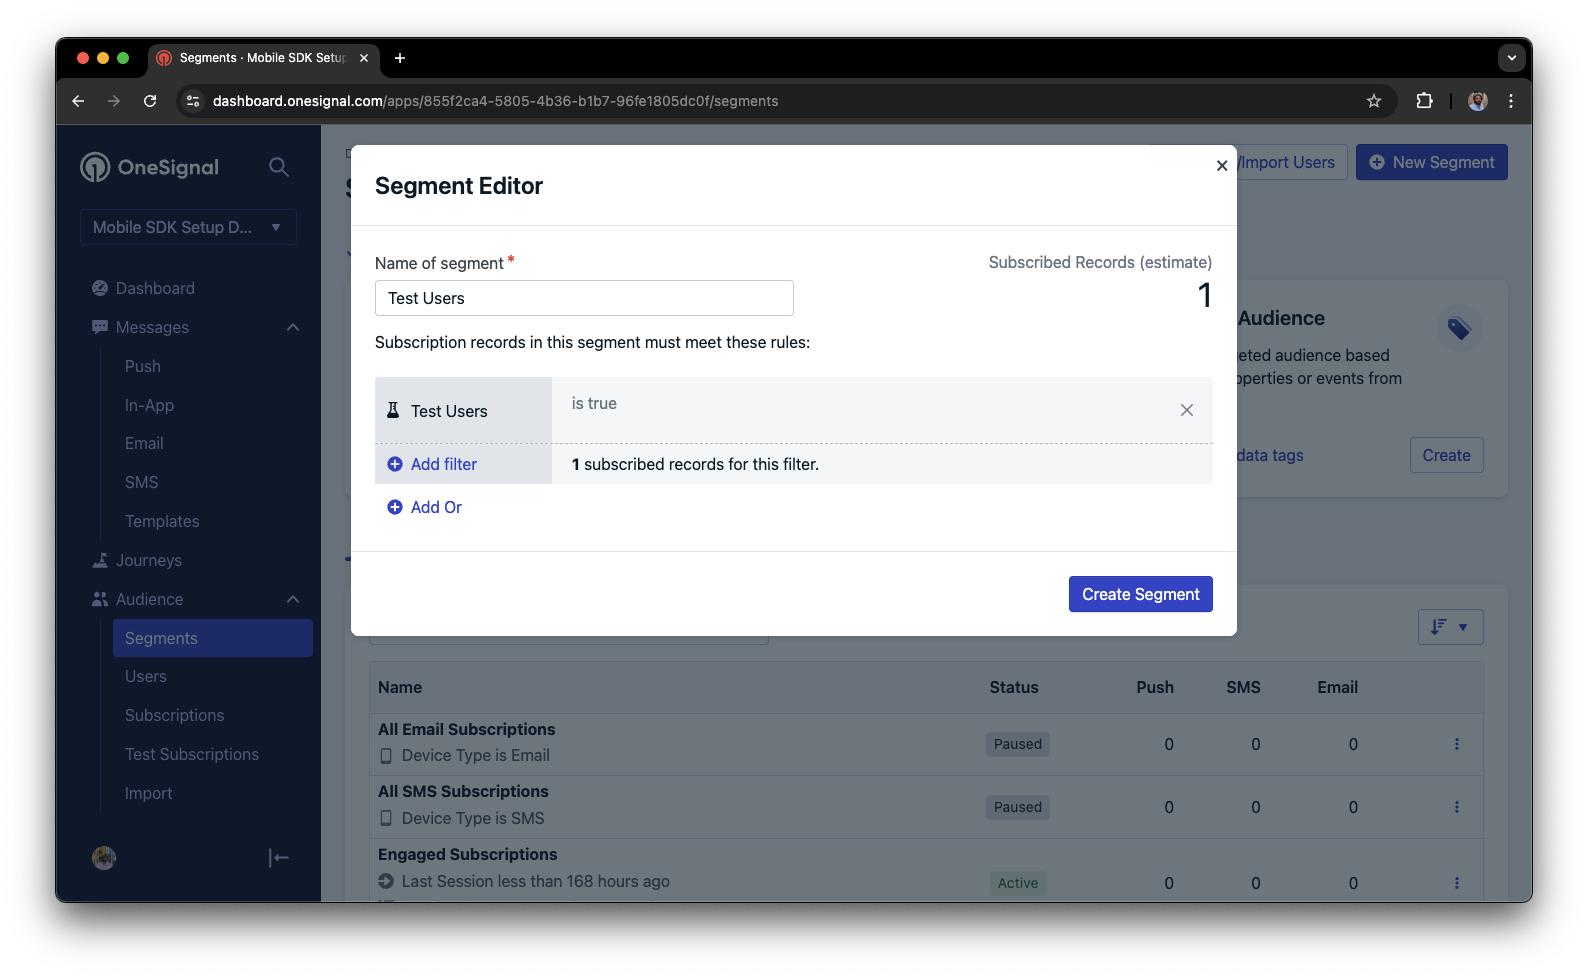
Creating a 'Test Users' segment with the Test Users filter
Send test push via API
Get your App API Key and App ID.
Update the provided code.
YOUR_APP_API_KEY and YOUR_APP_ID in the code below with your actual keys. This code uses the Test Users segment we created earlier.Run the code.
Check images and confirmed delivery.
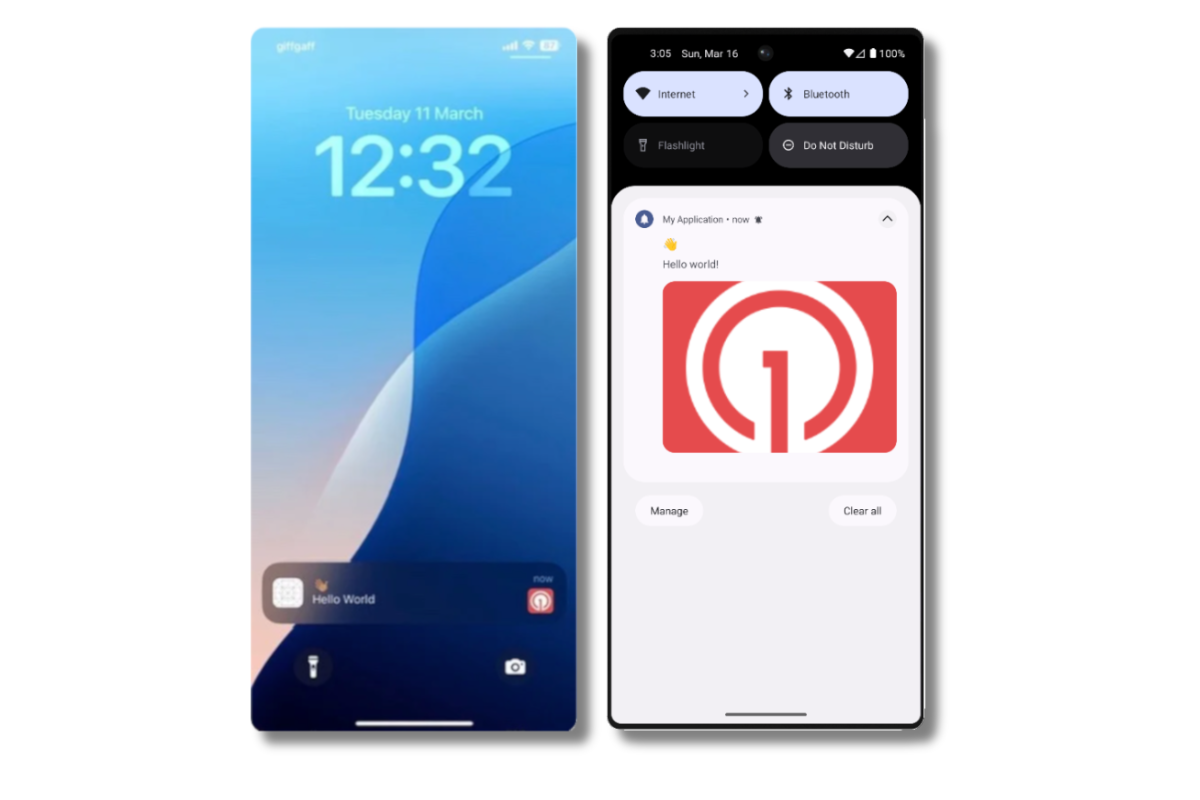
Push notification with image on iOS and Android
Check for confirmed delivery.

Delivery stats showing confirmed delivery
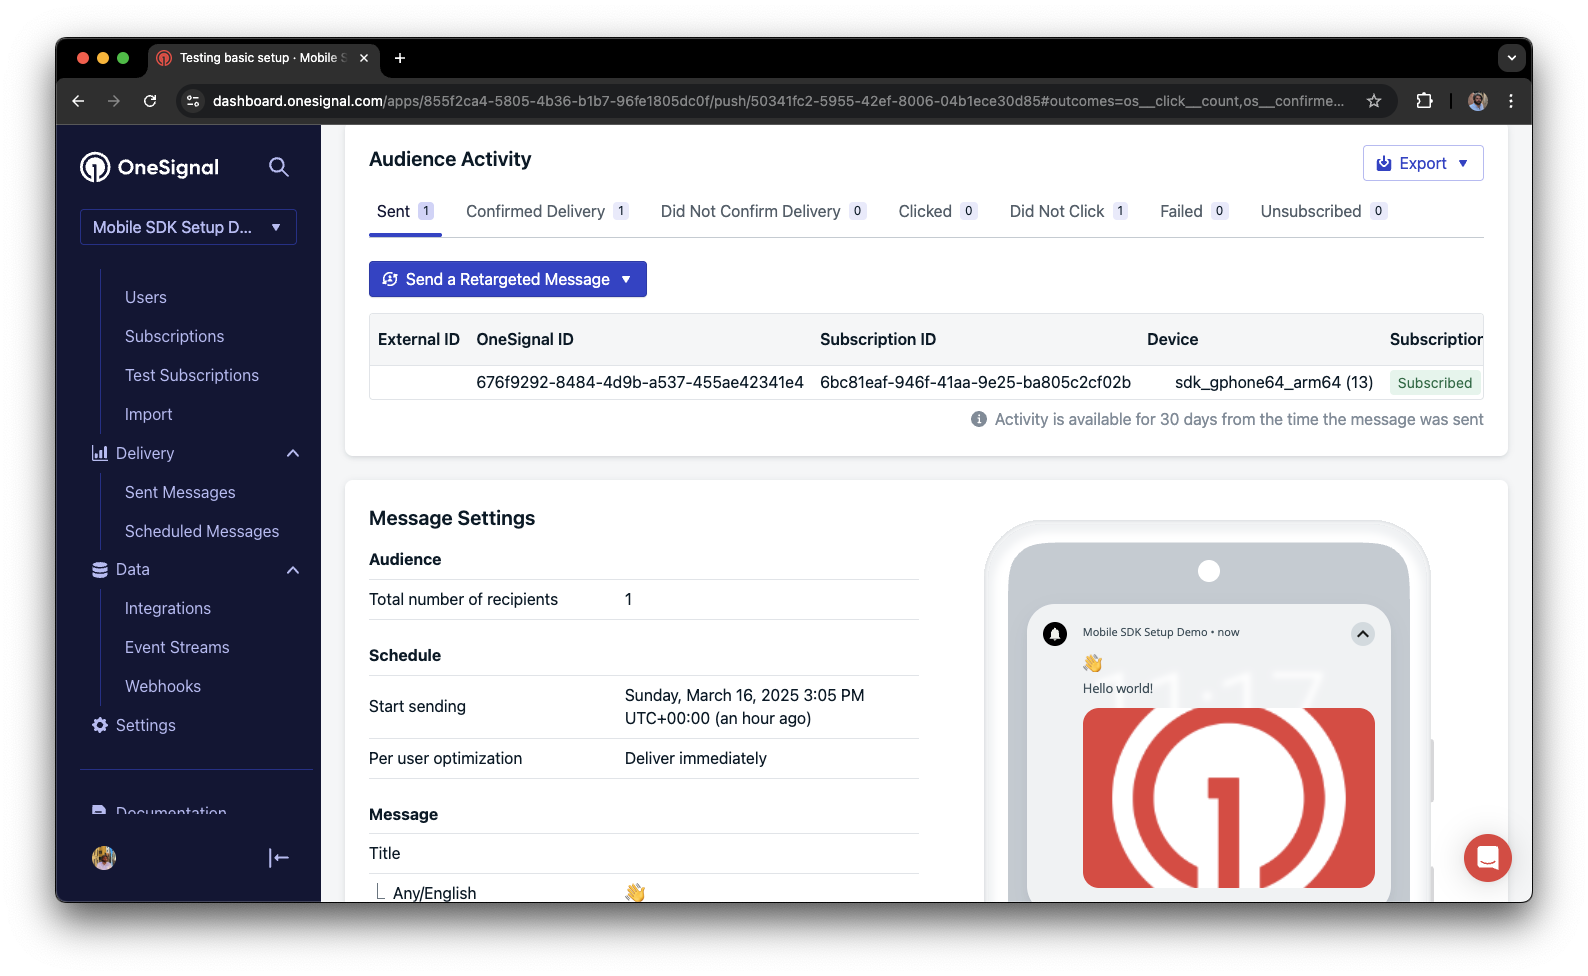
Confirmed delivery at the device level in Audience Activity
- No image received? Your Notification Service Extension might be missing.
- No confirmed delivery? Review your App Groups setup.
- Having issues? Copy-paste the api request and a log from start to finish of app launch into a
.txtfile. Then share both withsupport@onesignal.com.
Send an in-app message
In-app messages let you communicate with users while they are using your app.Close or background your app on the device.
Create an in-app message.
- In your OneSignal dashboard, navigate to Messages > In-App > New In-App.
- Find and select the Welcome message.
- Set your Audience as the Test Users segment we used previously.
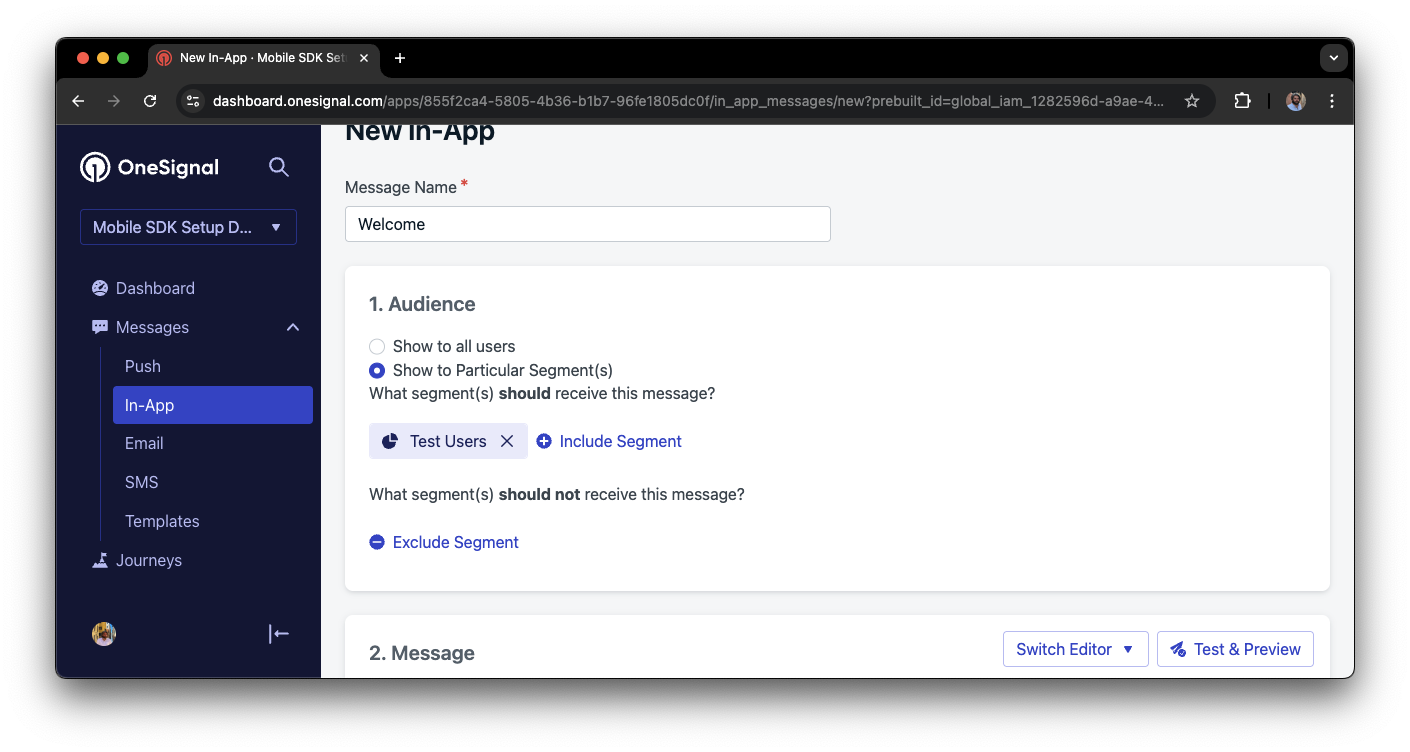
Targeting the 'Test Users' segment with an in-app message
Customize the message content if desired.
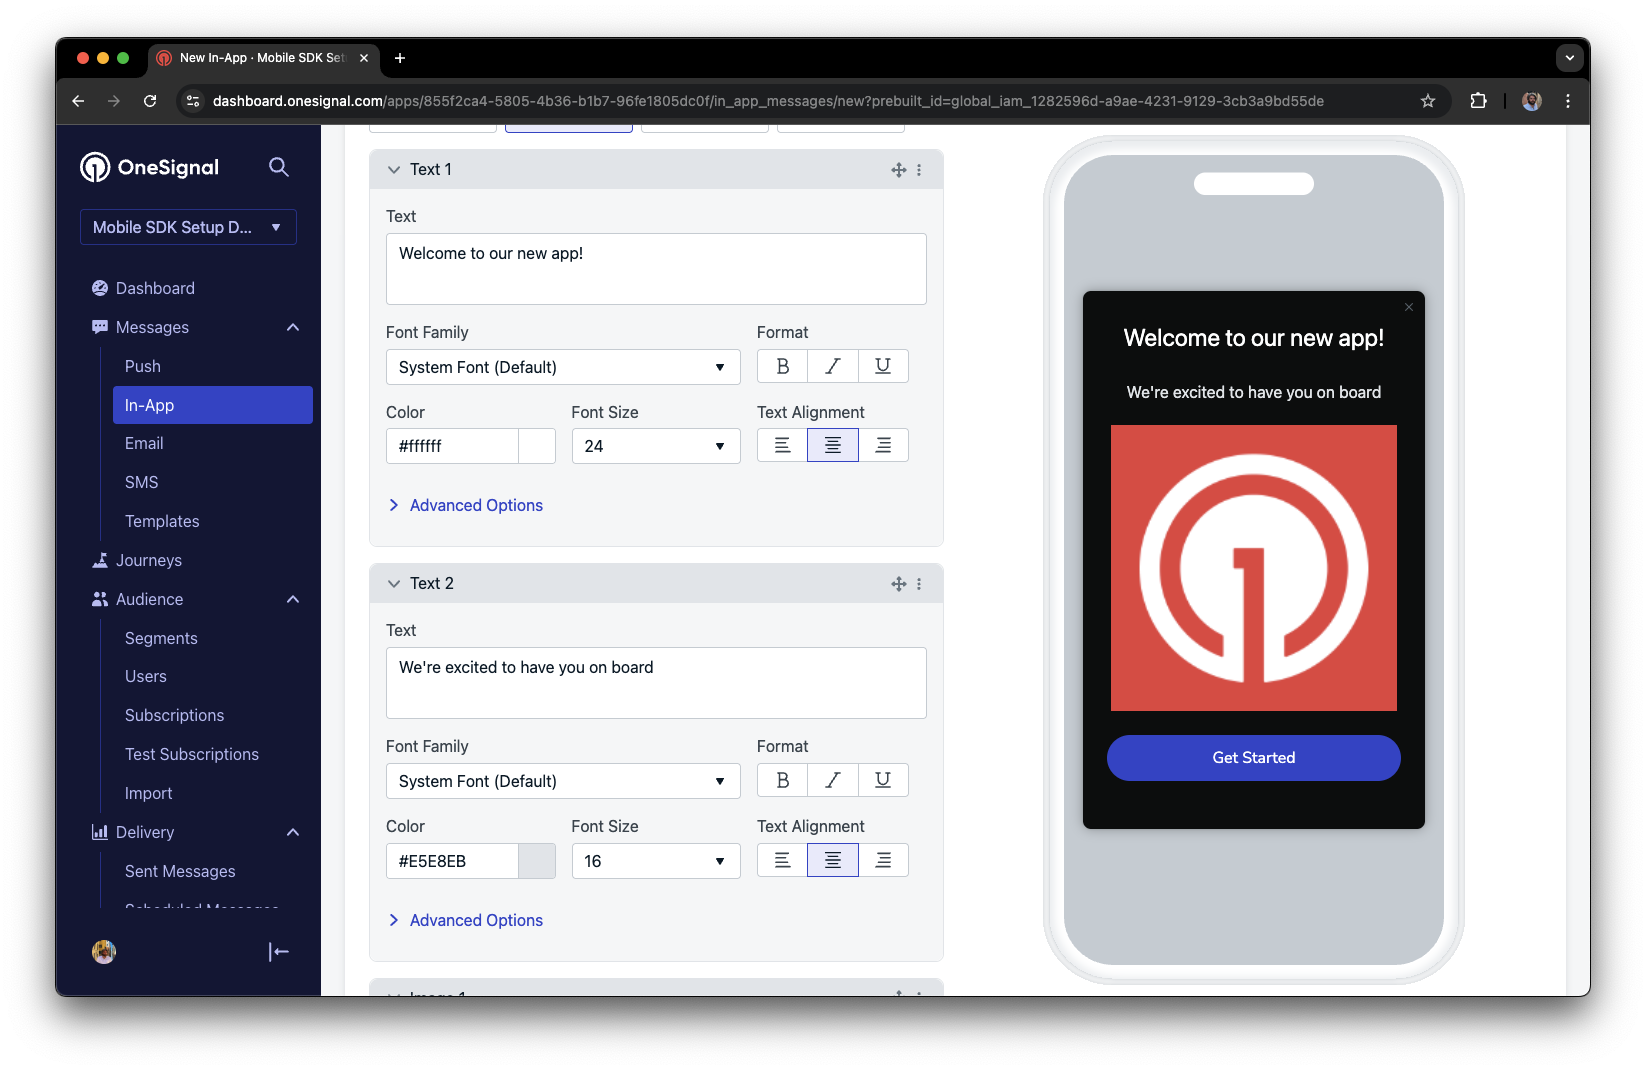
Example customization of in-app Welcome message
Set Trigger to 'On app open'.
Schedule frequency.
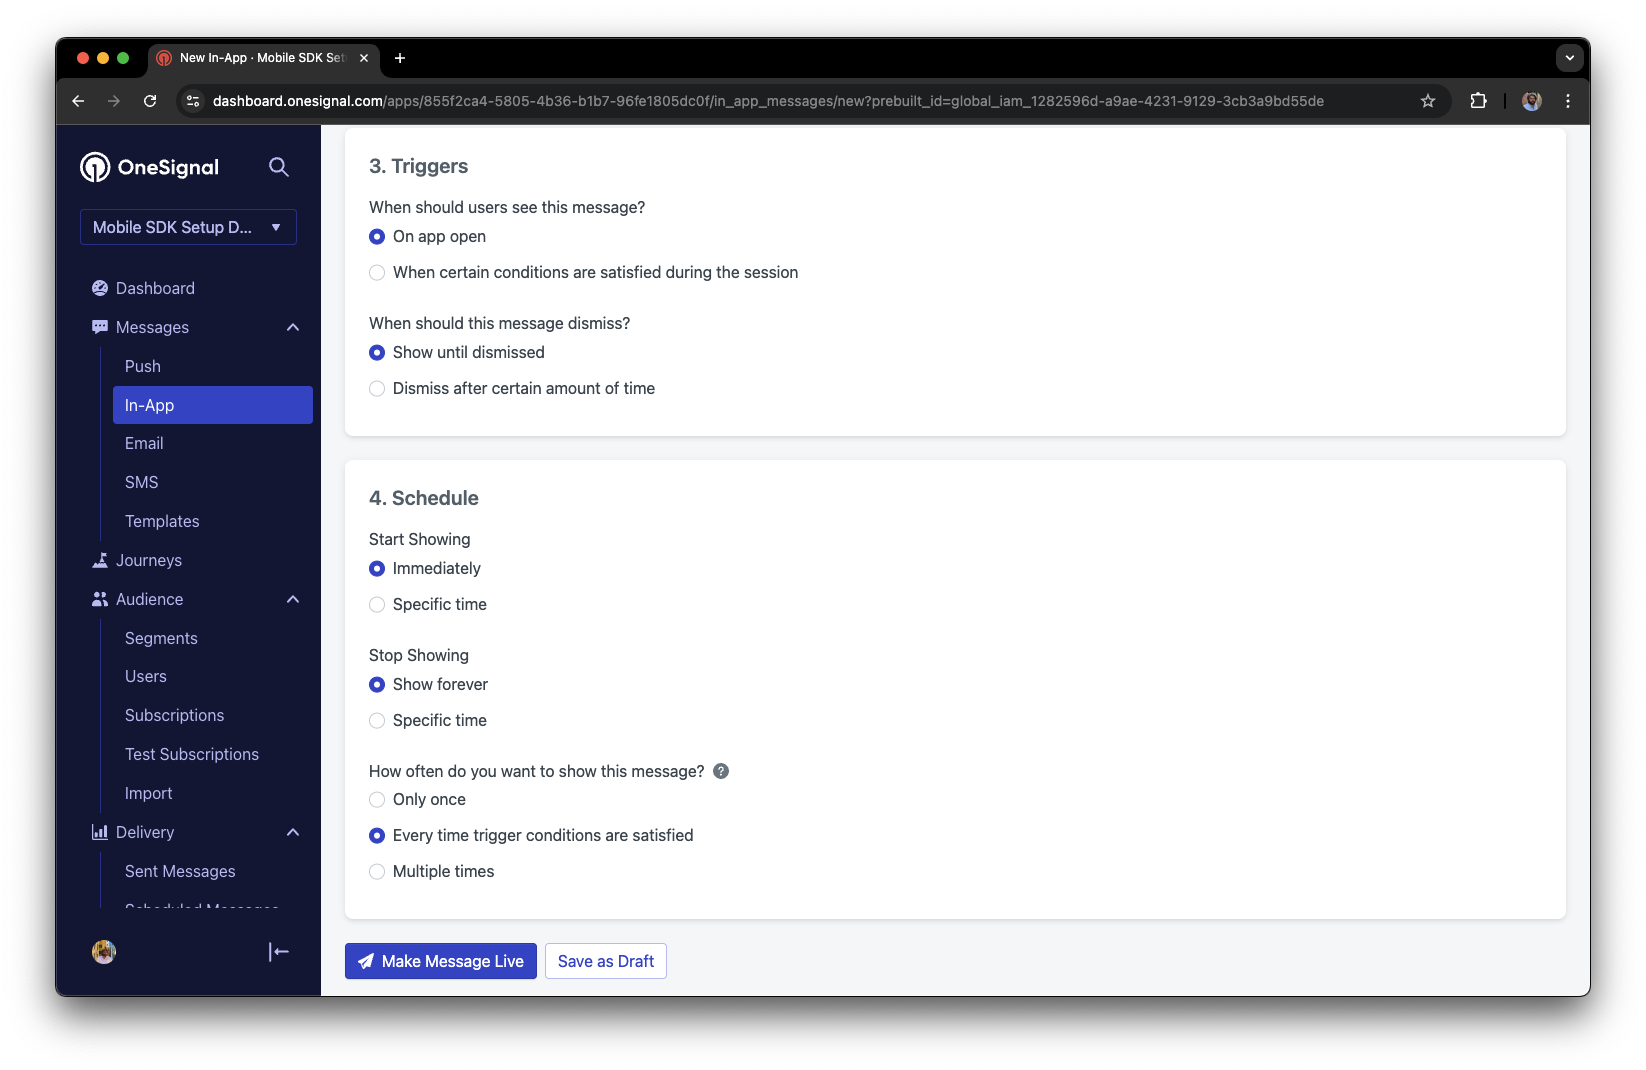
In-app message scheduling options
Make message live.
Open the app and see the message.
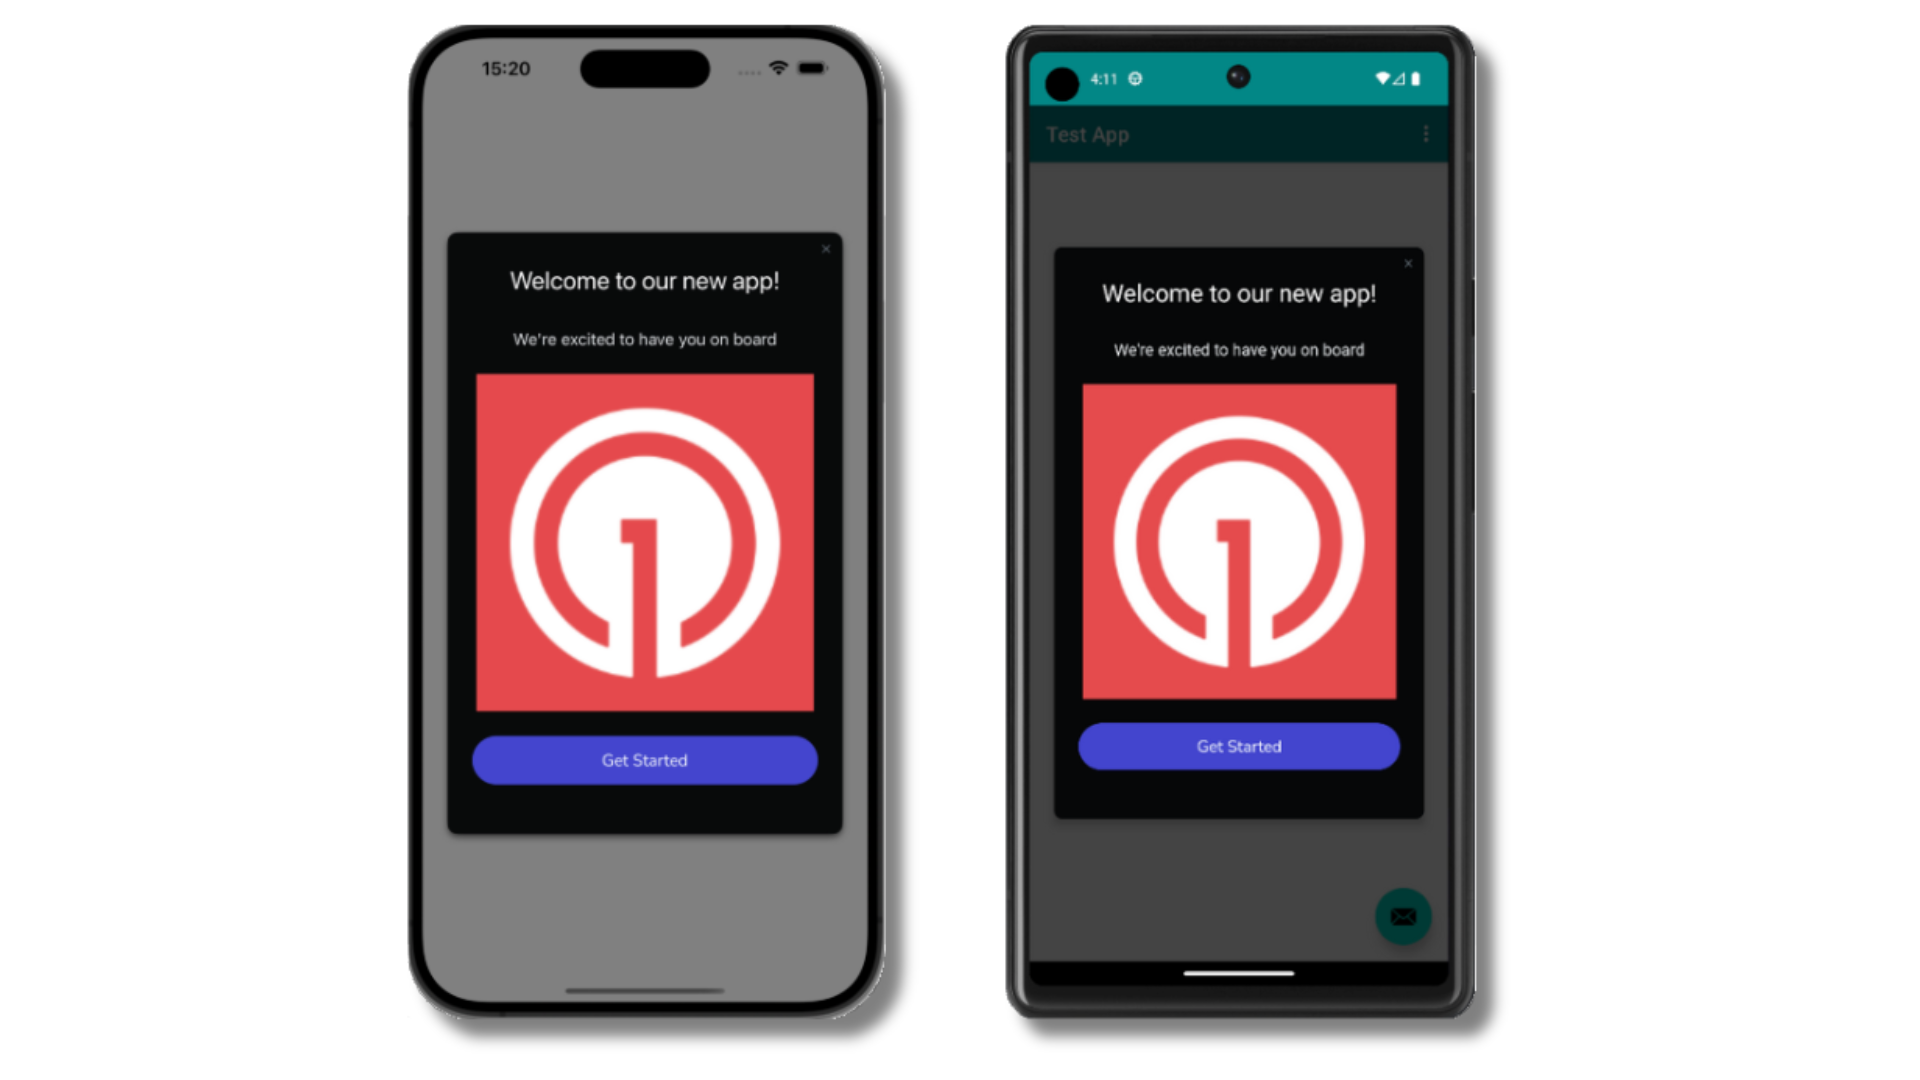
Welcome in-app message shown on devices
- Start a new session
- You must close or background the app for at least 30 seconds before reopening. This ensures a new session is started.
- For more, see how in-app messages are displayed.
- Still in the
Test Userssegment?- If you reinstalled or switched devices, re-add the device to Test Subscriptions and confirm it’s part of the Test Users segment.
- Having issues?
- Follow Getting a Debug Log while reproducing the steps above. This will generate additional logging that you can share with
support@onesignal.comand we will help investigate what’s going on.
- Follow Getting a Debug Log while reproducing the steps above. This will generate additional logging that you can share with
- Gathering Subscriptions, setting Test subscriptions, and creating Segments.
- Sending Push with images and Confirmed Delivery using Segments and our Create message API.
- Sending In-app messages.
Prompt for push permissions
Instead of callingrequestPermission() immediately on app open, take a more strategic approach. Use an in-app message to explain the value of push notifications before requesting permission.
For best practices and implementation details, see our Prompt for push permissions guide.
FAQ
How can I access OneSignal data on the client side?
Use the Median Native JavaScript Bridge methodmedian_onesignal_info to retrieve the OneSignal Subscription ID (oneSignalUserId) and the subscription status.
How do I send deep link push notifications to my Median app?
Median apps use deep linking for a native experience instead of opening a pop-up browser.When using OneSignal dashboard:
- Do not use the Launch URL field.
- Instead, use the Additional Data field.
- Add a key:
targetUrl(capital “U”) - Add a value: the URL you want users to open.
- Add a key:
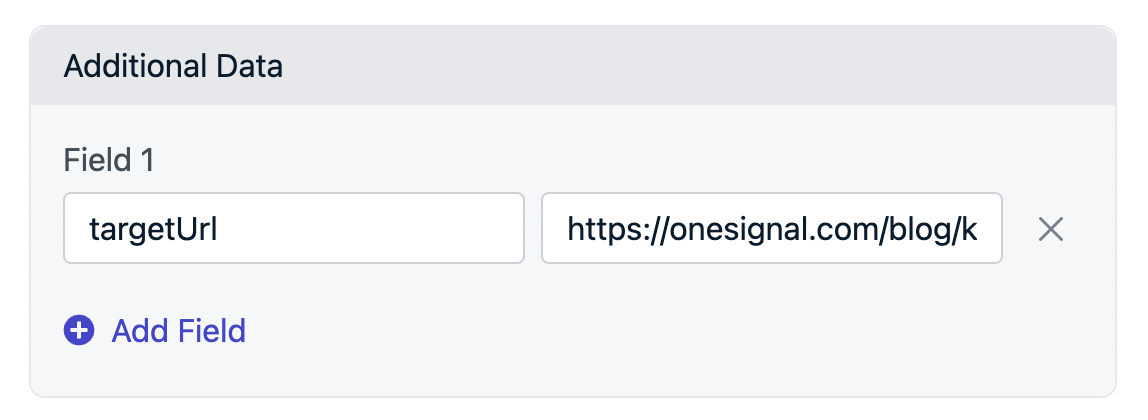
Using Additional Data with targetUrl
When using the REST API:
IncludetargetUrl in the data object of your push payload. Example:
Sending to both web and mobile?
If you send to web and mobile simultaneously: In the Launch URL section, select “Different URL for web/app”. Leave the APP URL field blank to prevent override.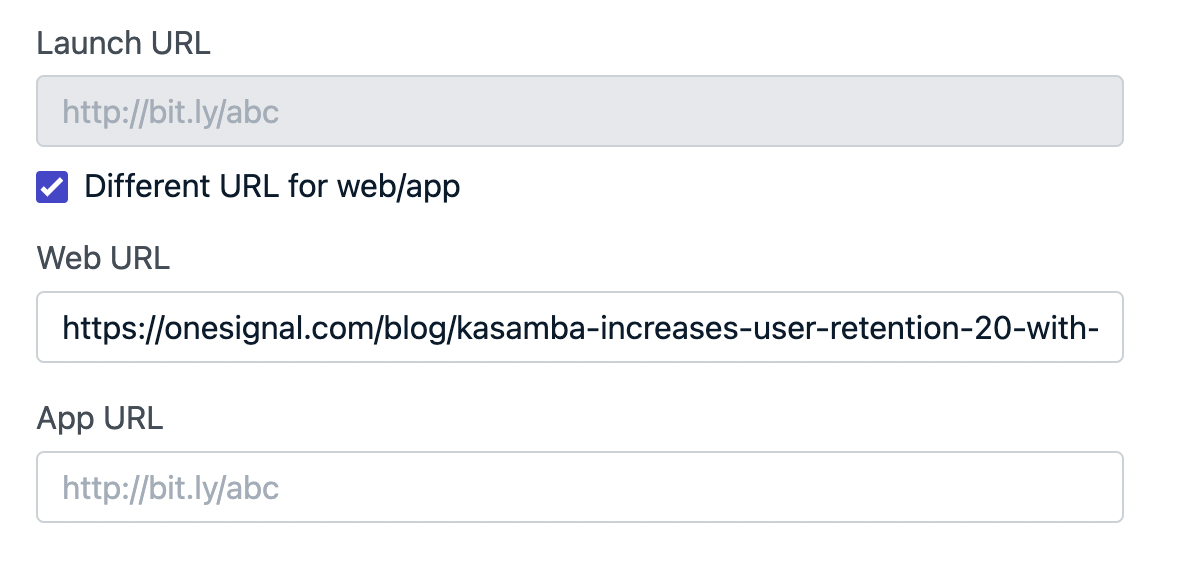
Configuring different URLs for web and mobile