Windows App Setup
Requirements
Before setting up OneSignal for your Windows app, ensure you have:- Universal Windows Platform (UWP) App - OneSignal currently supports UWP apps only
- Microsoft Store App Registration - Required for obtaining Package SID and Secret Key
- OneSignal Account - Free account with configured app and platform settings
OneSignal does not currently support Windows App SDK (WinUI 3). If your app uses Windows App SDK instead of UWP, please contact
support@onesignal.com for guidance on migration options.Configure Your OneSignal App and Platform
Step 1: Set Up Your OneSignal Account
If your team already has a OneSignal account, request admin access to configure platform settings. Otherwise, create a free account to get started.Step 2: Create or Configure Your OneSignal App
OneSignal allows you to configure multiple platforms (iOS, Android, Huawei, Amazon, Windows) within a single app for cross-platform messaging.Create New App
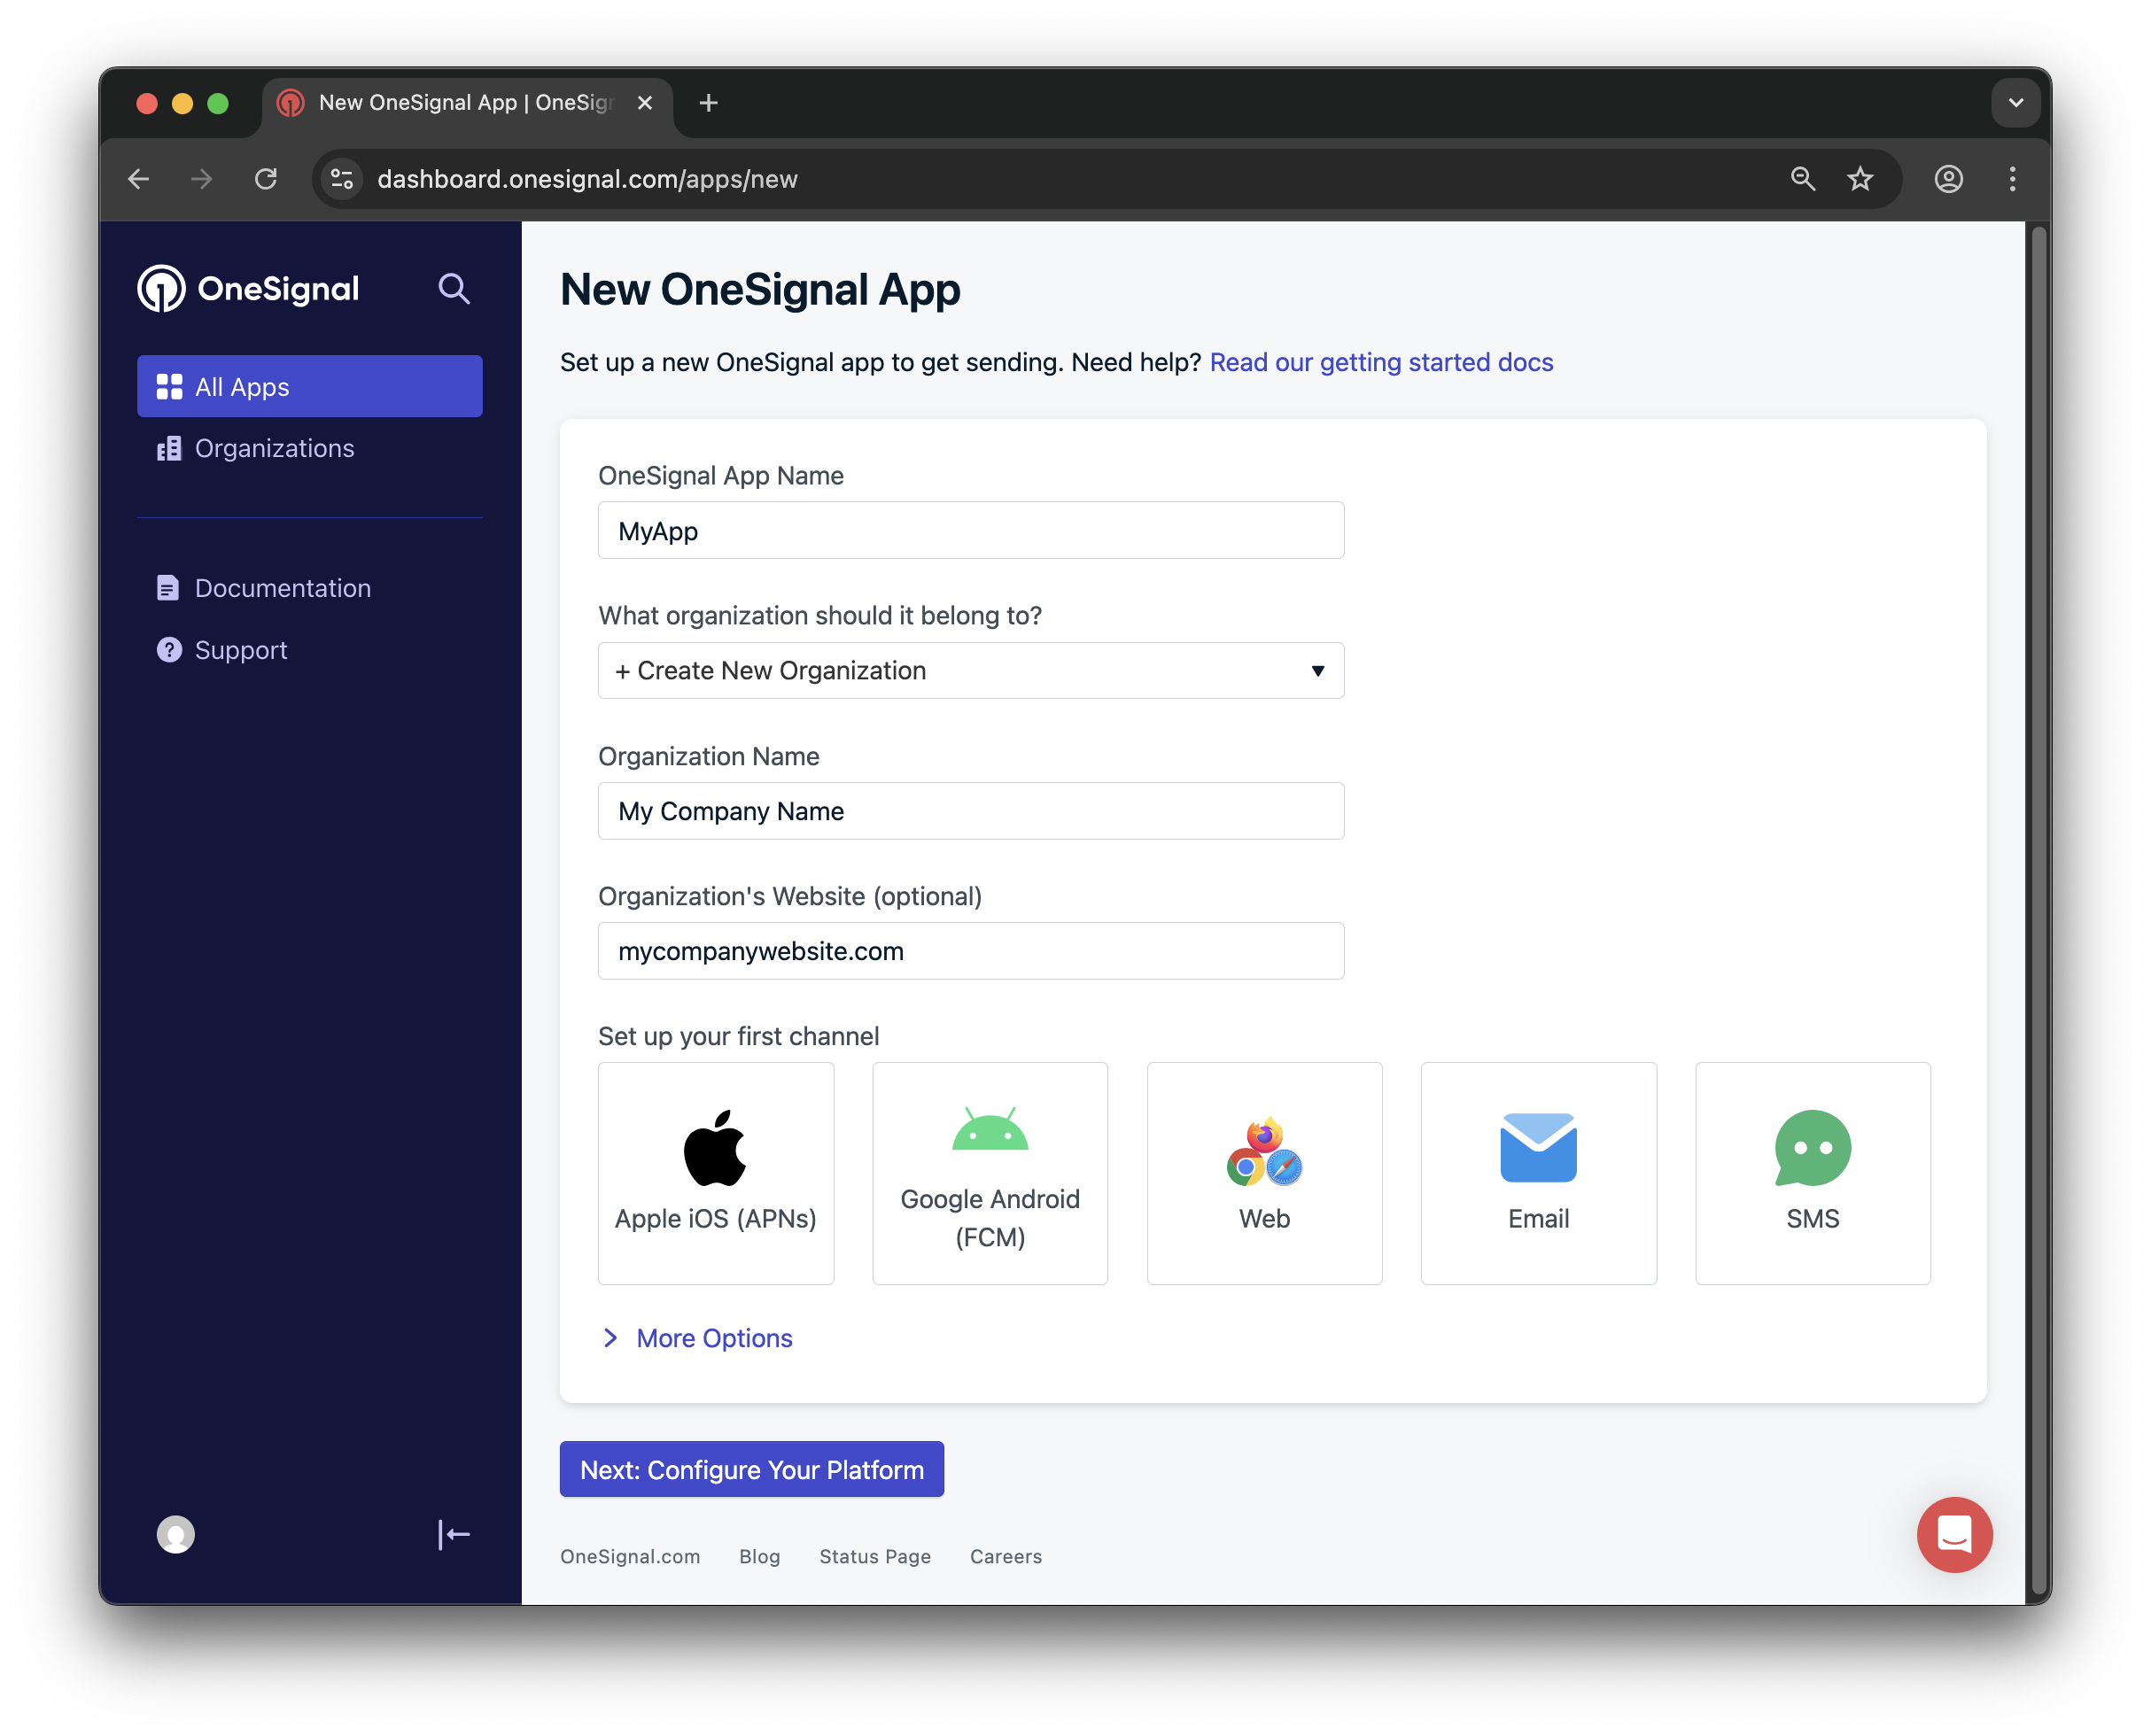
- Click New App/Website from your dashboard
- Choose a recognizable app name and organization name
- Select Windows (UWP) as your platform
- Click Next: Configure Your Platform

Creating a new OneSignal app with Windows platform
Add Platform to Existing App
- Select your existing app
- Navigate to Settings > Push & In-App
- Click Add Platform and select Windows (UWP)
Setting up your OneSignal app and selecting Windows platform
Step 3: Configure Additional Platforms (Optional)
If you’re building a cross-platform app, configure additional platforms now:- Android: Set up Firebase Credentials
- iOS: p8 Token (Recommended) or p12 Certificate
- Amazon: Generate API Key
- Huawei: Authorize OneSignal
Step 4: Select Target SDK
Choose Windows UWP as your target SDK and click Save & Continue.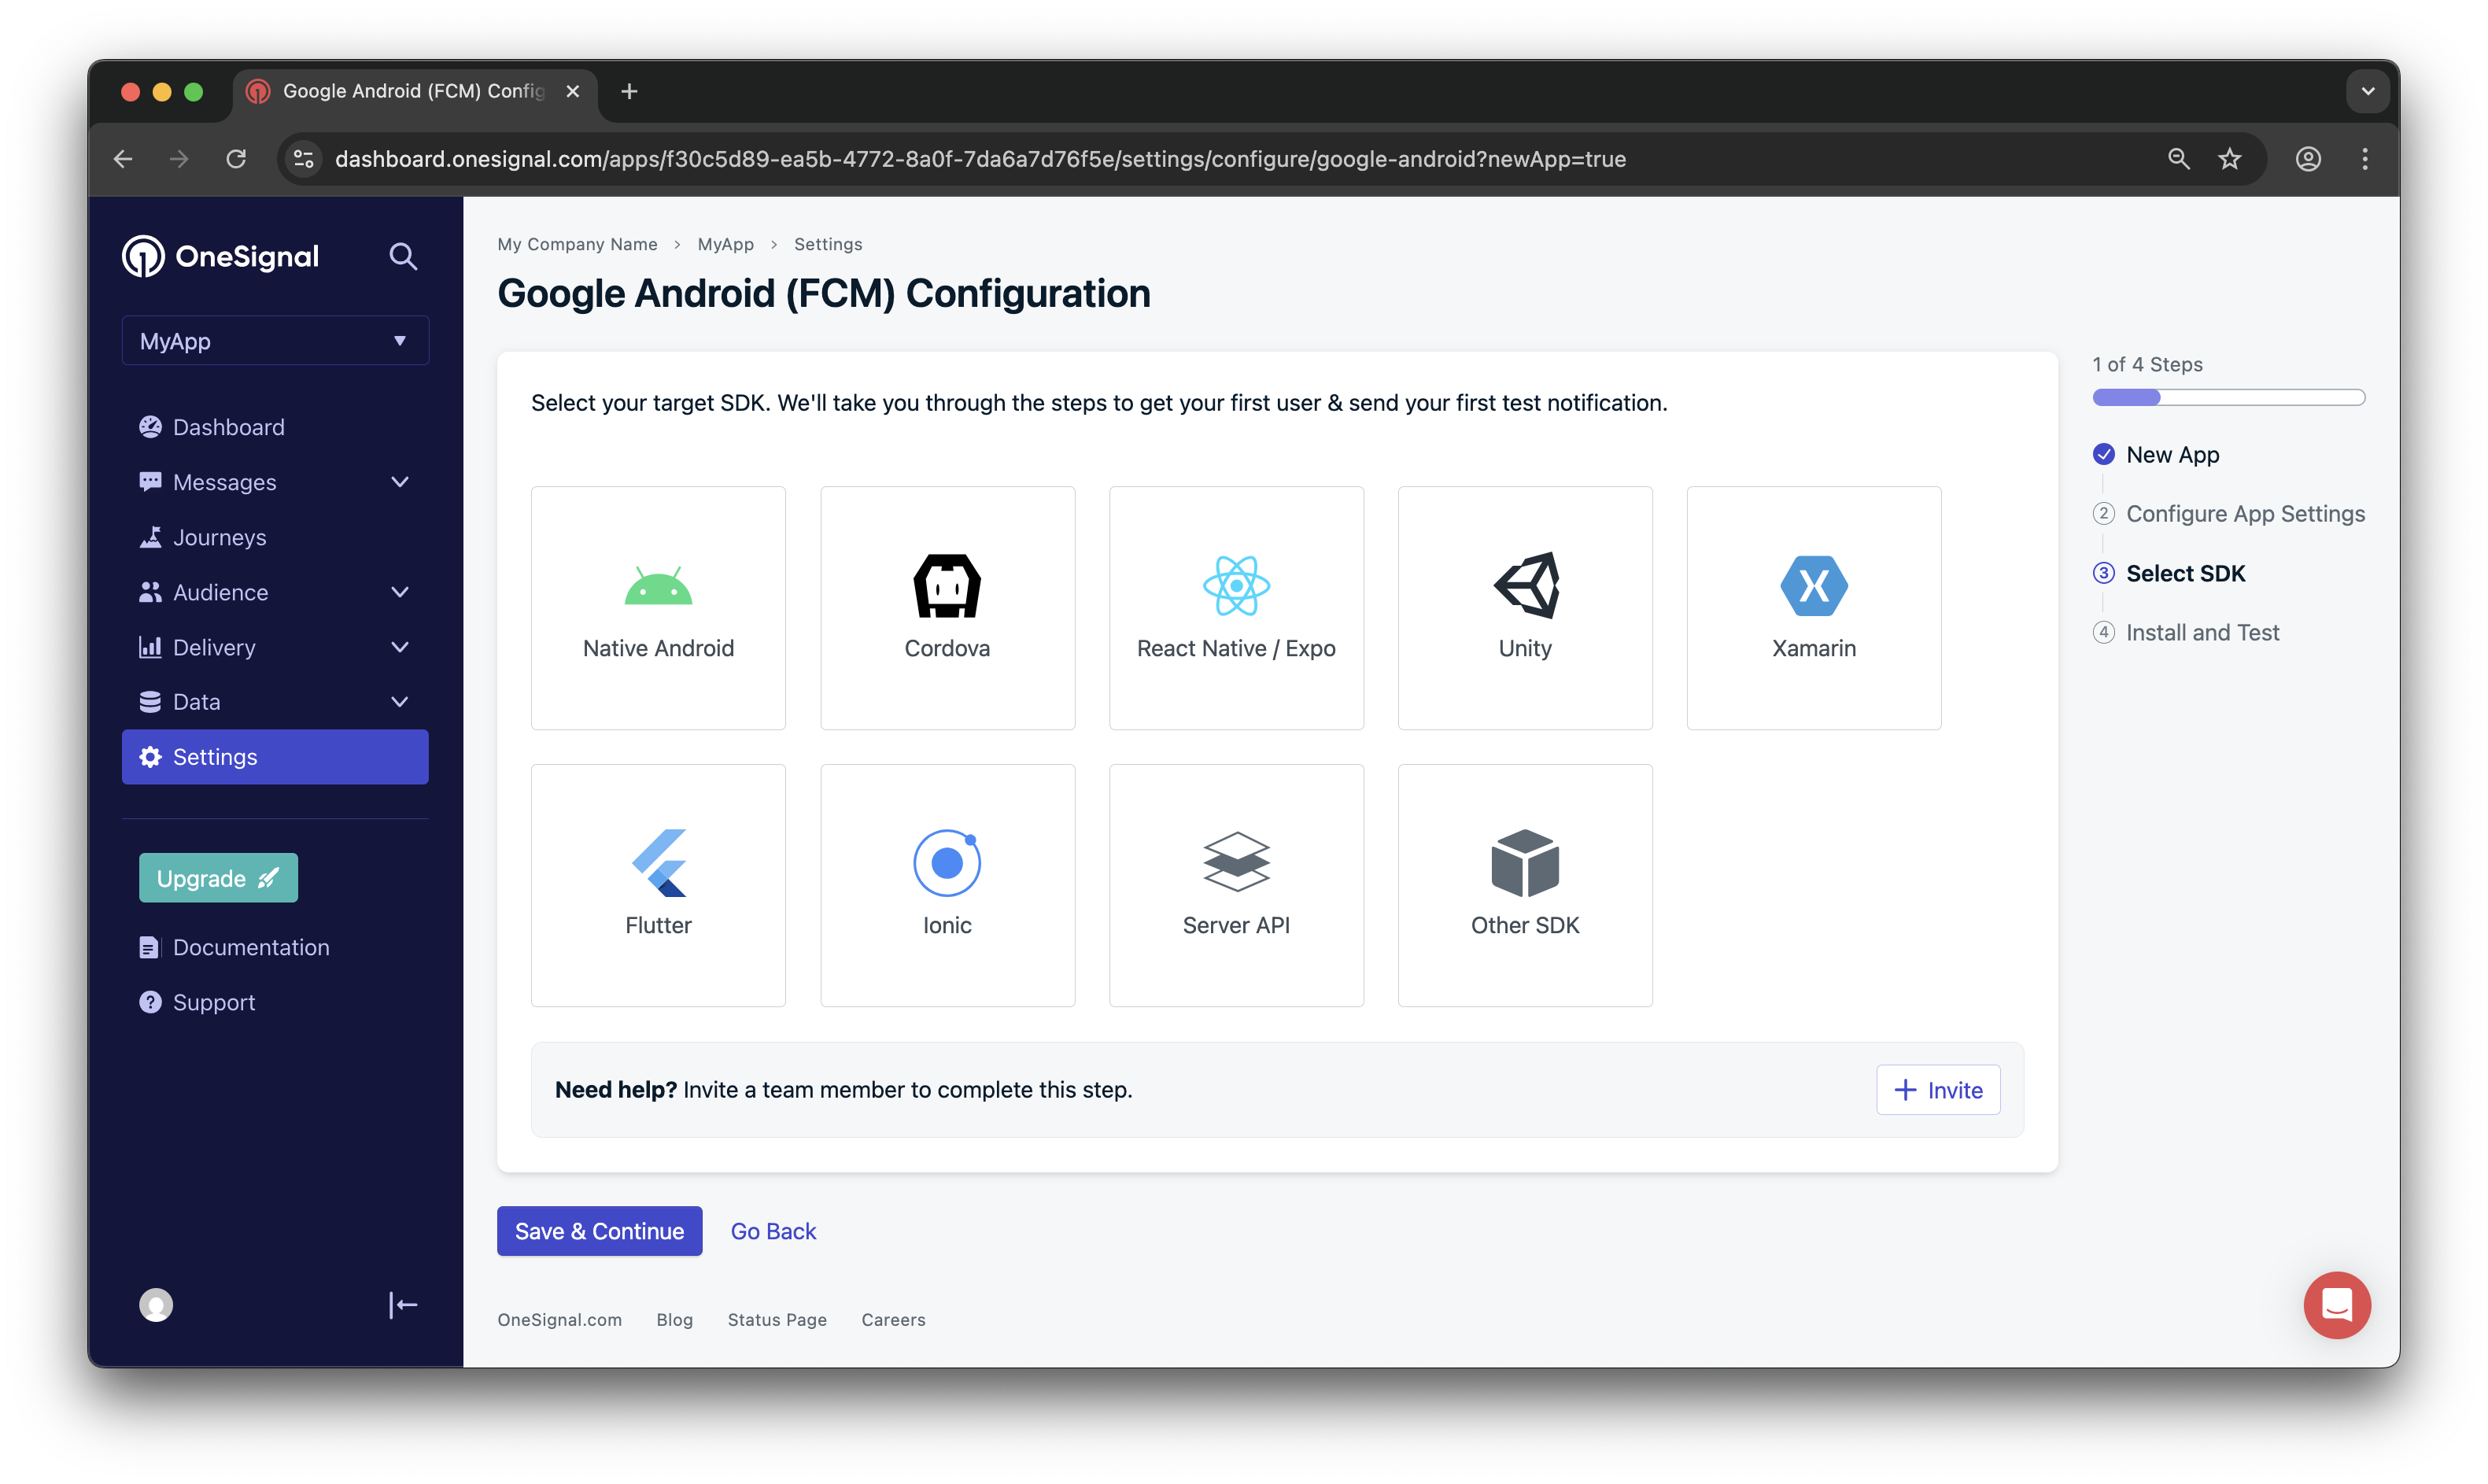
Select Windows UWP SDK to access platform-specific documentation
Step 5: Save Your App ID
Critical: Copy and securely store your OneSignal App ID - you’ll need this for API calls and user registration.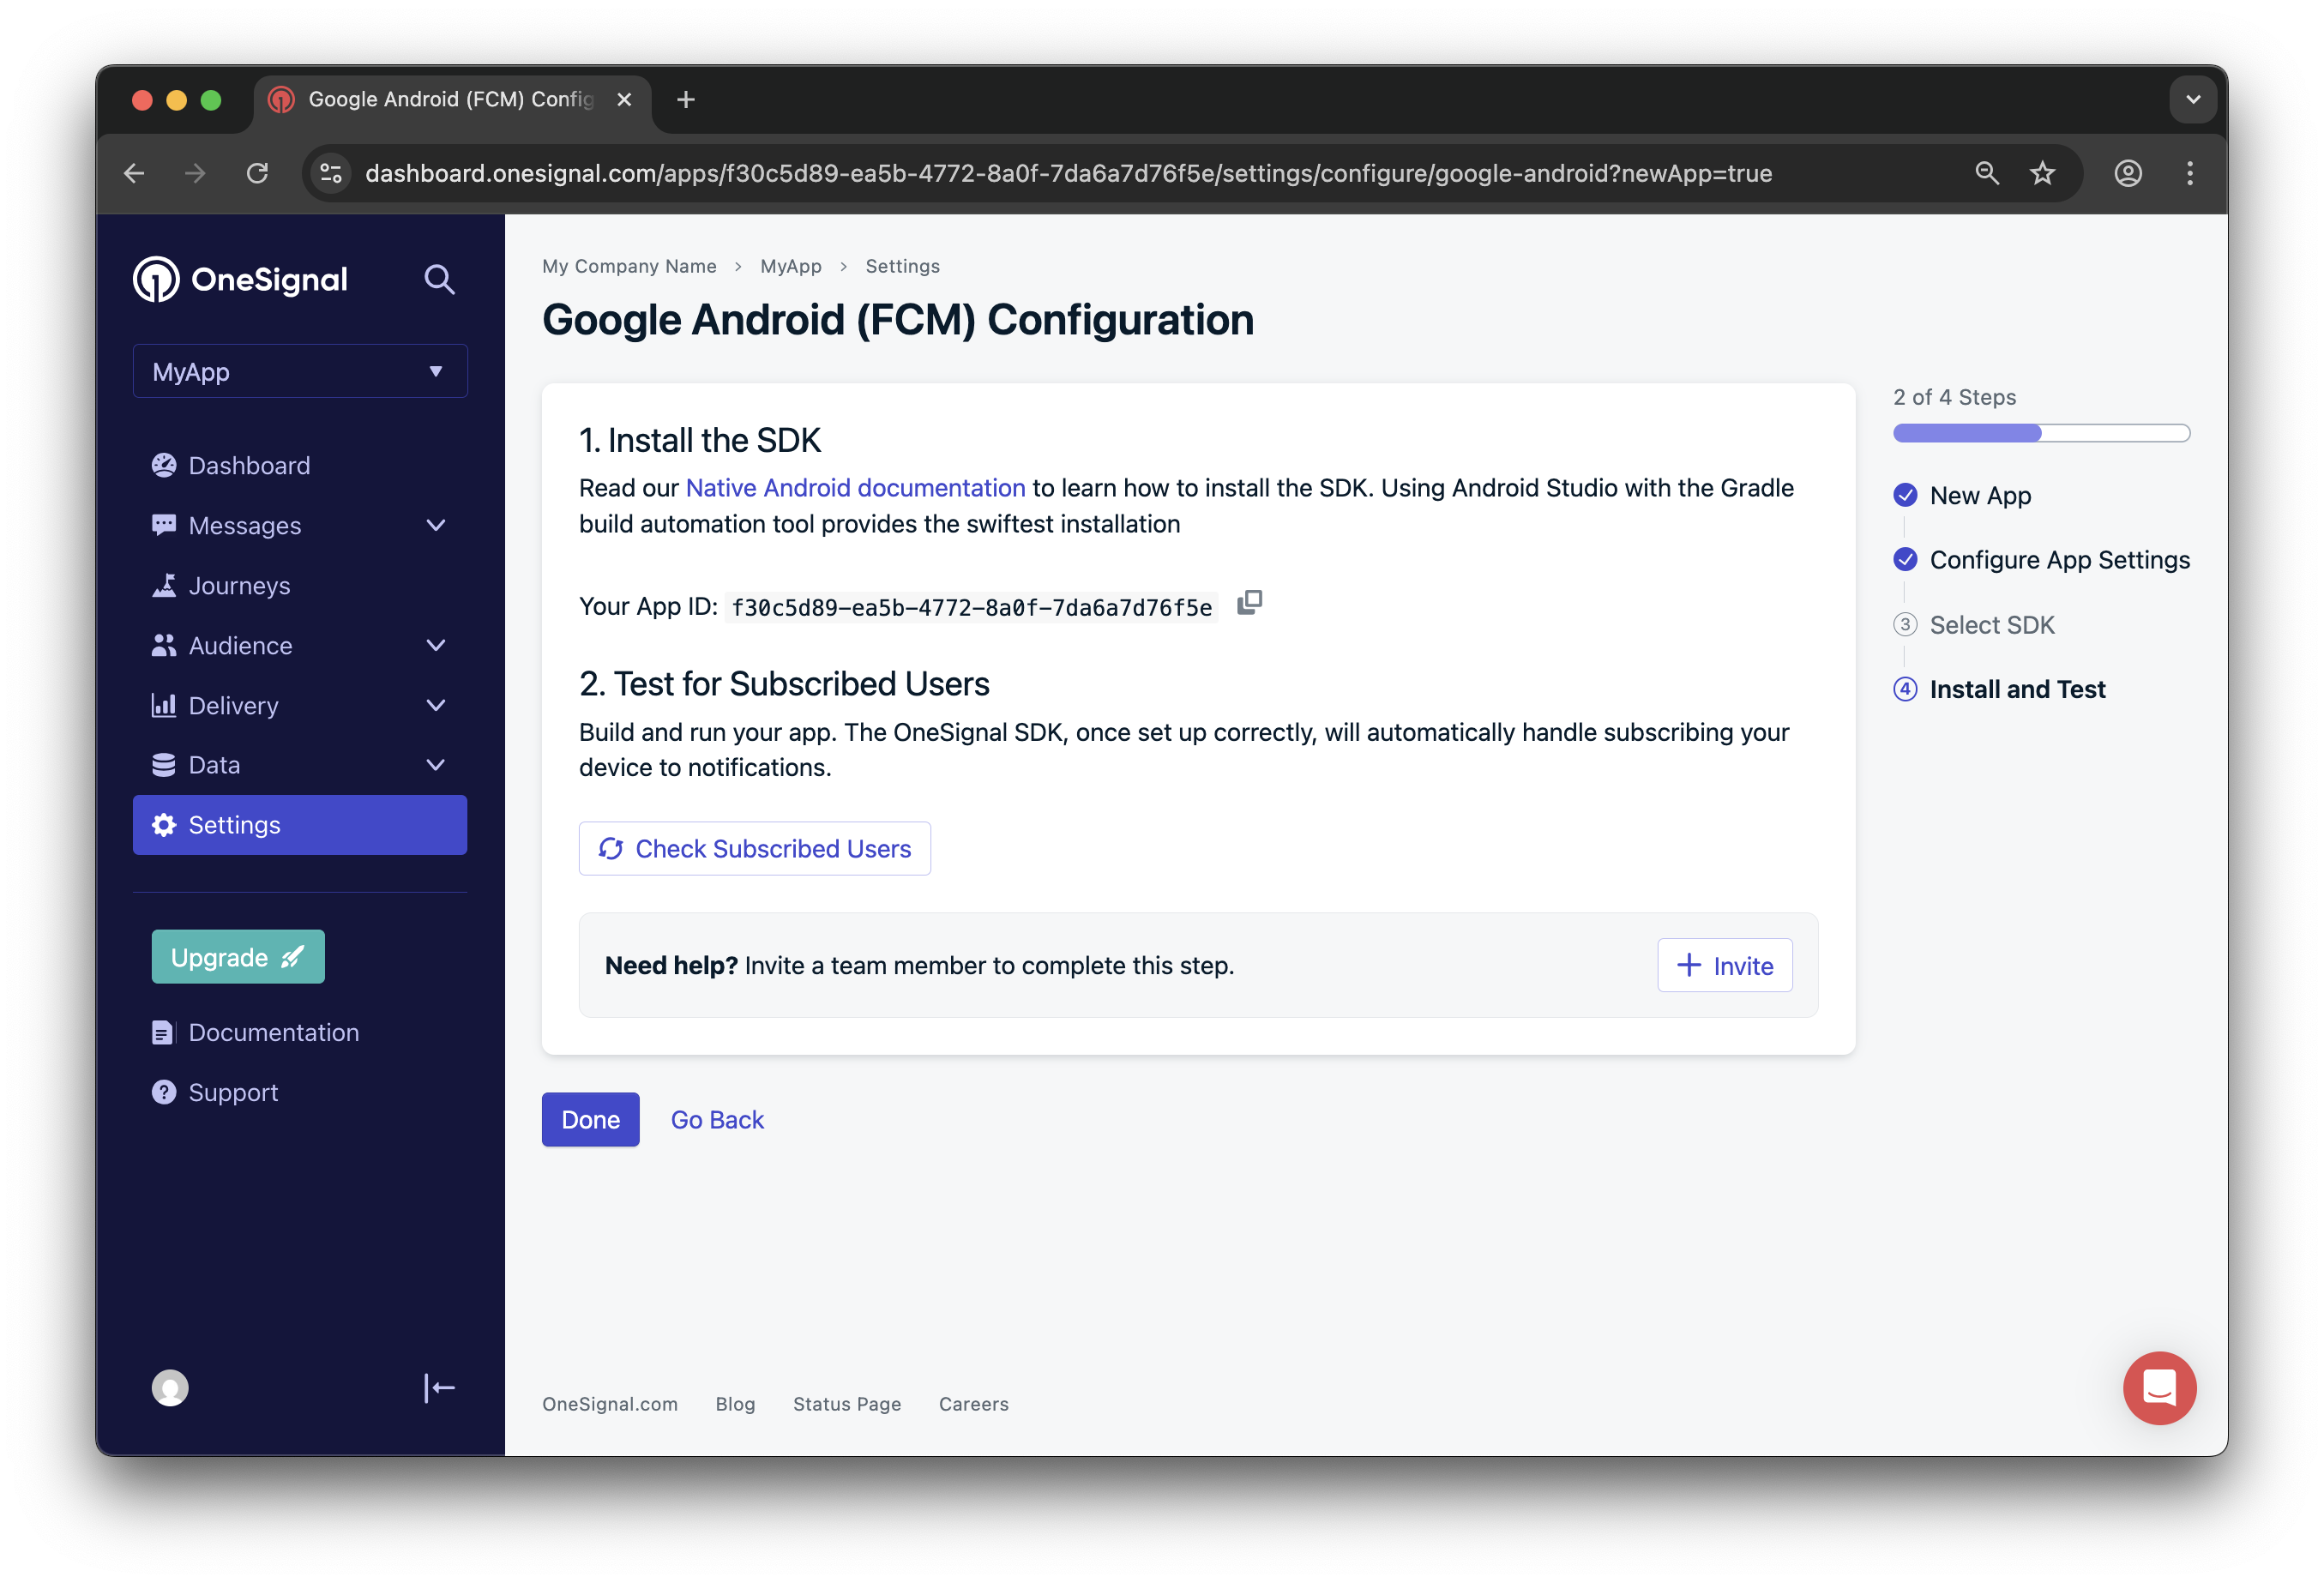
Save your App ID and invite team members who need access
Windows Platform Configuration
Get Microsoft Store Credentials
Since OneSignal uses Windows Push Notification Service (WNS), you’ll need credentials from the Microsoft Store:- Publish to Microsoft Store - Your app must be registered in the Microsoft Store (even if not publicly available)
- Obtain Package SID and Secret Key - Follow Microsoft’s detailed guide to retrieve these credentials
- Configure OneSignal Platform:
- Navigate to Settings > Windows (UWP) in your OneSignal dashboard
- Paste your Package SID and Secret Key
- Click Save to activate the platform
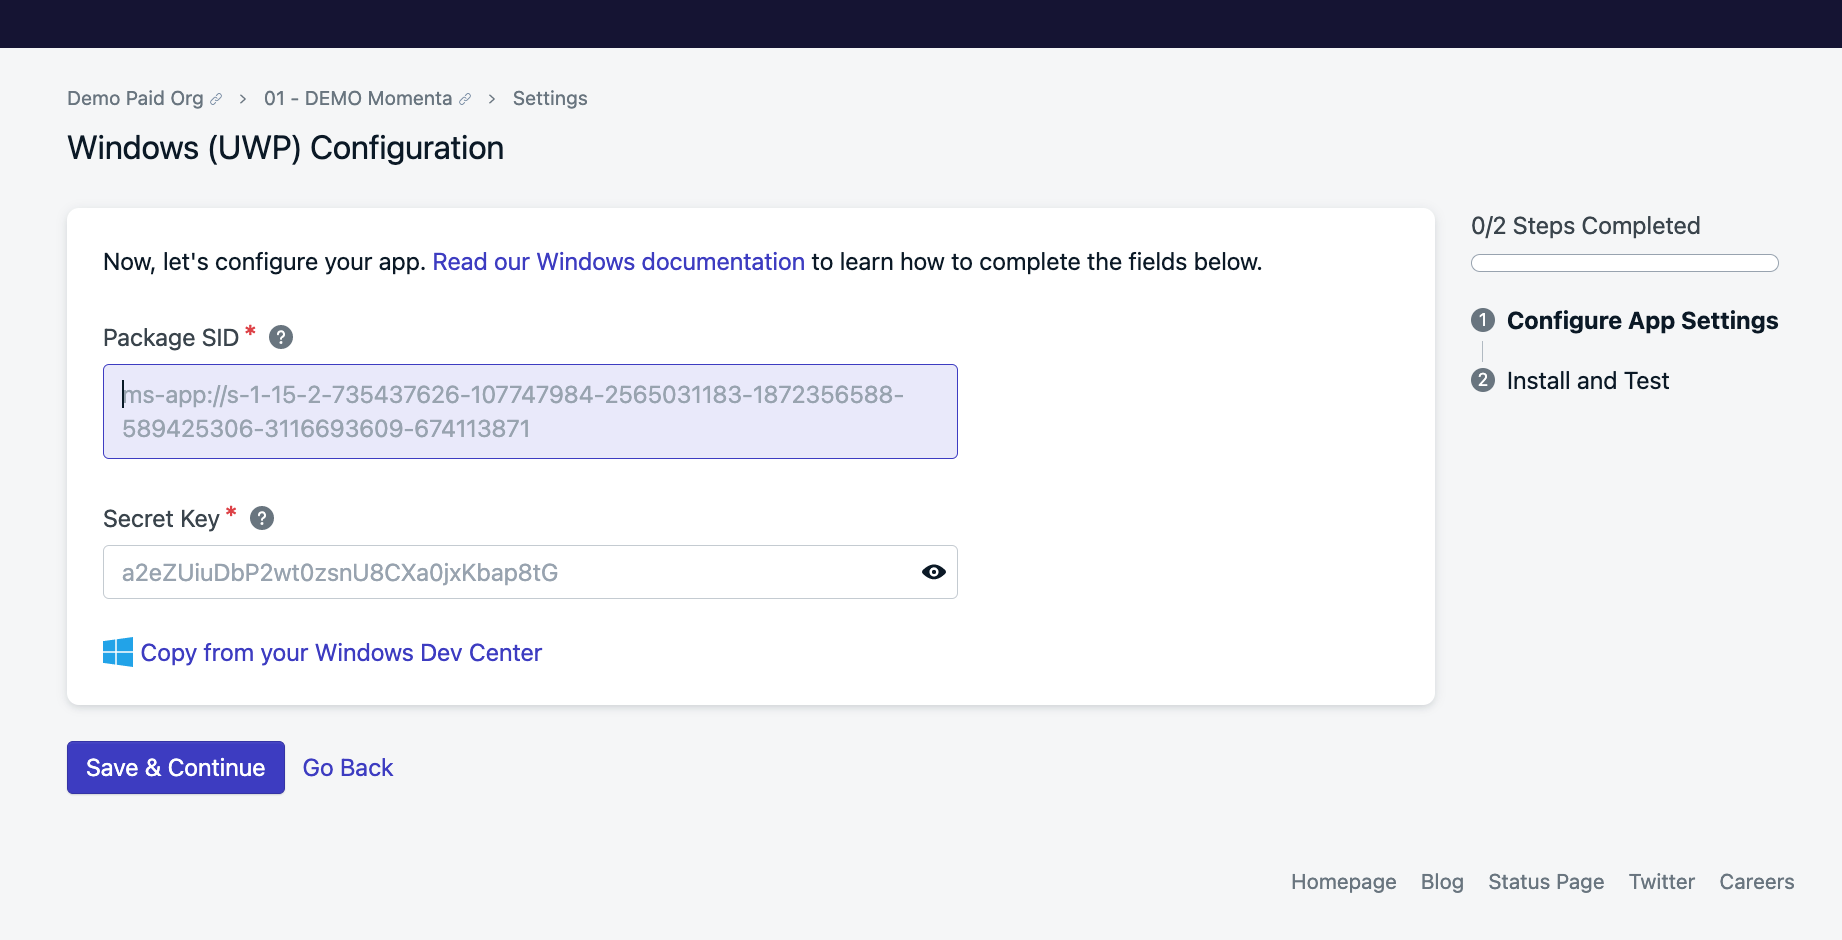
Configure Windows platform credentials in OneSignal dashboard
Gotcha: Package SID and Secret Key are only available after your app is registered with the Microsoft Store. You cannot test push notifications locally without these credentials.
SDK Integration
Understanding the Architecture
OneSignal doesn’t provide a dedicated UWP SDK. Instead, you’ll integrate using:- Windows Push Notification Service (WNS) - Microsoft’s native push service
- OneSignal REST API - For user management and message sending
- Notification Channel URI - Acts as the device token for push notifications
Register Users for Push Notifications
Step 1: Request Notification Channel
Follow Microsoft’s guide to create a notification channel. The channel URI returned by WNS serves as your device token.Step 2: Create OneSignal User Record
Call OneSignal’s Create user API to register the device: Required Parameters:subscription.type:"WindowsPush"subscription.token: The channel URI from Step 1
identity.external_id: Unique identifier for the user (e.g., user ID from your system)properties: Any custom user properties for targeting
Gotcha: Channel URIs can expire and change. Implement logic to refresh the channel URI periodically and update the OneSignal user record when it changes.
Handle Channel URI Changes
WNS channel URIs can expire. Implement thePushNotificationReceived event to detect when you need to refresh:
Sending Push Notifications
Using OneSignal Dashboard
- Navigate to Messages > Push in your OneSignal dashboard
- Create a new push notification
- Select your Windows platform
- Configure your message content and targeting
- Send immediately or schedule for later
Using OneSignal API
Send notifications programmatically using the Create notification API:Next Steps and Best Practices
Testing Your Integration
- Test Notification Channel Creation - Ensure your app successfully creates and maintains a WNS channel
- Verify User Registration - Confirm users are properly registered in your OneSignal dashboard
- Send Test Notifications - Use the OneSignal dashboard to send test messages
- Handle Notification Events - Implement proper handling for notification received, opened, and dismissed events
Common Issues and Solutions
Channel URI Not Working- Verify your Package SID and Secret Key are correctly configured
- Ensure your app is properly registered with the Microsoft Store
- Check that the channel URI hasn’t expired
- Confirm the OneSignal user record was created successfully
- Verify the Windows platform is properly configured in OneSignal
- Check that notifications aren’t being blocked by Windows notification settings
- Validate your OneSignal App ID is correct
- Ensure you’re using the correct API endpoints and authentication
- Review API response codes and error messages for troubleshooting
Production Considerations
- Implement proper error handling for all OneSignal API calls
- Set up monitoring for channel URI refresh failures
- Consider implementing offline queueing for API calls during network issues
- Plan for scaling user registration during peak app usage periods