- Prompt User actions like subscribing to push notifications or updating their location
- Promote new or underutilized features to targeted Users
- Display announcements and news in real time without releasing an app update
- Create surveys and carousels
- Help with onboarding and educational content
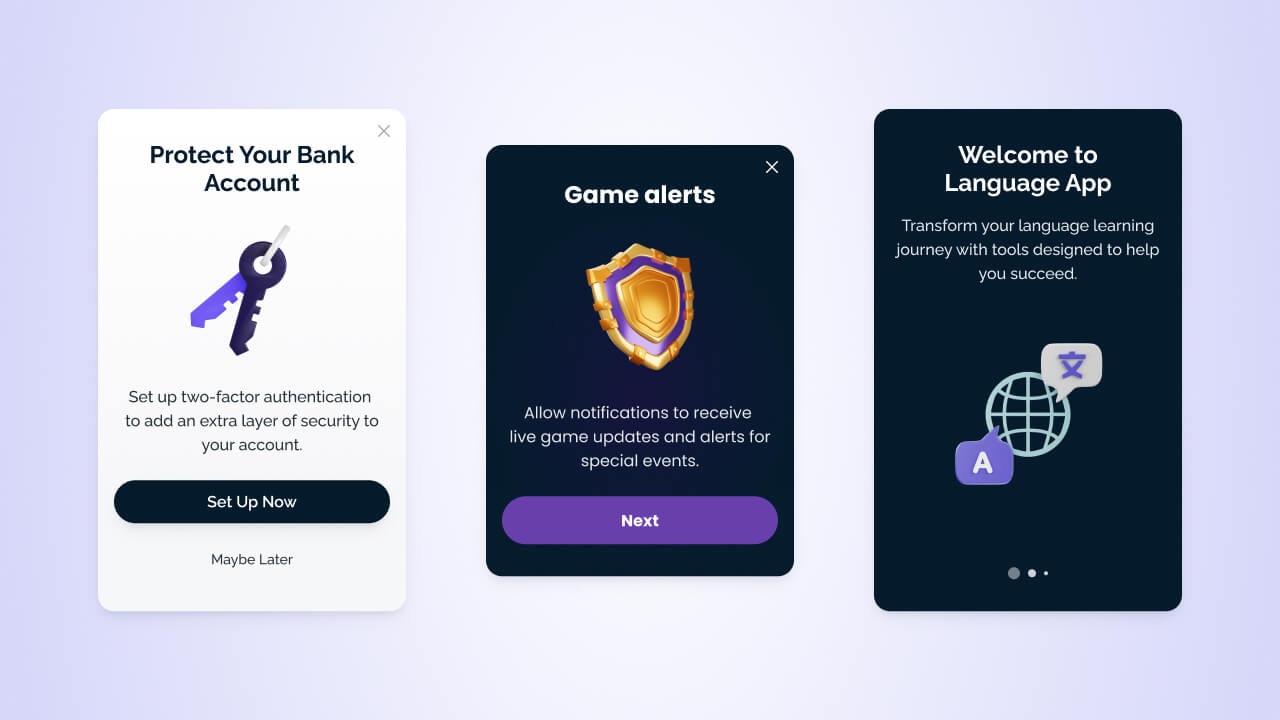
In-app message examples
In-app setup
You must have the OneSignal SDK installed in your app to use in-app messages. Once the SDK is integrated, you can create and send in-app messages from the OneSignal dashboard without writing any code. The SDK also provides methods for advanced use cases like:- Triggering the message at specific times
- Click handling and deep linking
- Pausing the message
- Lifecycle management
Mobile SDK setup
In-app message SDK methods
In-app triggers
In-app click actions
Send in-app messages
You can send in-app messages from the OneSignal dashboard and within Journeys.How to create and send in-app messages in OneSignal
Dashboard
Journeys
Send from the dashboard
Select the message channel
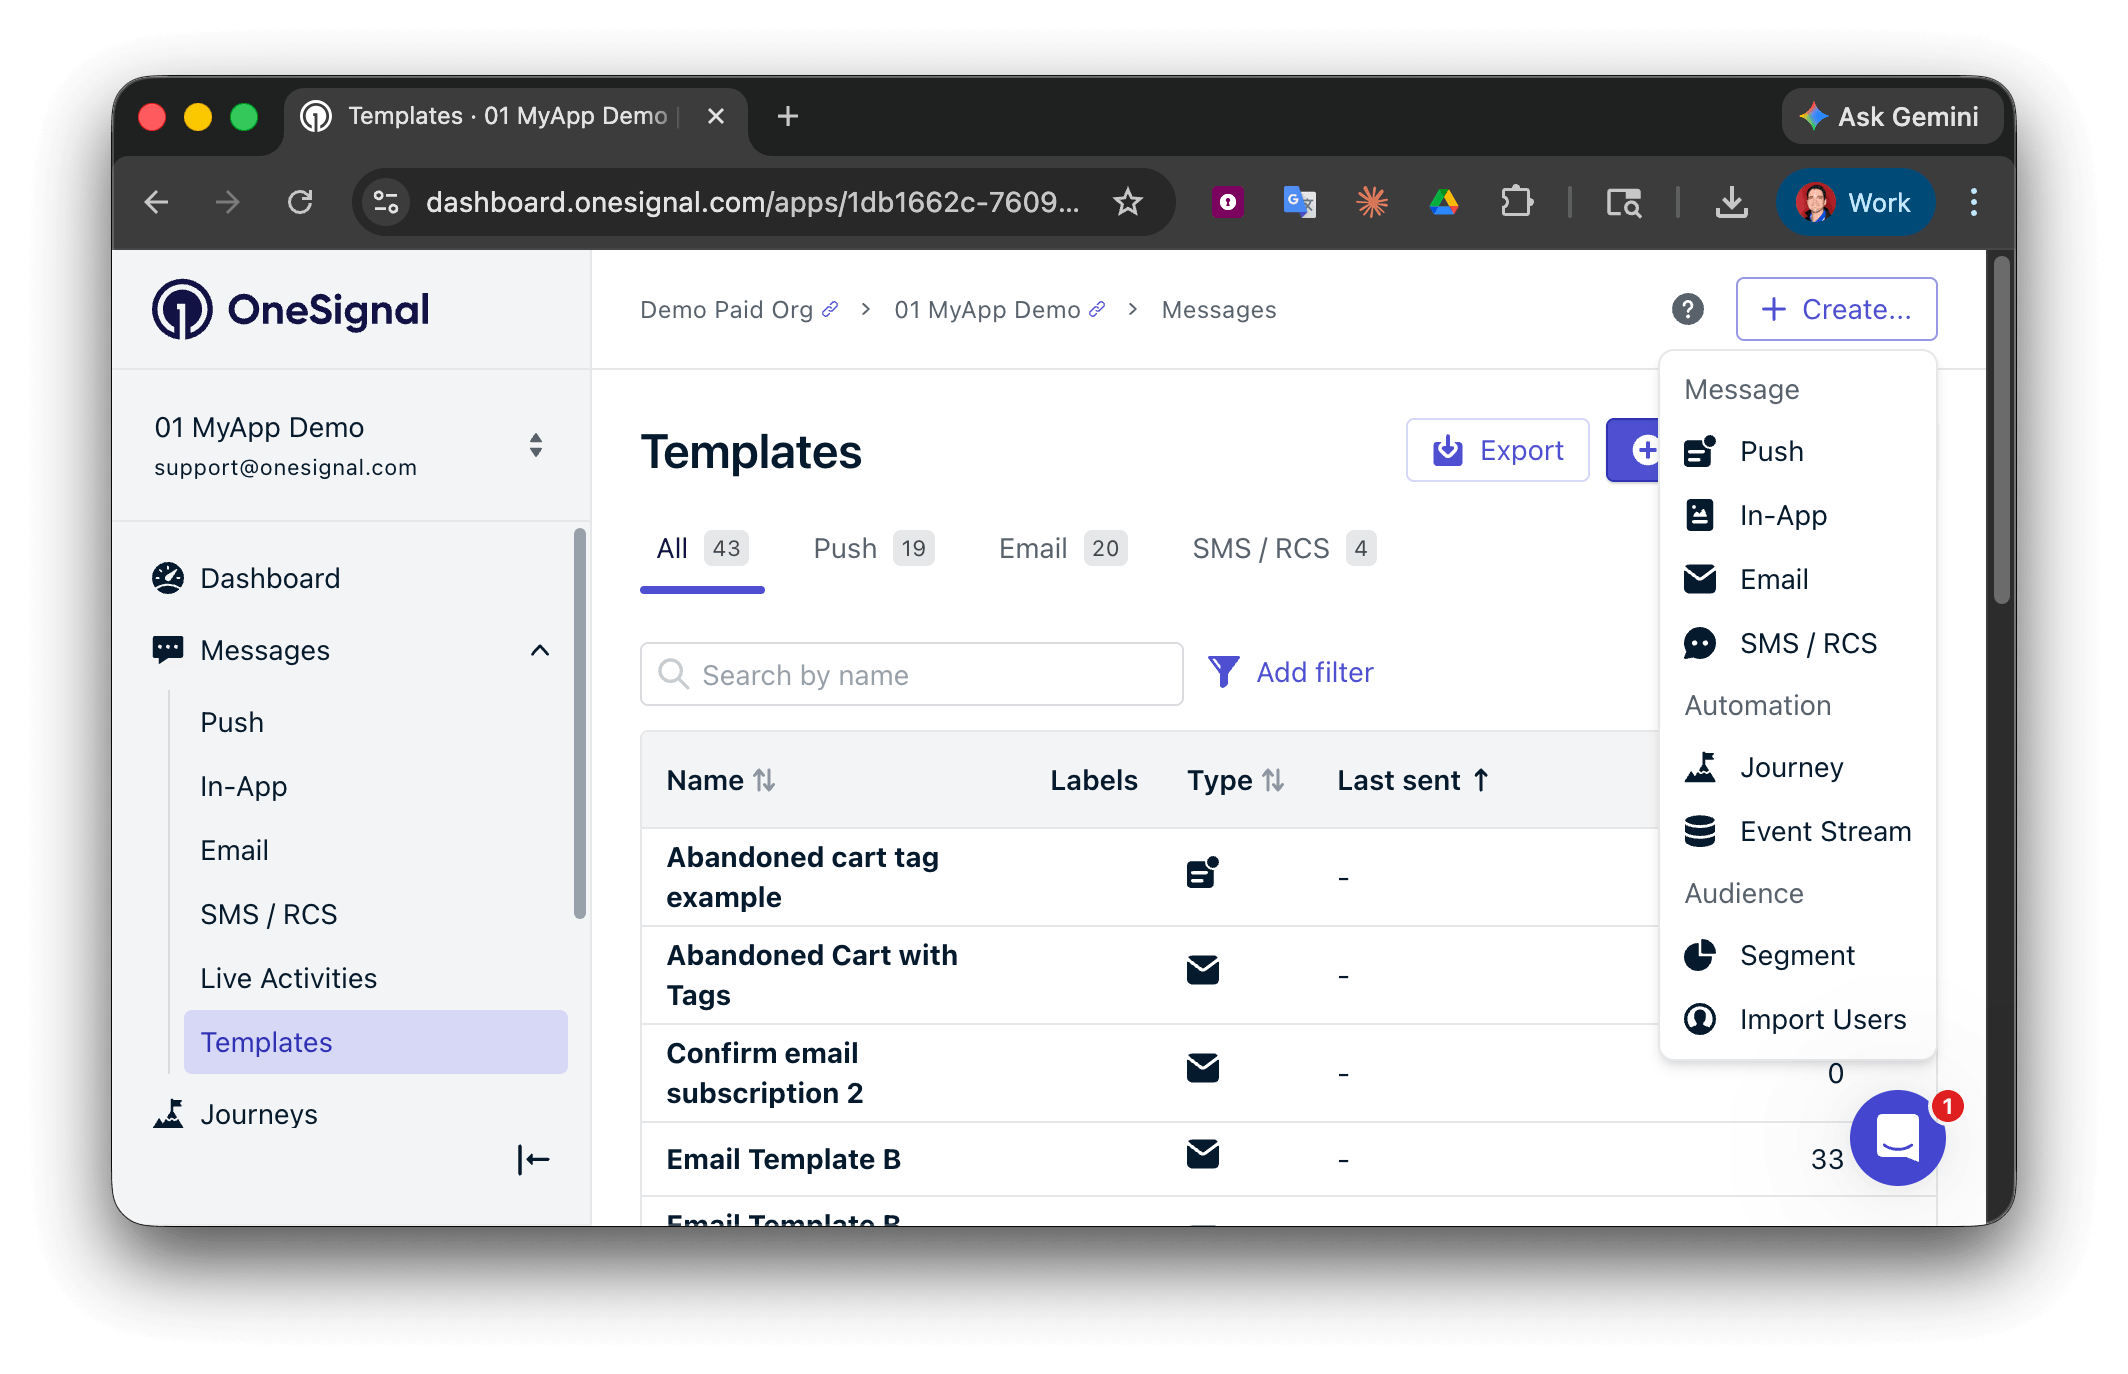
Create a new message in the OneSignal dashboard.
Choose a composition method
- Start from scratch with the Block Editor or HTML Editor
- Use a pre-built template
Set a name and label
nameSelect your audience
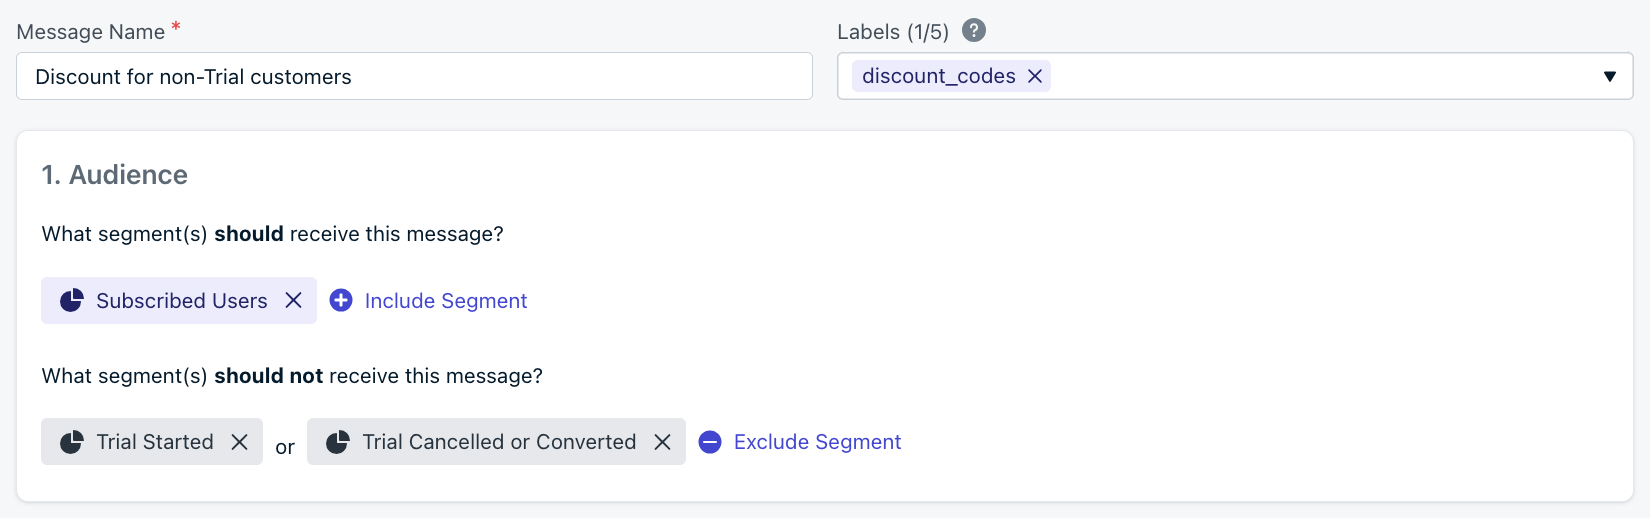
Name, label, and audience segment selection in the dashboard.
Message design
Use the visual drag-and-drop editor or the HTML editor for more control.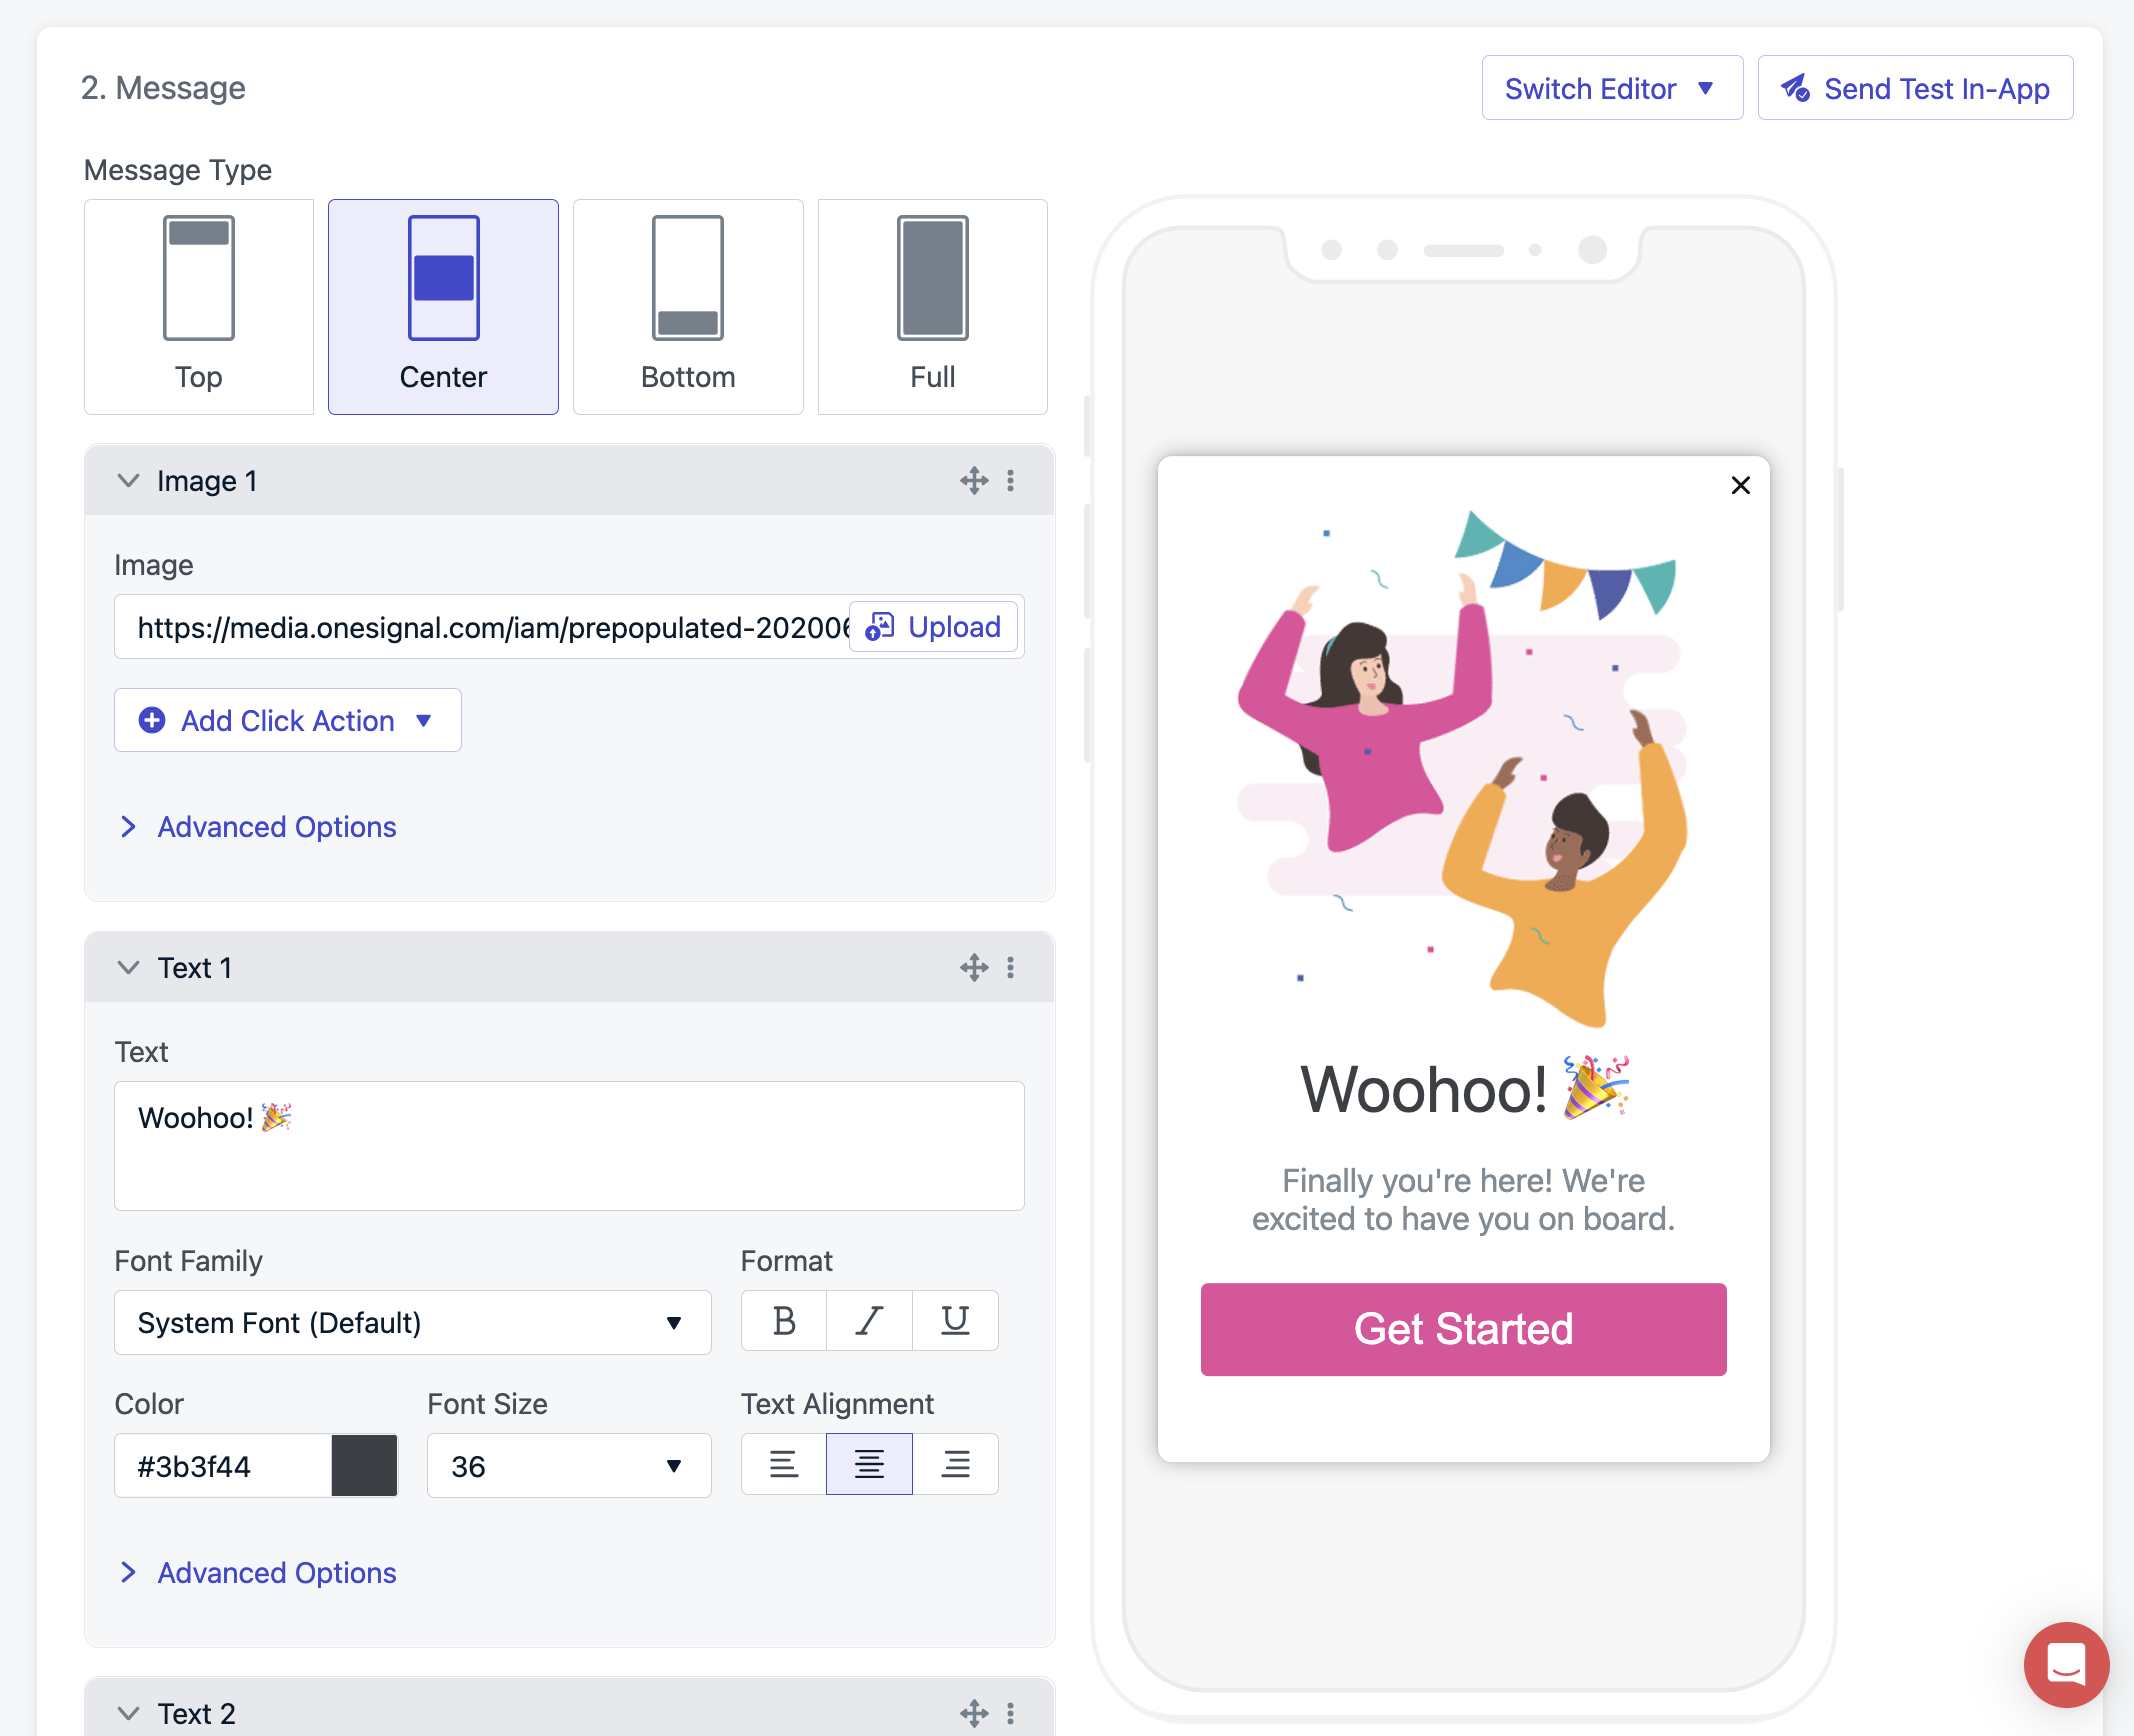
In-app message block editor interface
Design your in-app message
Design with HTML
Pre-built HTML templates
In-app JavaScript APIs for HTML
Message personalization
Multi-language messaging
Click actions
Customize what happens when Users click elements in your message.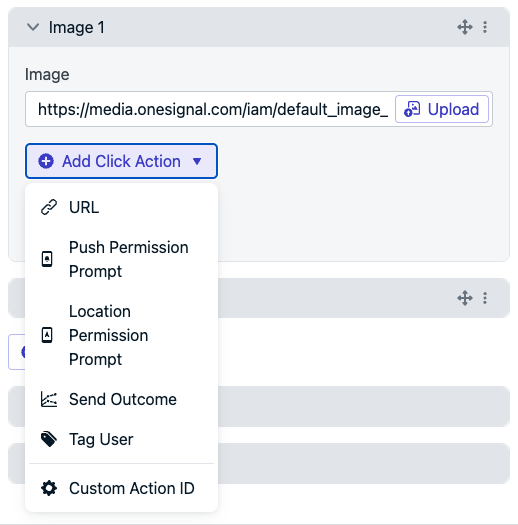
Click action options in the in-app message editor
Click actions
Event Streams
SDK click handler
Deep linking
Triggers
Define when messages should appear during app sessions.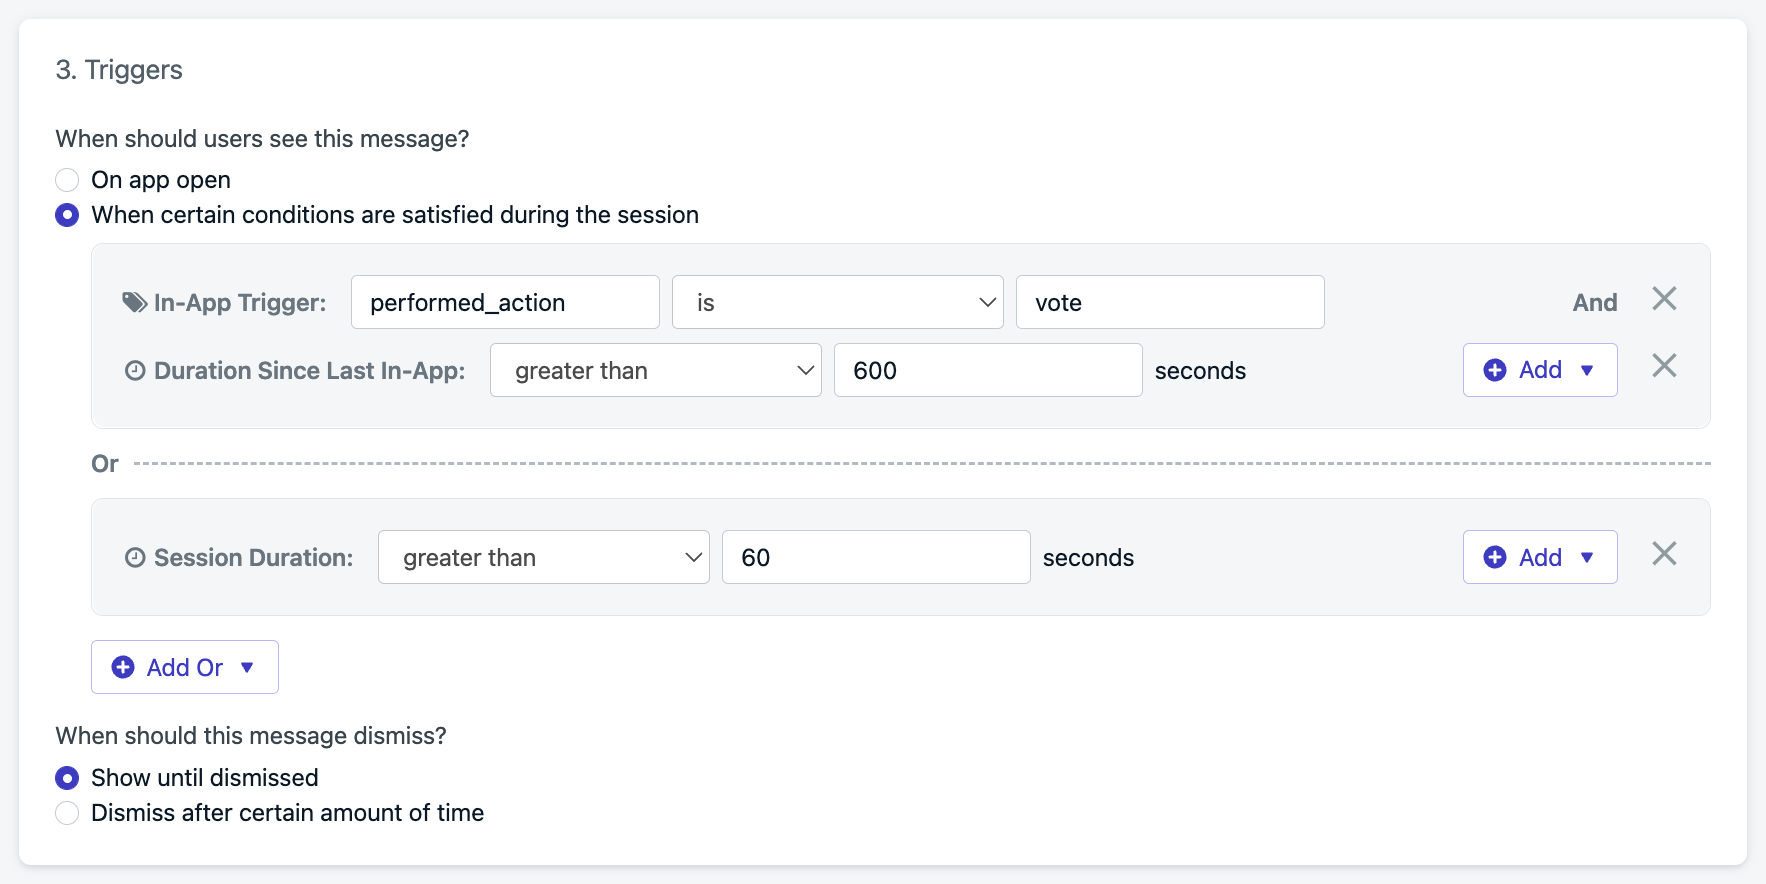
Trigger setup options for in-app messages
- On app open: Display when the User launches the app.
- Session duration: Delay a set number of seconds after app open.
- Since last message: Delay a set time after the last in-app message was shown.
- Custom triggers: Controlled via the SDK
addTrigger(s)method for precise timing based on User behavior.
Dismiss behavior
Messages can dismiss:- On User interaction (click, swipe)
- After a set time (auto-dismiss)
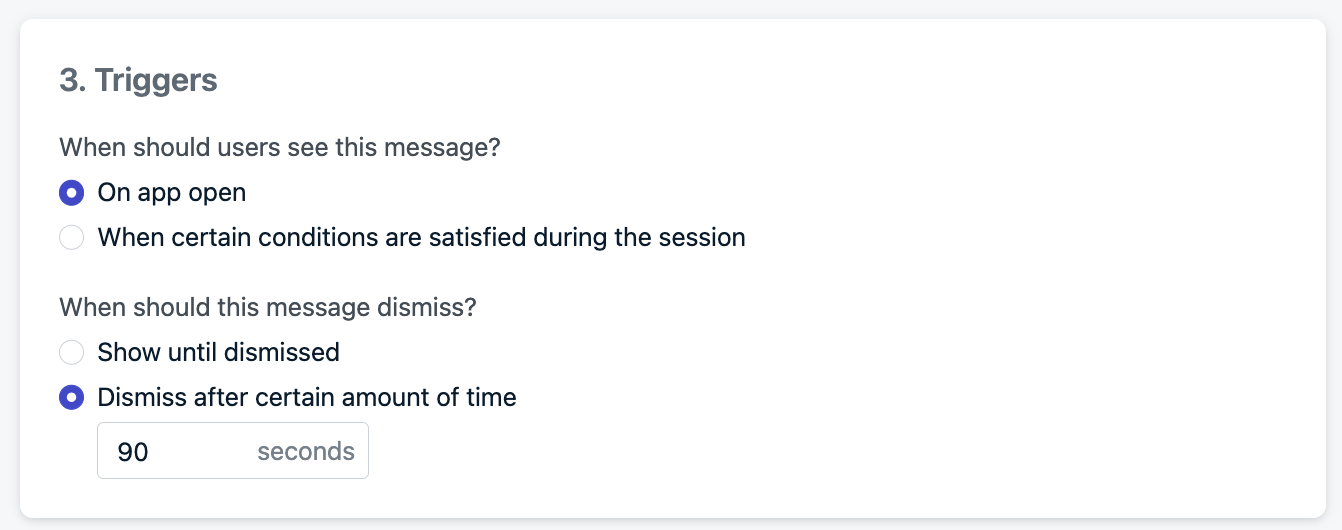
Auto-dismiss configuration set to 90 seconds
Schedule and frequency
- Start showing: When the message becomes eligible to display
- Stop showing: Set an end date/time or “Show forever”
Display frequency
- Only once (default)
- Every time trigger conditions are met
- Multiple times with custom repeat logic
- Show 2 times with a 1 hour gap
- Show 12 times with a 30 day gap
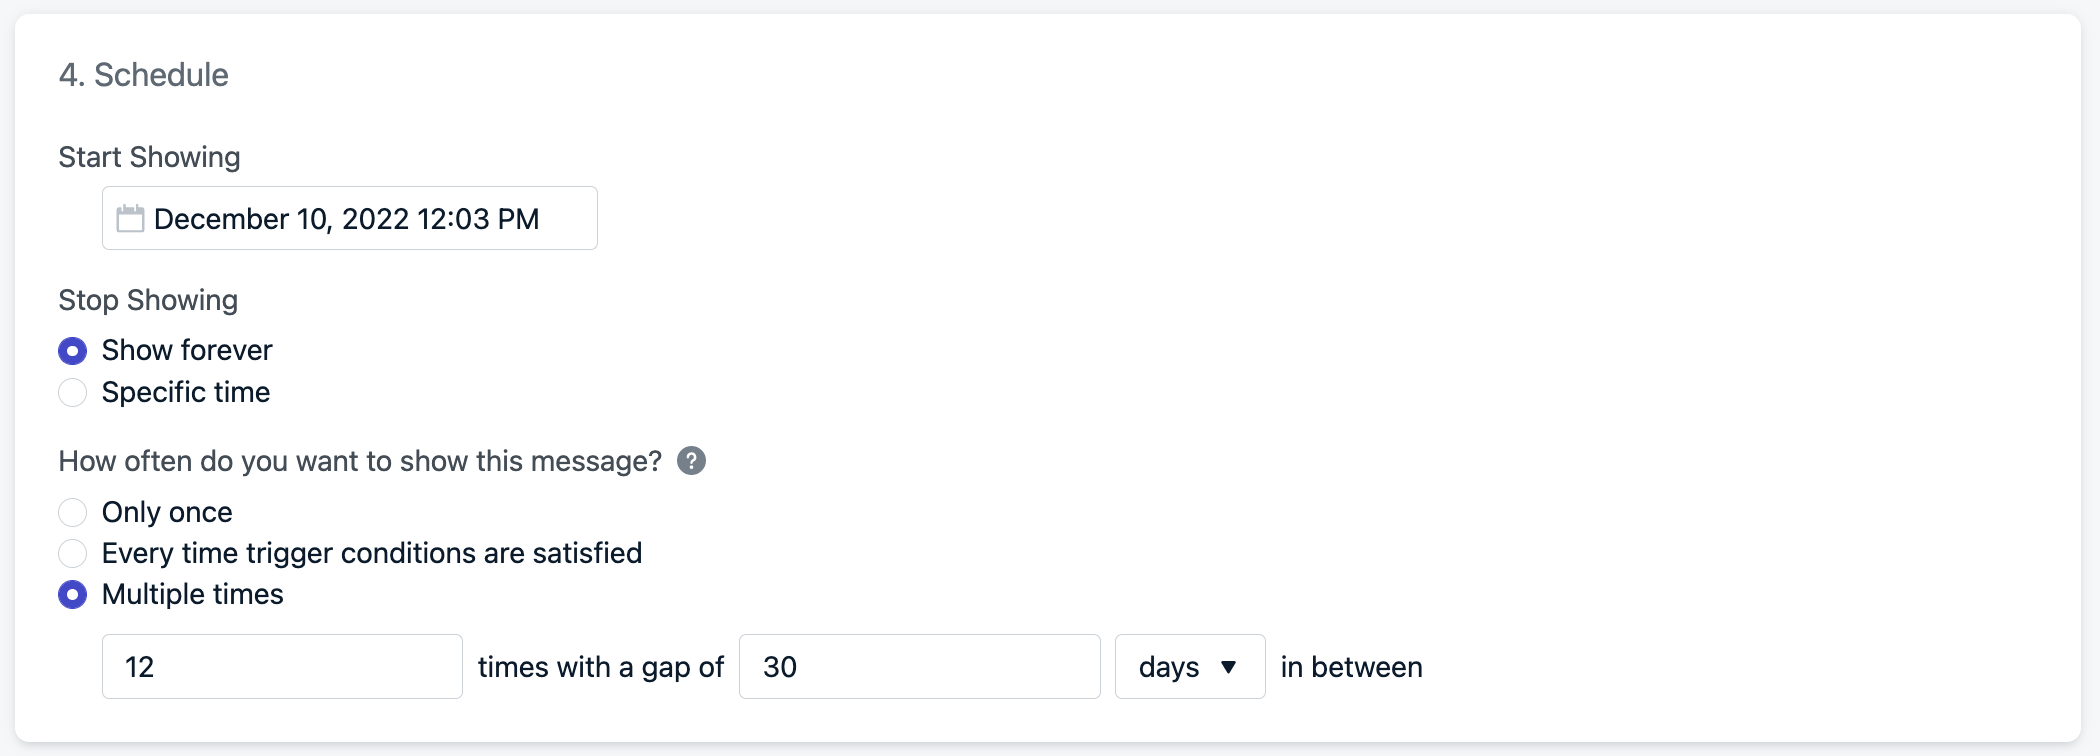
Frequency configuration: show the message 12 times every 30 days
How in-app messages are shown
In-app messages are not actively pushed. Instead, they’re pulled at app start based on audience, then displayed based on trigger logic.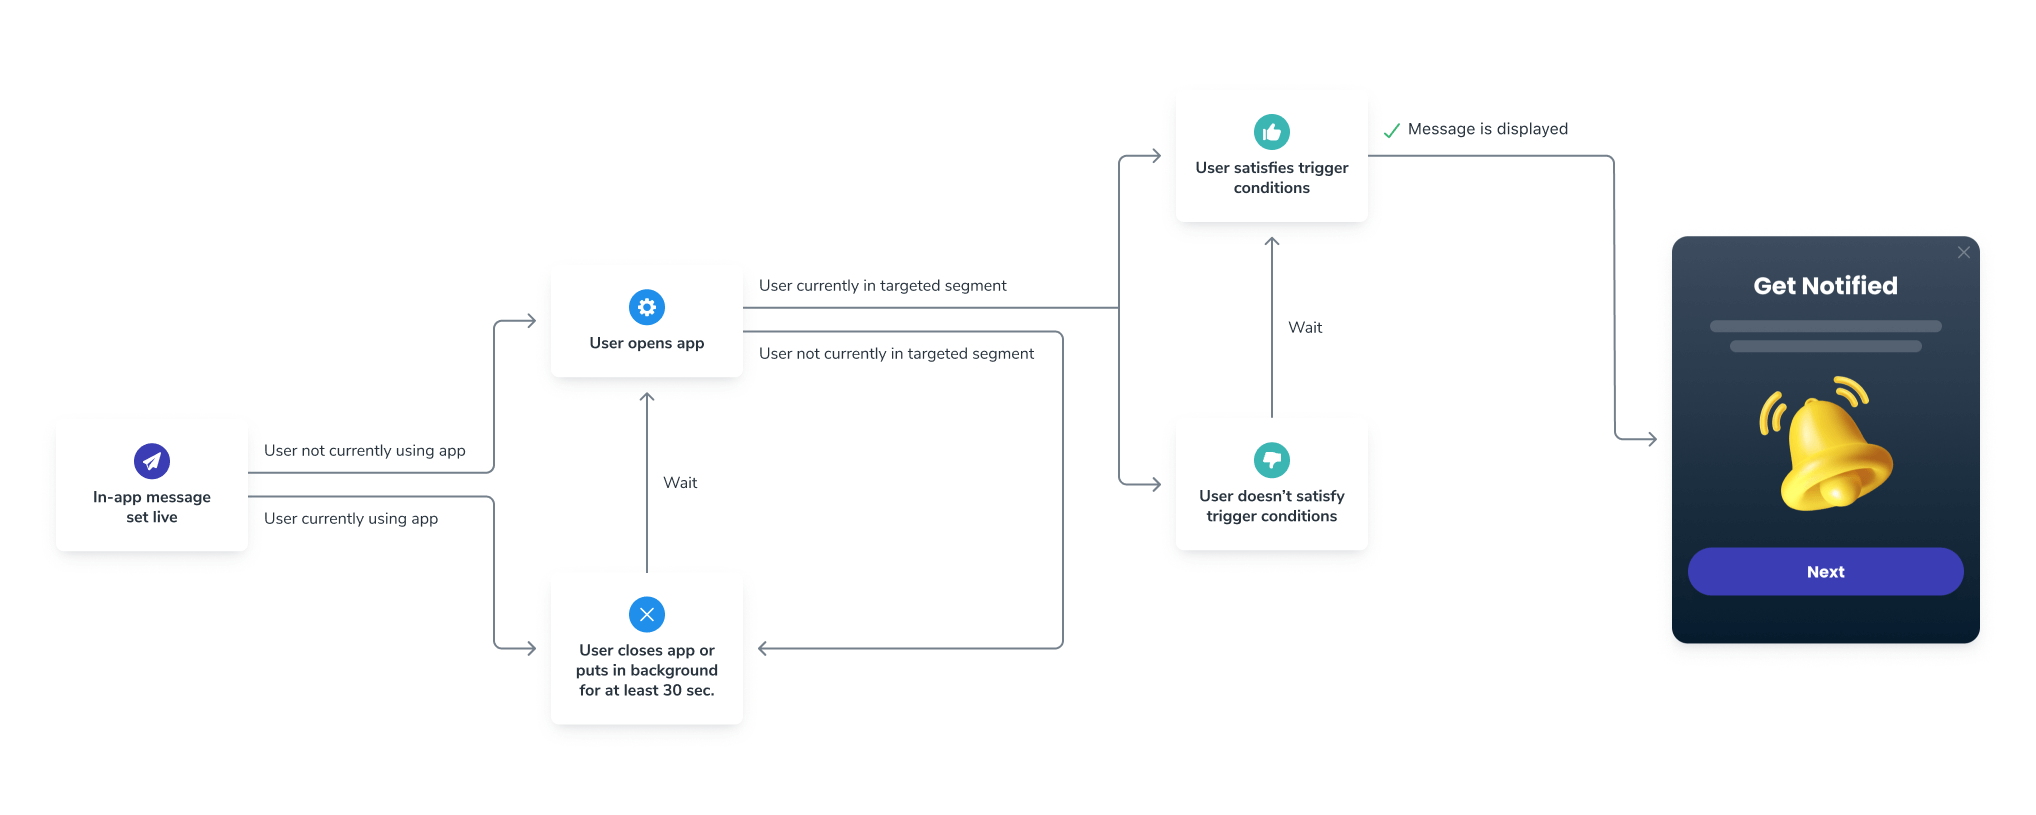
In-app message display logic flow
- The User meets audience criteria before a new session starts.
- A new session starts when the User opens your app after it has been in the background or closed for at least 30 seconds. See Sessions.
- If the User has the app open when the message goes live or enters the Segment during the same session, they must close or background the app for at least 30 seconds to be eligible.
- The trigger conditions are met.
- The scheduled time and frequency are valid.
Testing
Add verbose logging to your app
setLogLevel method set to Verbose in your app to get more detailed logs.Make sure your Subscription is in the Segment
- See Find devices and set test Users if you don’t know your device’s Subscription ID.
- Make sure your device’s Subscription is in the included Segment(s) and not in the excluded Segment(s).
Close or background the app for at least 30 seconds
Check trigger conditions
Check the schedule and frequency
- Make sure the “Start showing” and “Stop showing” dates are set correctly.
- Set display frequency to “Every time trigger conditions are satisfied” while testing.
Update the message and make sure it is active
Test and preview
The Test & Preview button sends a push notification to your selected test device. When you click the push to open the app, the in-app message displays. Requirements and notes:- Your device must be a test User
- Your device must be subscribed to push — test in-app messages are triggered via push notification (this is not required for normal in-app messages)
- Push is only sent for testing purposes and will not be sent when the message is live
- If you are not seeing the message, follow the testing steps above
support@onesignal.comPlease include:- Details of the issue you’re experiencing and steps to reproduce if available
- Your OneSignal App ID
- The External ID or Subscription ID if applicable
- The URL to the message you tested in the OneSignal Dashboard if applicable
- Any relevant logs or error messages