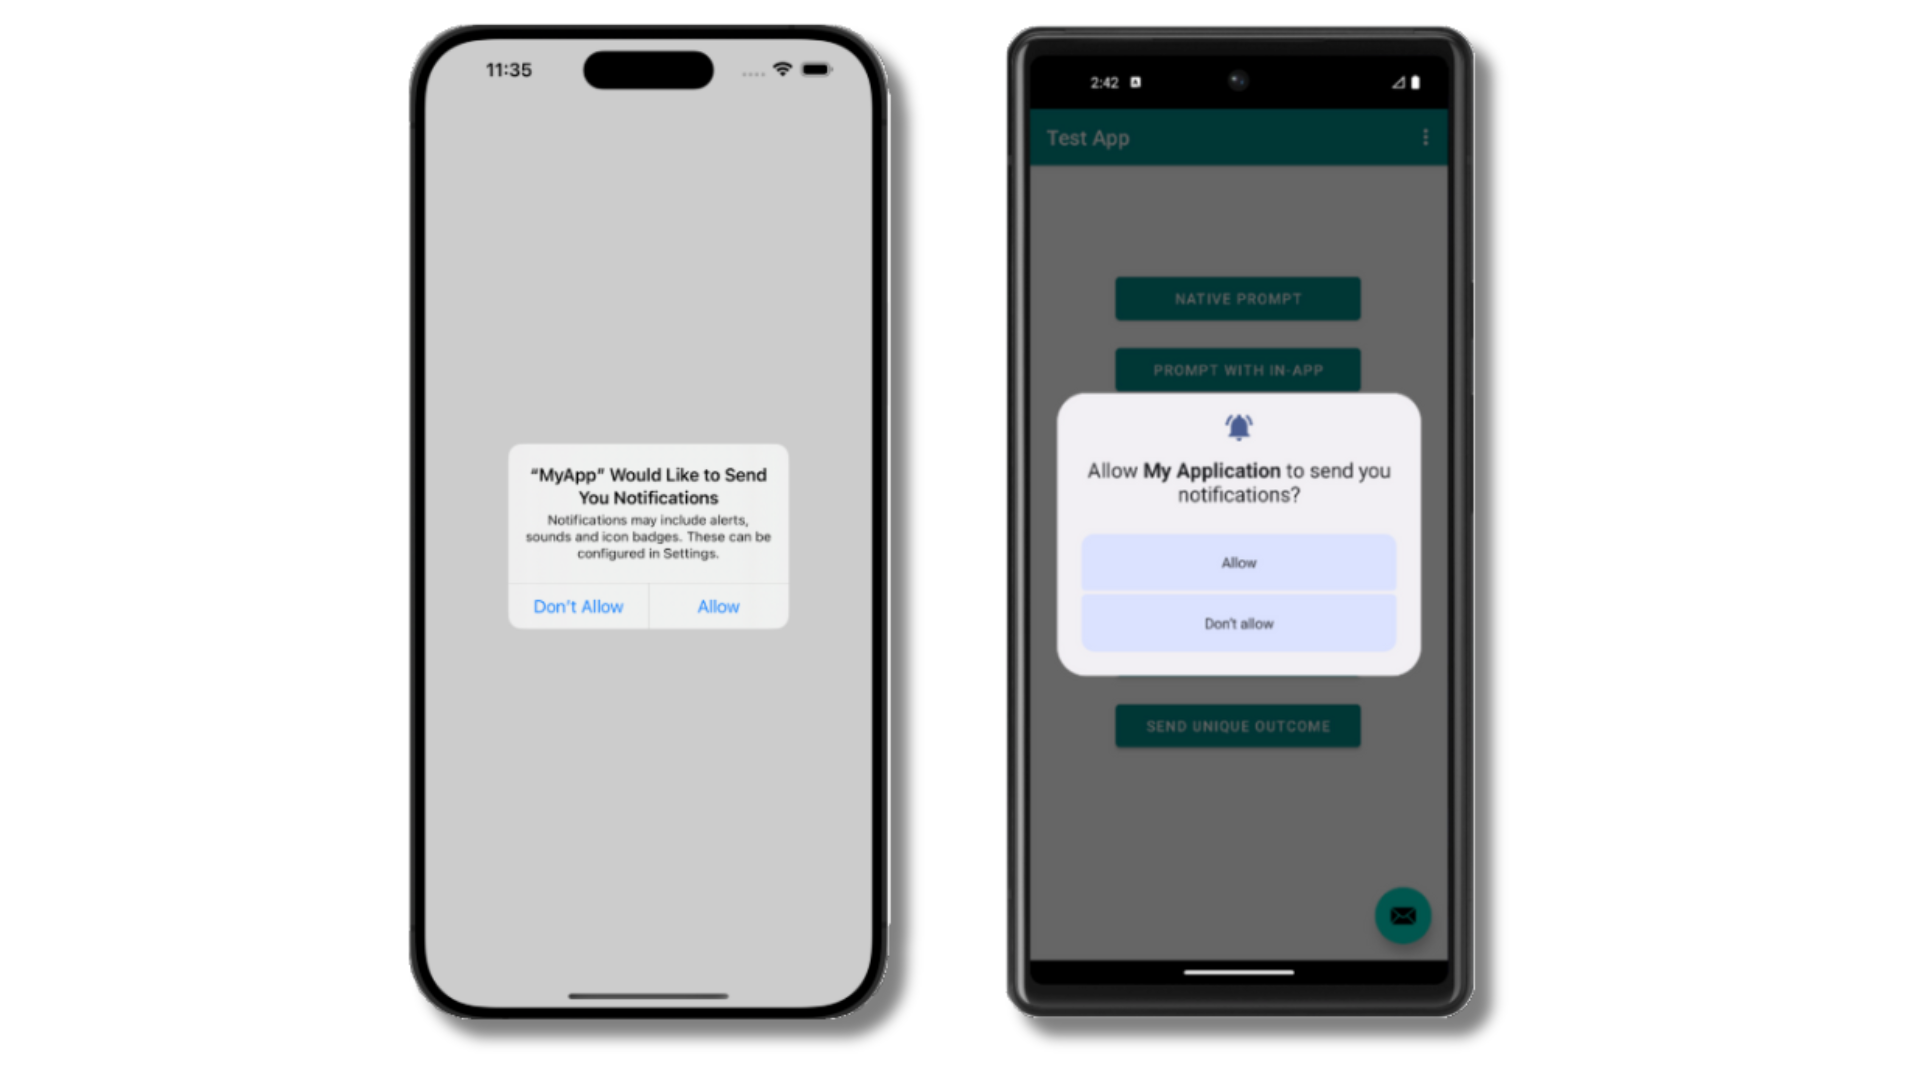
An iOS and Android device displaying the system permission prompt.
Strategy for a high opt-in rate
Push opt-in rates depend far more on when and how you ask than on what the system prompt itself says. Apps that treat prompting as a strategy consistently outperform apps that prompt on first launch. The principles below are the building blocks. The example strategy below shows how to combine them into a concrete playbook.Principles
- Ask after a value moment. Wait until the user has just experienced something notification-worthy: completing onboarding, saving an item, following a topic, placing an order, or finishing a first session. Prompting on first launch, before the user understands what your app does, is the single biggest cause of low opt-in rates.
- Start with provisional notifications on iOS. Provisional notifications deliver quietly to the Notification Center without any prompt, so users decide whether to keep them based on real content instead of a hypothetical explanation. This is often the highest-conversion path on iOS and should be your default starting point.
- Explain the value with an in-app soft prompt. A soft prompt is a OneSignal in-app message that tells users what kind of notifications you’ll send and why they matter. Dismissing a soft prompt does not consume a system prompt attempt, so you can re-ask users who were not ready.
- Re-ask users who declined the soft prompt, not the system prompt. Configure the soft prompt to re-show on a cadence (for example, every 2 weeks). Users who were not ready get another chance without exhausting the system prompt limit.
- Iterate on copy and timing. Ship the soft prompt, watch the conversion in the message report, then adjust the trigger, wording, and frequency. Small changes to timing and copy routinely shift opt-in rates by tens of percentage points.
Example: onboarding opt-in strategy
This example combines provisional notifications for immediate iOS reach with a soft prompt at a value moment for full opt-in. Use it as a starting point and adapt the notification types and value moments to your app. For Android and Huawei apps, skip phase 1 and start at phase 2. Phase 1: Silent reach on iOS- Turn on provisional authorization in the OneSignal dashboard under Settings > Apple iOS > Advanced Configuration > Enable iOS 12 direct to history.
- Send 2 to 3 high-quality notifications during the user’s first week. Pick content that demonstrates the value of subscribing: a personalized recommendation, a breaking-news alert, or a weekly digest. Users receive them silently in the Notification Center with no prompt.
- In Messages > In-App, create a soft prompt that references the value the user has already experienced. Example headline: “Get breaking news alerts on your lock screen.”
- Set the audience to Show to all users. The Push Permission Prompt click action filters to unsubscribed users automatically.
- Trigger the message on a high-signal event: opening or acting on a provisional notification, following a topic, adding an item to a cart, or 5 minutes of session time.
- Add a Push Permission Prompt click action to the CTA button.
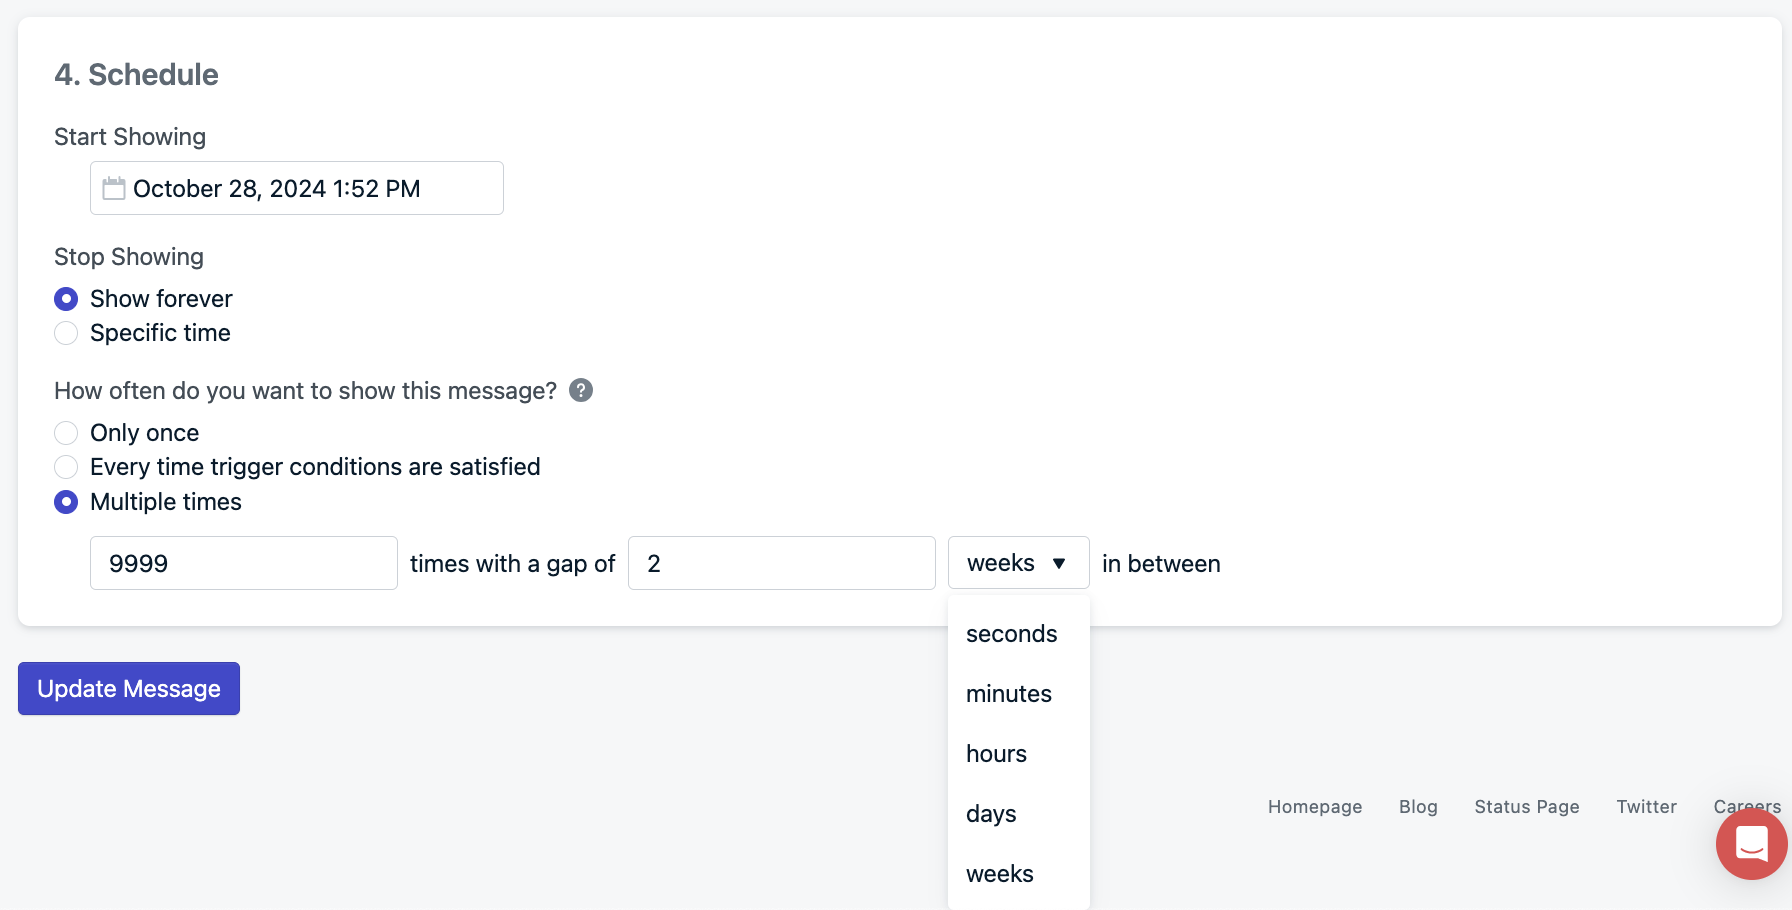
- Set the schedule to Multiple times with max per user
20and a gap between views of2 weeks(about 10 months of re-prompting).
- After 1 to 2 weeks, check the message report for prompt-to-opt-in conversion.
- Instrument the full funnel with the SDK listeners: soft prompt clicks, dismissals, and the system prompt outcome. Forward the events to your analytics tool.
- Adjust one variable at a time (trigger event, headline, CTA copy, or gap between displays) based on the numbers.
Choose an approach
You have three ways to grow your push subscriber base with OneSignal. Most iOS apps should combine provisional notifications with an in-app soft prompt; most Android apps should start with the soft prompt.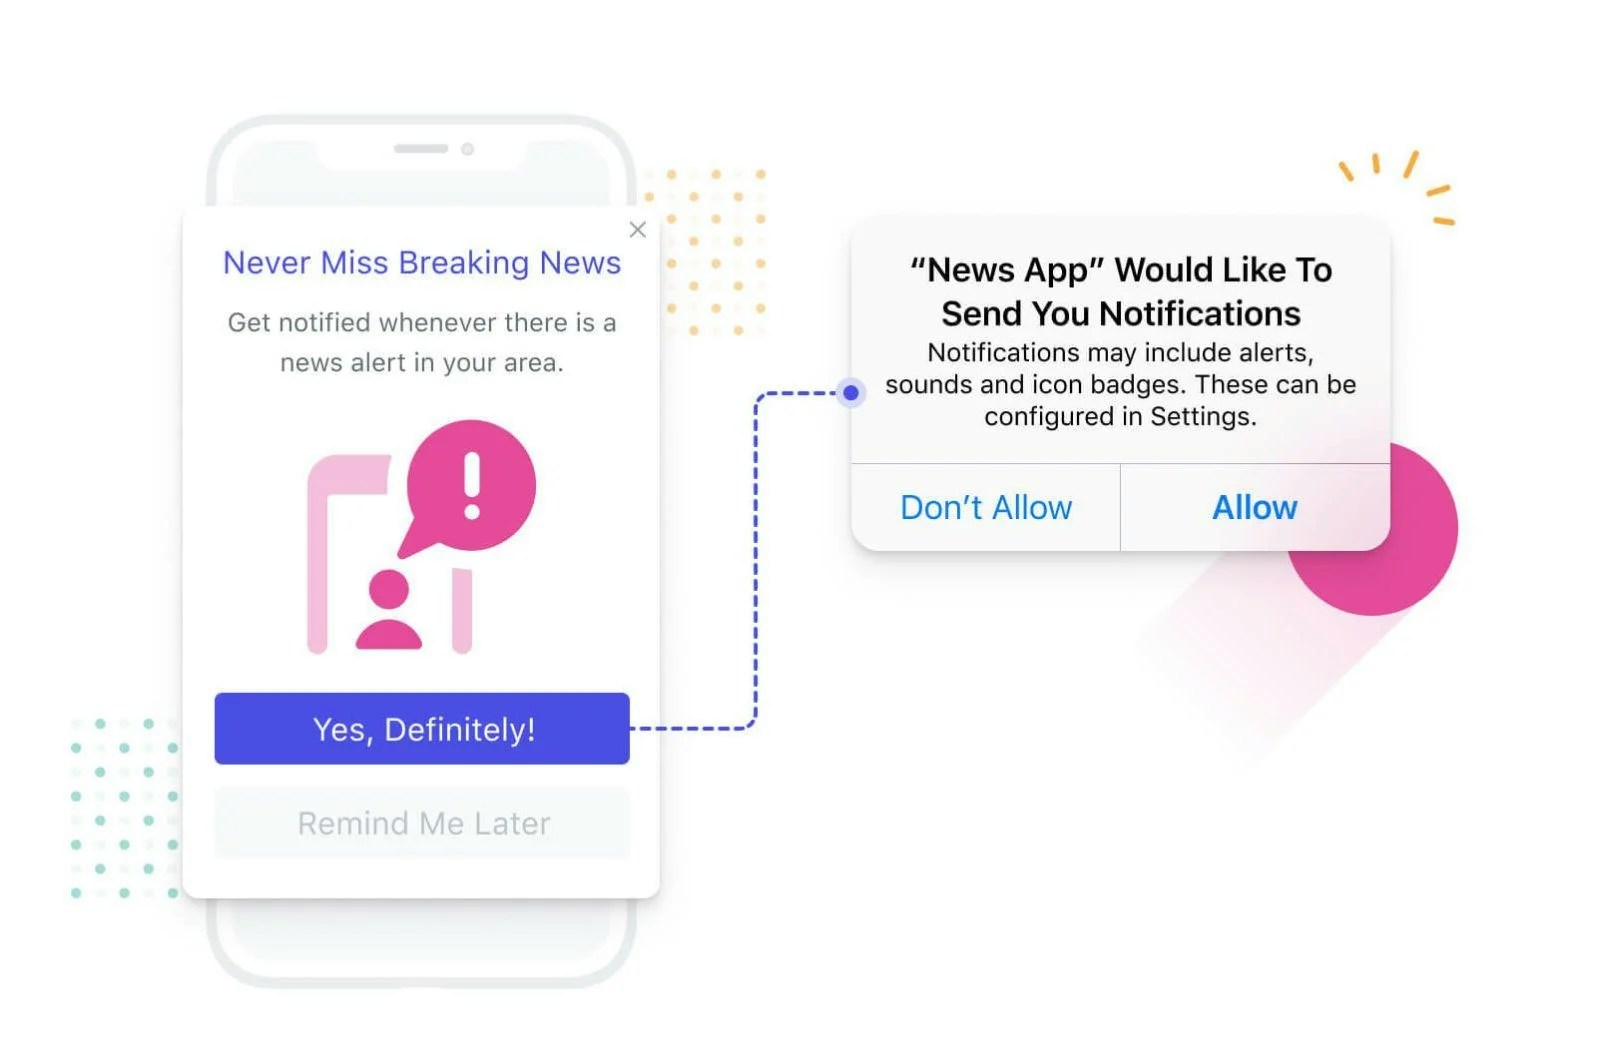
An in-app soft prompt followed by the system permission prompt.
Prerequisites
- A OneSignal account.
- A mobile app with the OneSignal SDK installed and the
OneSignalInAppMessagespackage enabled.
Set up an in-app push permission prompt
Remove any automatic permission prompts
- Remove any
requestPermission()oroptIn()calls invoked on app start. - Remove native iOS calls to
requestAuthorizationWithOptionsand any code that generates push tokens directly. - Remove Android calls to
requestPermissionsand any code that generates push tokens directly.
Create or edit the in-app message
- Edit the default Push Permission Prompt template, or
- Click New Message to create your own.
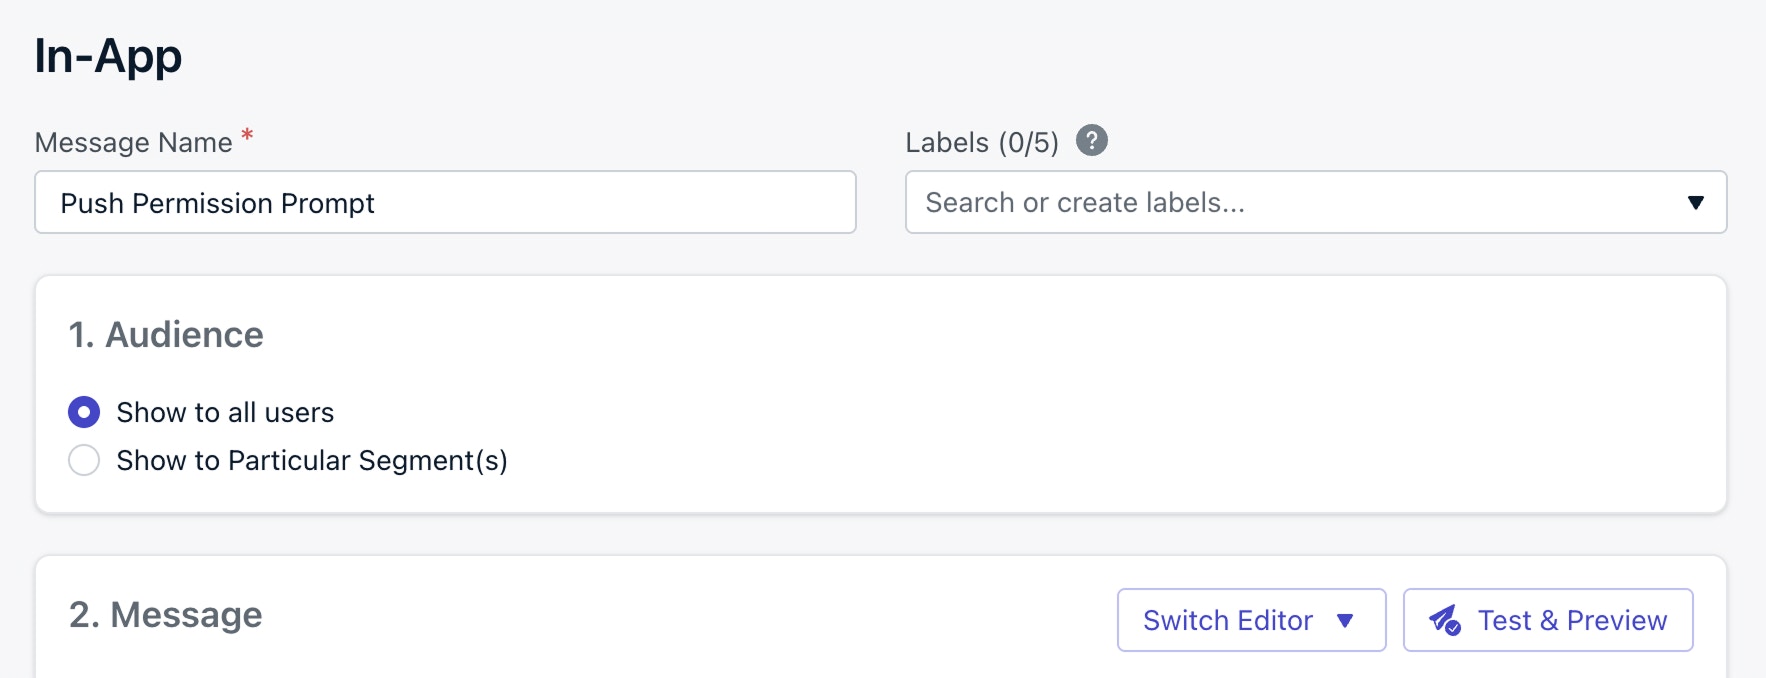
Edit the default Push Permission Prompt template or create your own.
Set the audience to 'Show to all users'. The Push Permission Prompt click action filters to unsubscribed users automatically.
Customize the message design
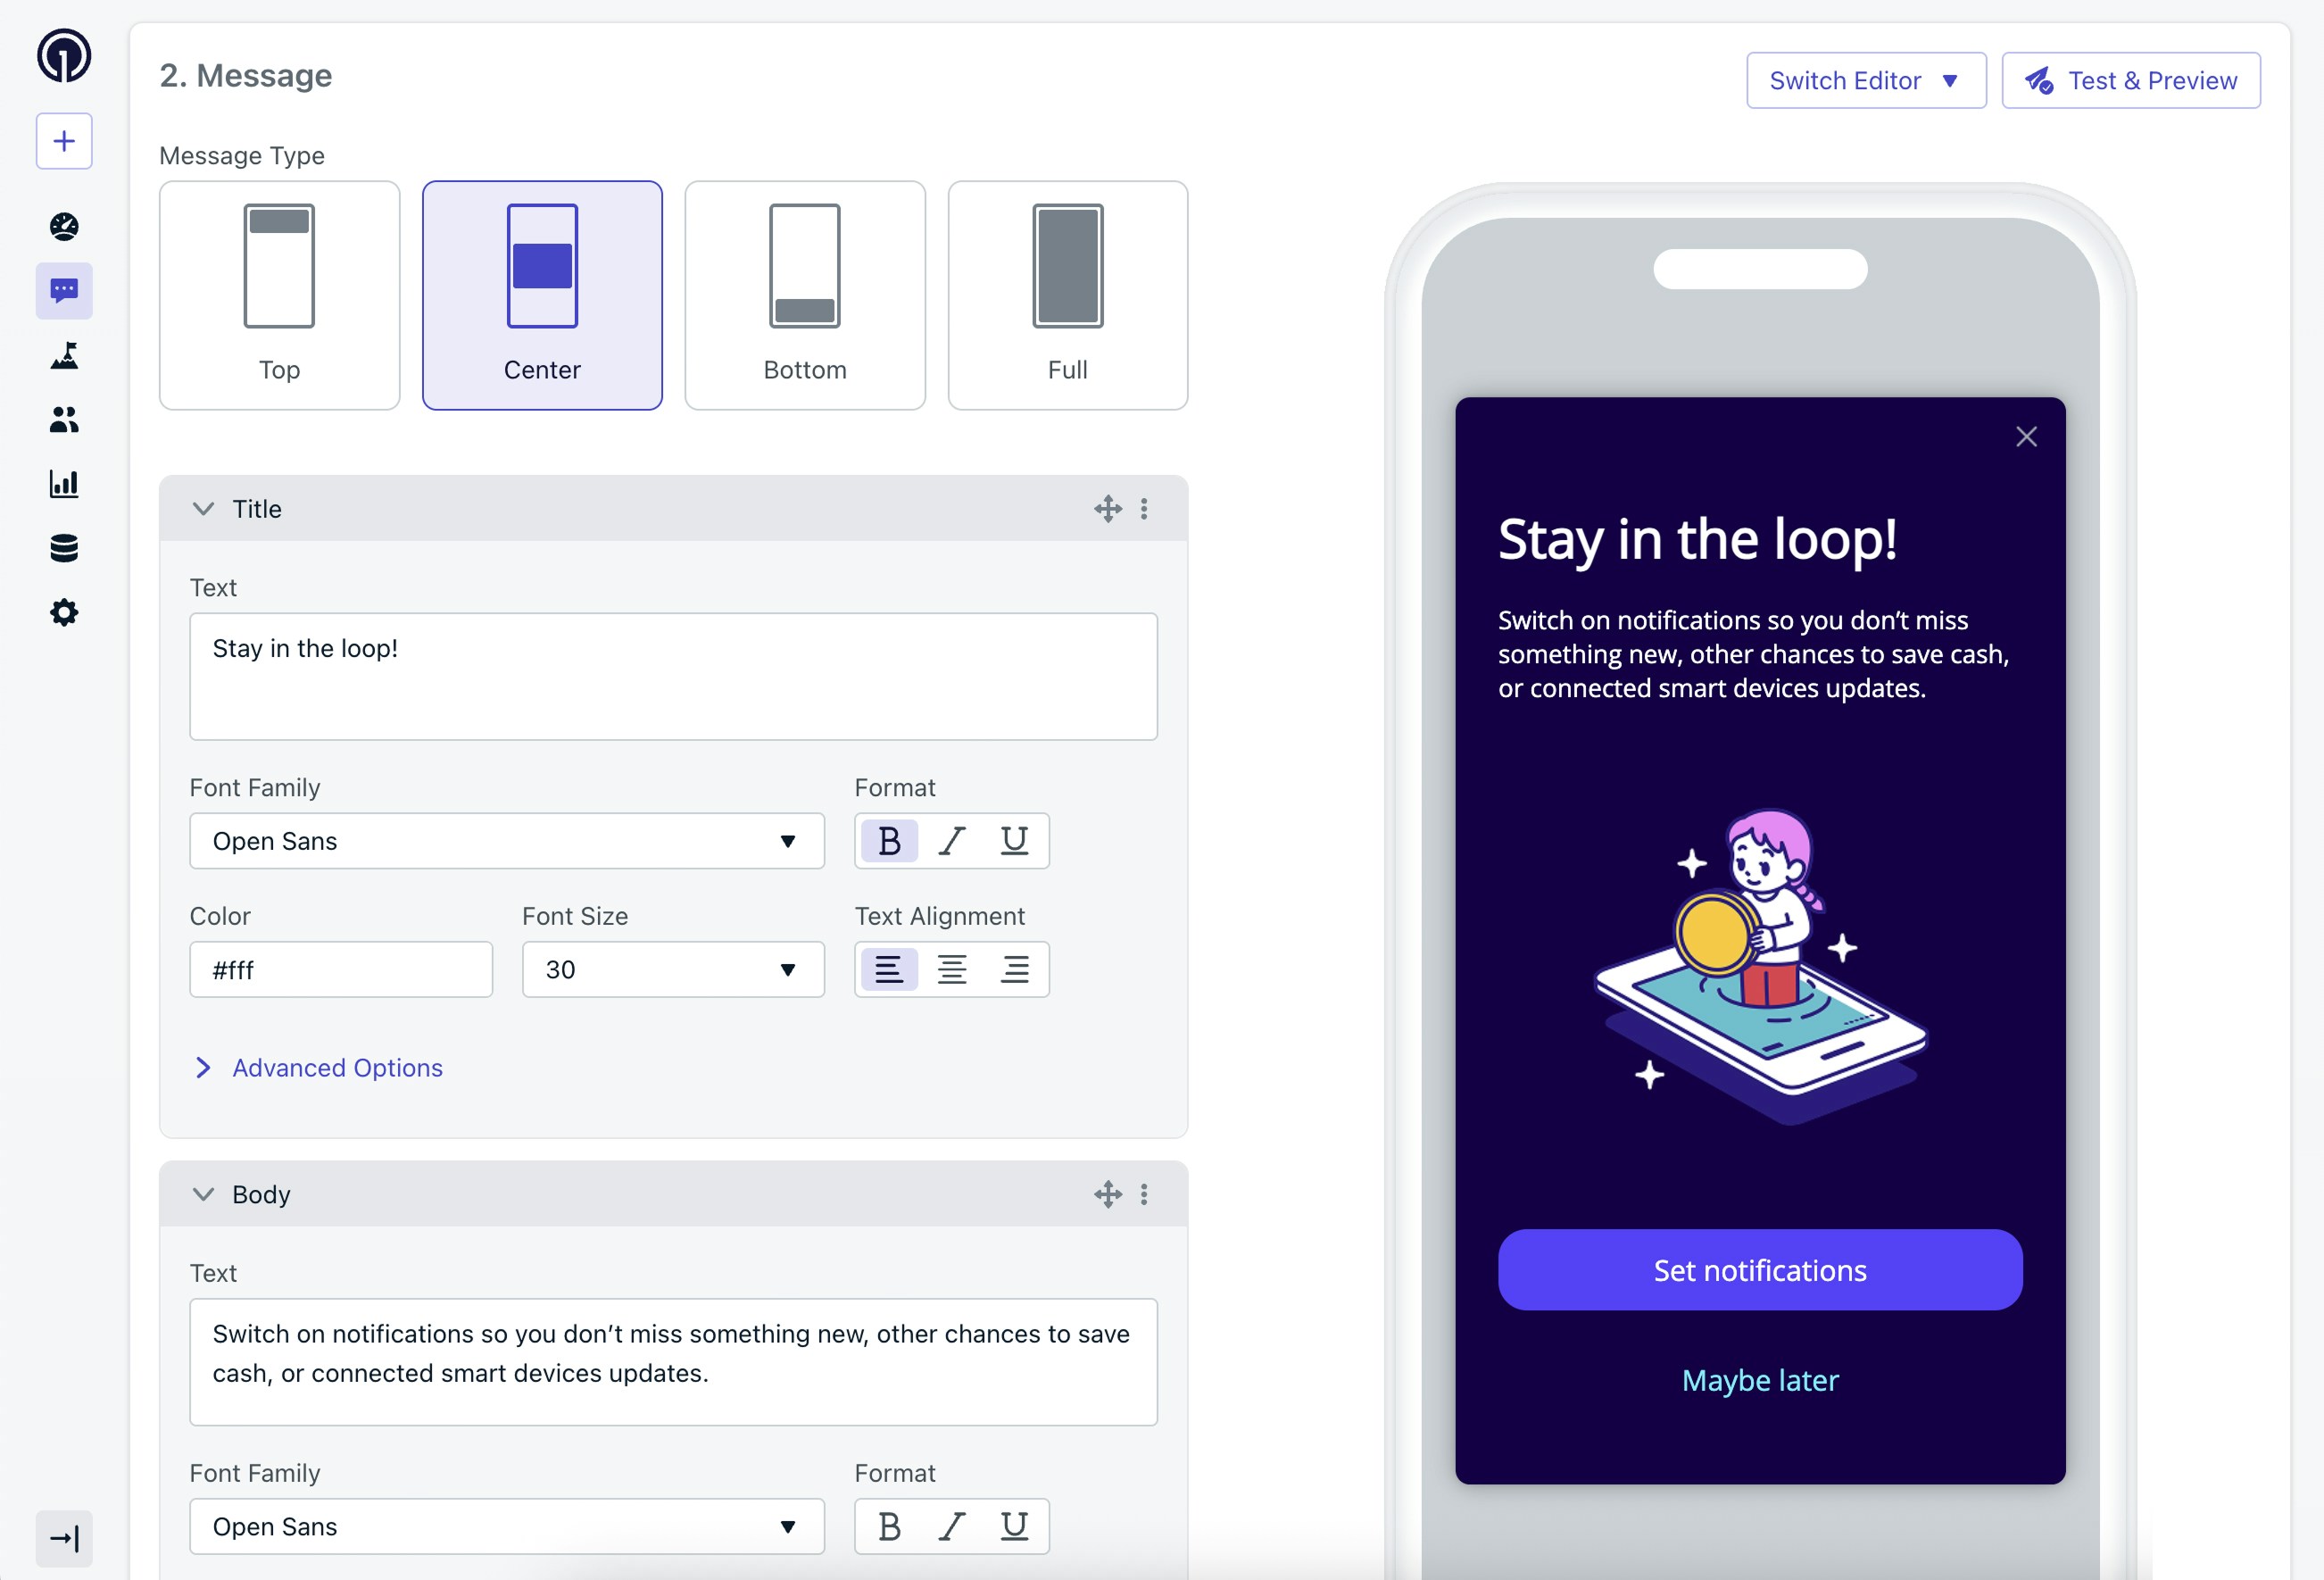
The in-app message block editor for creating push opt-in messages.
Add the Push Permission Prompt click action
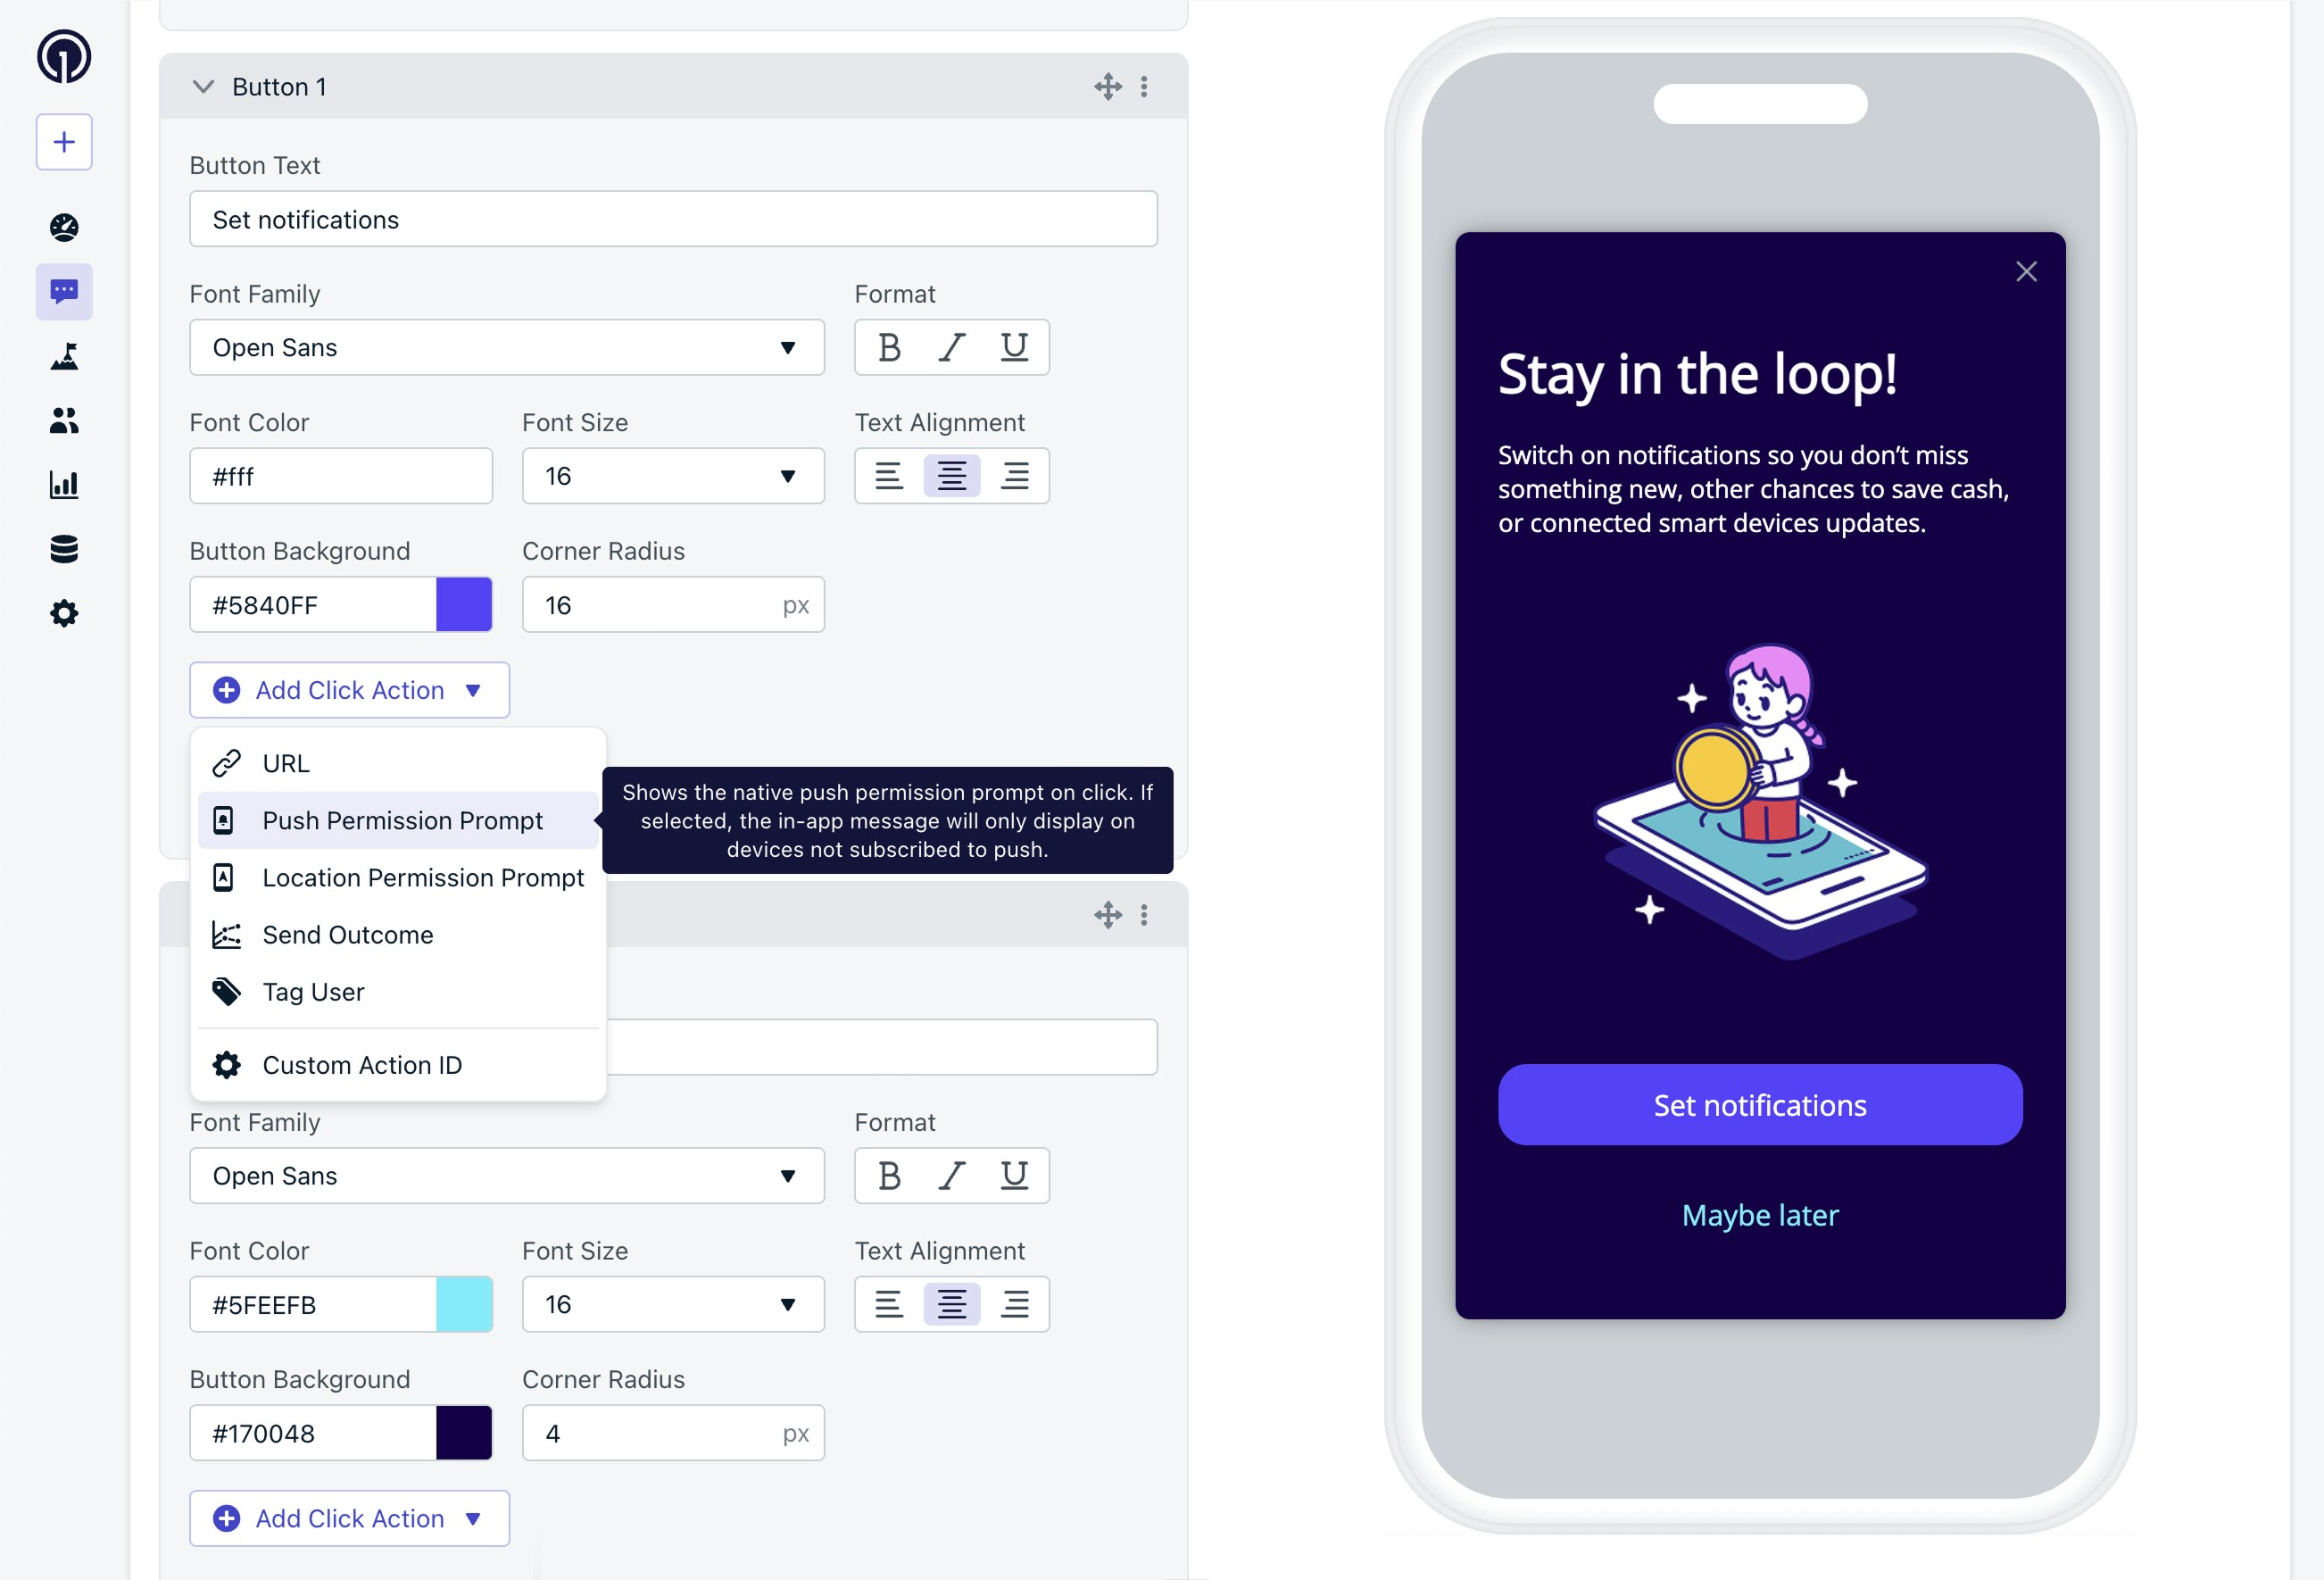
Adding a Push Permission Prompt click action to a button.
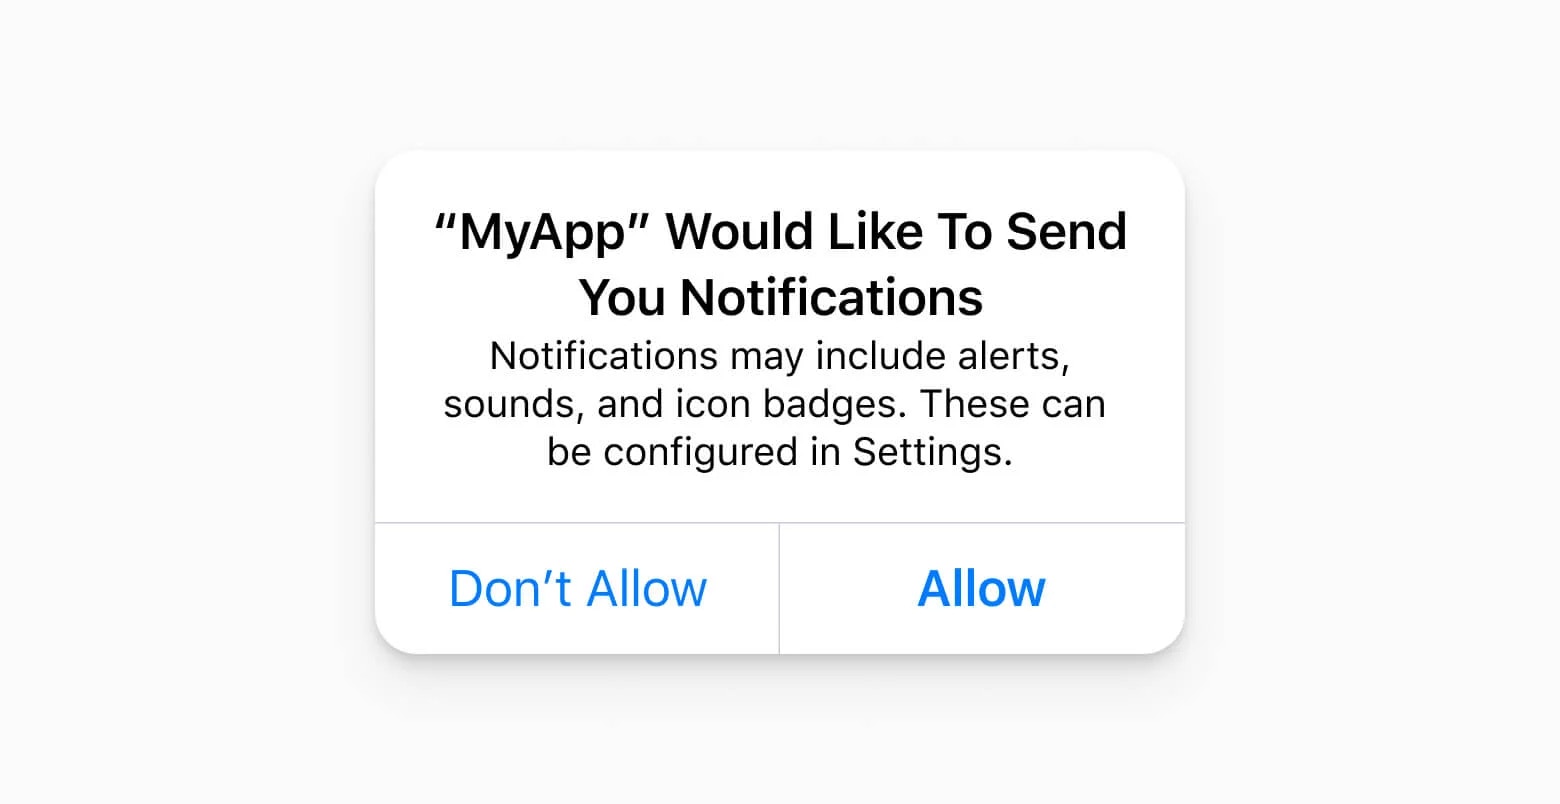
The system permission prompt triggered by the click action on iOS.
requestPermission(fallbackToSettings: true) from the SDK.Choose a trigger
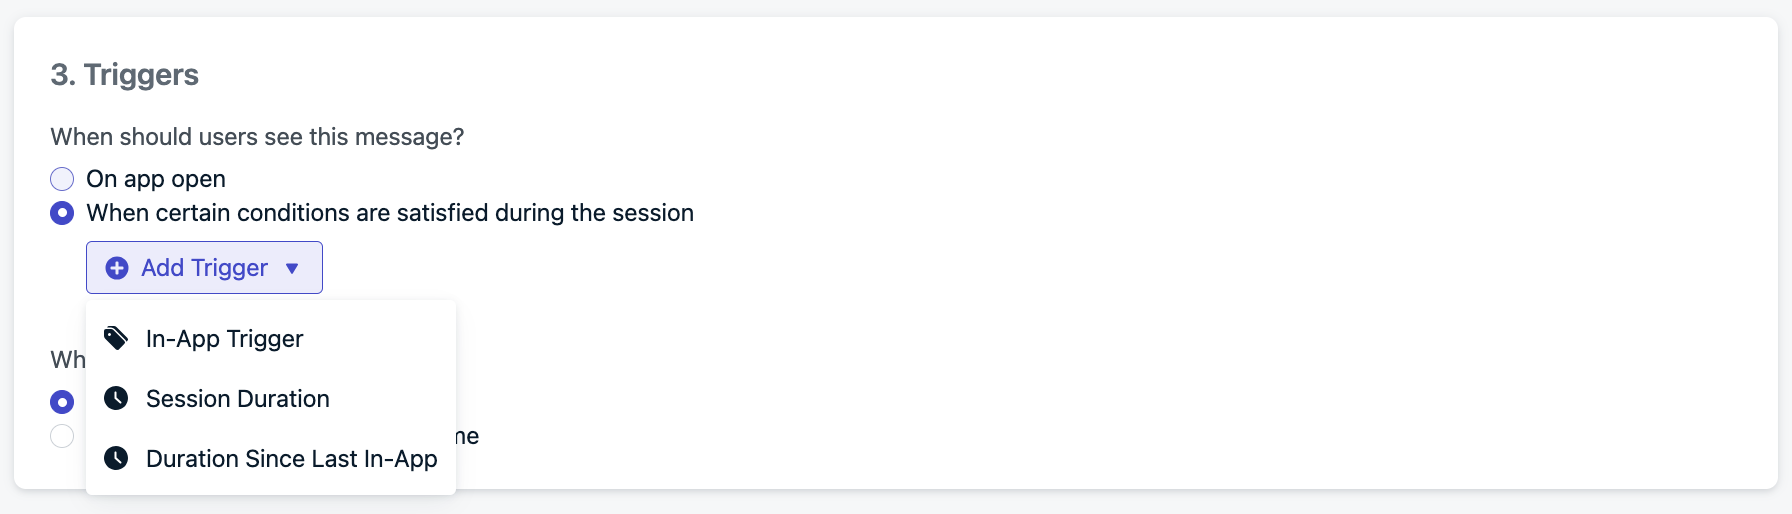
Trigger options to control when the message is shown.
- On app open. Simple, but rarely optimal. Use only if the app’s value is obvious within seconds.
- After a set amount of session time. A good default. Waits until the user has explored the app before asking.
- On a specific user event. Best for conversion. Trigger after high-signal actions like completing onboarding, saving an item, following a topic, or finishing a first purchase.
- Programmatically, using the in-app message trigger SDK methods. Full control over timing and context, including combining multiple signals before you prompt.

Trigger configured to show the message after 5 minutes of session time.
Schedule and frequency
- Only once. Low chance of converting users who weren’t ready the first time.
- Every time conditions are met. Too aggressive and may annoy users.
- Multiple times (recommended). Set a max per user with a gap between views. For example,
20displays with a2 weeksgap re-prompts unsubscribed users for about 10 months at an aggressive cadence. Loosen the gap (for example,30 daysor60 days) for lower-engagement or utility apps where a 2-week cadence feels pushy.
Schedule and frequency settings for the in-app message.
Programmatically show the permission prompt
You can trigger the system permission prompt manually using therequestPermission() or optIn() SDK methods. This is useful for custom flows such as:
- A preference center.
- A user profile screen.
- Specific in-app events.
fallbackToSettings: true to requestPermission() so that users who have already declined are redirected to the app’s notification settings instead of silently doing nothing.
optOut() (shown as notification_types: -2 on the subscription record), requestPermission() alone will not change the subscription status. Use optIn() instead. It requests permission and clears the opt-out state.Use iOS provisional notifications
Provisional push notifications were introduced in iOS 12. They let you deliver notifications to the Notification Center without showing a permission prompt. Users see real content from your app and decide whether to keep, silence, or turn off notifications based on that experience. Why it works as a strategy:- No system prompt to fail. You can start reaching users on their first session without any upfront opt-in decision.
- Users decide based on real value, not a hypothetical explanation.
- You can still show a soft prompt later to convert provisional users into full push subscribers with banners, sound, and lock-screen alerts.
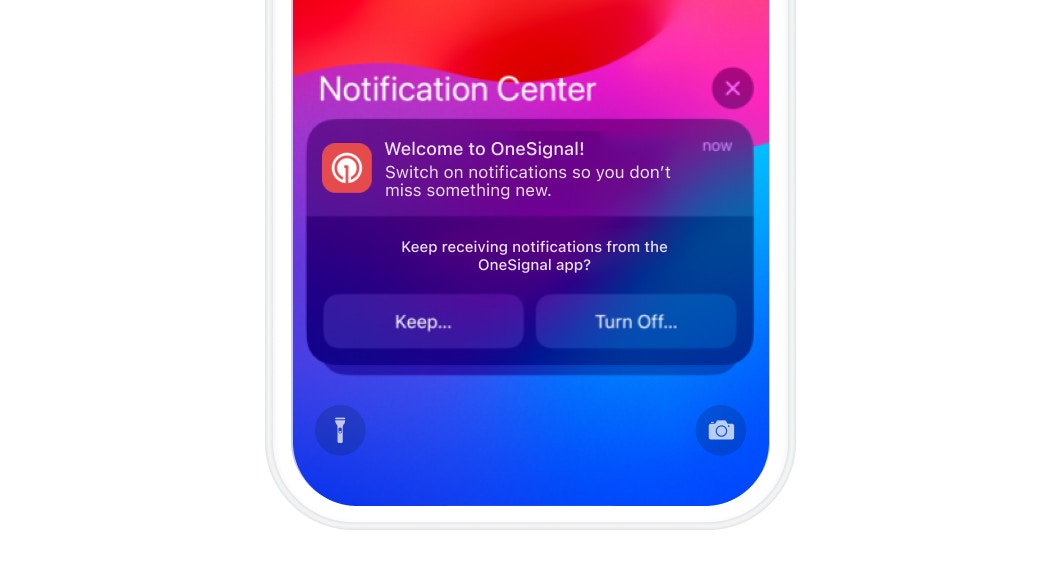
A provisional notification prompting the user to keep or turn off notifications.
Track push permissions and prompt results
- Track which button the user tapped in the soft prompt with the in-app message click listener.
- Track impressions and dismissals (when the user sees but doesn’t tap the soft prompt) with the in-app message lifecycle listener.
- Track the result of the system permission prompt itself with the push permission observer.
FAQ
What happens if a user denies the system permission prompt?
On iOS, denying the system permission prompt permanently disables push notifications for your app. The prompt cannot be shown again. On Android, the user gets one more chance (two total). After all attempts are used, the user must re-enable notifications manually in Settings > Notifications on their device. The Push Permission Prompt click action andrequestPermission(fallbackToSettings: true) both handle this by sending the user directly to their notification settings.
Can I customize the native system permission prompt?
No. The system permission prompt on iOS and Android is controlled by the operating system and cannot be customized. You can only customize the soft prompt (the in-app message shown before it). Use the soft prompt to explain the value of your notifications, set expectations, and increase the chance of an “Allow” on the system prompt.Can I still prompt users who have provisional notifications?
Yes, and you should. Provisional users are prime candidates for a soft prompt because they have already seen real notifications from your app. See Use iOS provisional notifications for the recommended pattern. Time the soft prompt for right after the user opens or acts on a provisional notification.How do I re-prompt users who previously denied push?
Once the system permission prompt has been exhausted (once on iOS, twice on Android), you cannot show it again. Instead, use therequestPermission(fallbackToSettings: true) SDK method or the Push Permission Prompt click action on an in-app message. Both open your app’s notification settings so the user can enable notifications manually. Pair this with an in-app message explaining why notifications are valuable.
Do all Android versions require a system permission prompt?
No. Only Android 13 (API level 33) and later. Android 13 introduced the runtime notification permission, requiring explicit user consent for push notifications.- Released: August 2022 (Pixel devices).
- Required for target SDK: As of August 31, 2023, all new apps and updates on Google Play must target API level 33 or higher.
- Source: Google’s developer guide on notification permissions.
iOS provisional push notifications
Mobile SDK reference
requestPermission, optIn, permission observer, and in-app click listener APIs.