Connect Shopify to OneSignal through the Vendo integration for web push notifications, customer tags, commerce events, and behavioral targeting.
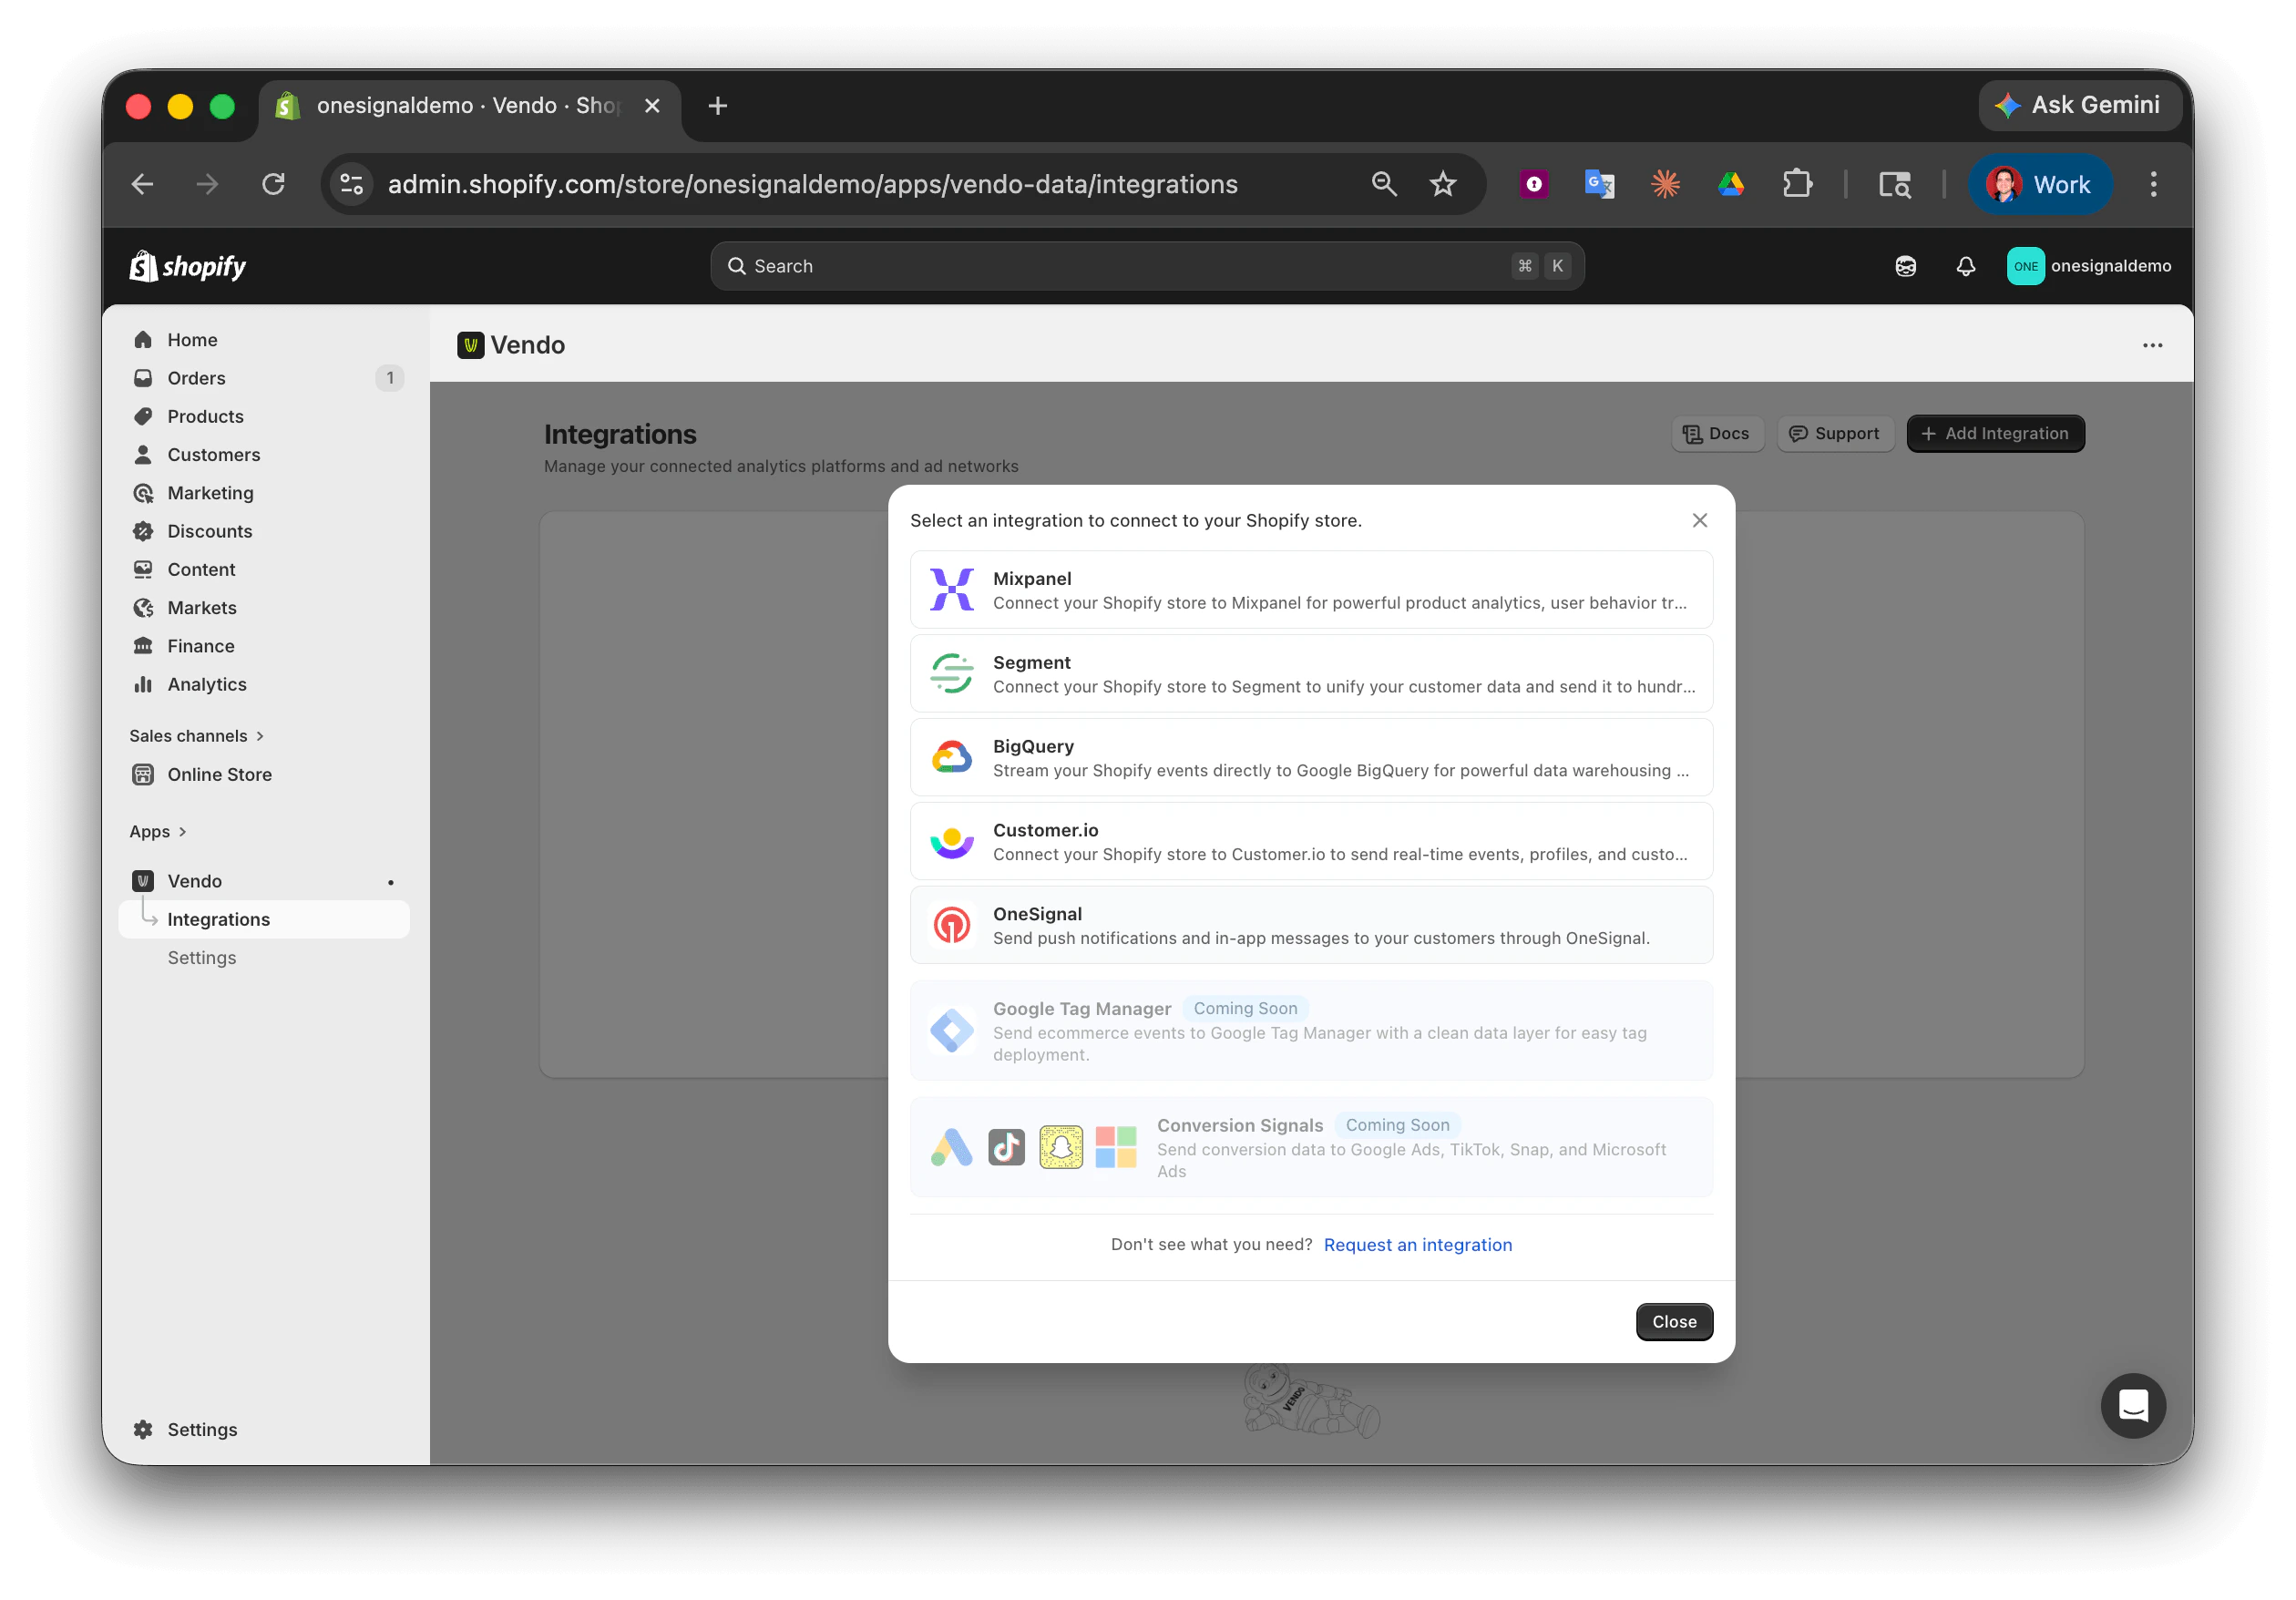
OneSignal has partnered with Vendo to create a seamless Shopify integration. Vendo deploys the OneSignal SDK on your Shopify storefront with one click — no manual theme code editing required. It syncs customer tags, client-side browsing events, and server-side commerce events to OneSignal so you can build segments and trigger push campaigns from real behavior and purchase history.For Vendo’s documentation, see Vendo OneSignal Destination.
Log in to onesignal.com and create or select an app. Choose Web as the platform and select Custom Code as the integration type.
You must select Custom Code. The Typical Site option does not expose the service worker path settings, so the SDK will try to load /OneSignalSDKWorker.js from your store root — Shopify blocks this and push subscriptions will silently fail. If you already created the app under Typical Site, switch to Custom Code in Settings > Platforms > Web, or delete and recreate the app.
2
Configure web push settings
In your OneSignal app, navigate to Settings > Push & In-App > Web Settings or follow the Web push setup guide.Site setup
Site Name: Your store name, used as the default notification title.
Site URL: Your Shopify store’s publicly accessible URL (e.g., https://yourstore.com).
Do not use https://your-site.myshopify.com/ if customers access your site through a custom domain like https://your-site.com/.
Default Icon URL: Upload a square 256×256 PNG, JPG, or non-animated GIF that appears in notifications and prompts. If not set, a bell icon is used as the default. See Notification icons.
3
Configure the service worker path
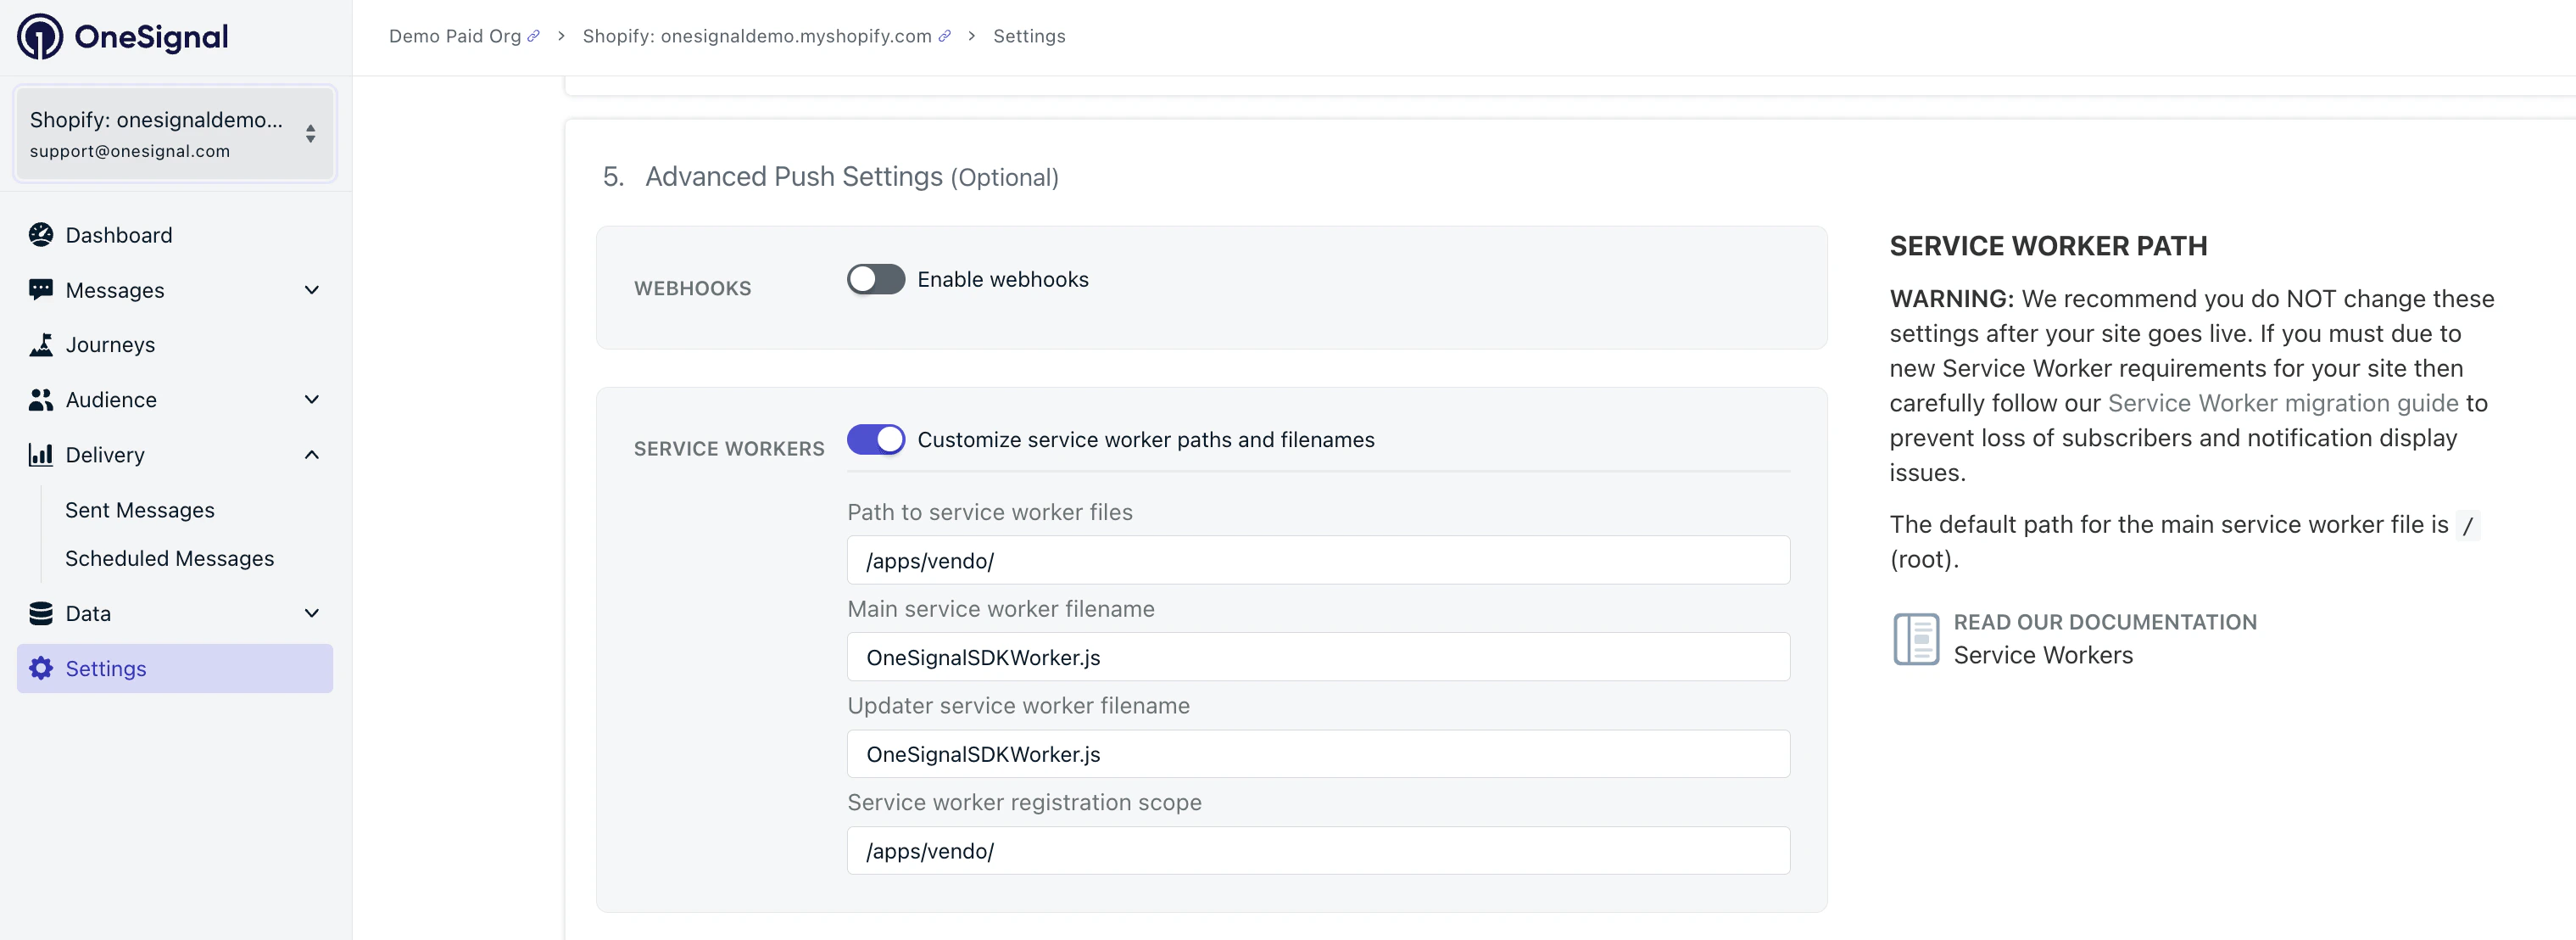
Shopify does not allow serving files from the site root, so you must tell OneSignal where Vendo serves the service worker file.In OneSignal, go to Settings > Push & In-App > Web Settings, scroll to Advanced Push Settings, and toggle on Customize service worker paths and filenames, then configure:
Setting
Value
Path to service worker files
/apps/vendo/
Main service worker filename
OneSignalSDKWorker.js
Updater service worker filename
OneSignalSDKWorker.js
Service worker registration scope
/apps/vendo/
Service worker configuration for Shopify stores using Vendo.
Vendo automatically serves the required OneSignalSDKWorker.js file at https://yourstore.myshopify.com/apps/vendo/OneSignalSDKWorker.js — no manual file uploads needed.
The Vendo app’s OneSignal > Push Settings page displays these exact values with click-to-copy, so you don’t need to retype them.The Updater Filename and Main Service Worker Filename are the same file. OneSignal v16+ uses a single service worker for both purposes.
4
Copy your credentials
In OneSignal, go to Settings > Keys & IDs and copy your App ID and REST API Key. You will enter these in Vendo.
Enter your OneSignal App ID and REST API Key from the previous section, then click Save.
4
Enable the Vendo theme block
The Vendo theme block loads the OneSignal SDK on your storefront. Without it, the push prompt will not appear and client-side tracking will not work.
In your Shopify admin, go to Online Store > Themes > Customize.
Click App embeds (puzzle piece icon in the left sidebar).
Toggle Vendo on.
Click Save.
The theme block handles SDK initialization, service worker registration, push prompt display, user identification (push subscription, login, newsletter signup), and tag syncing for identified users.
5
Select events to sync
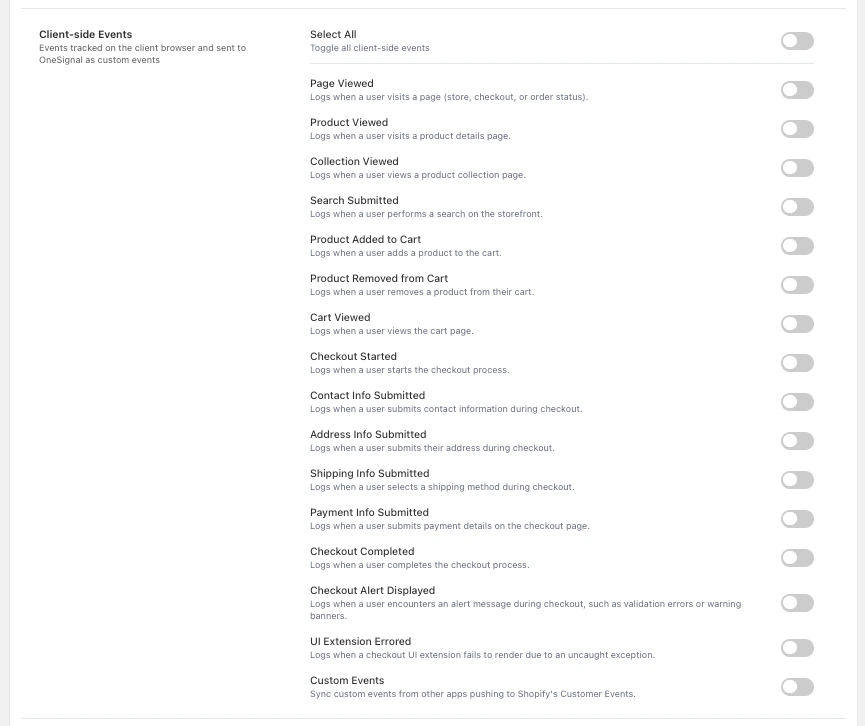
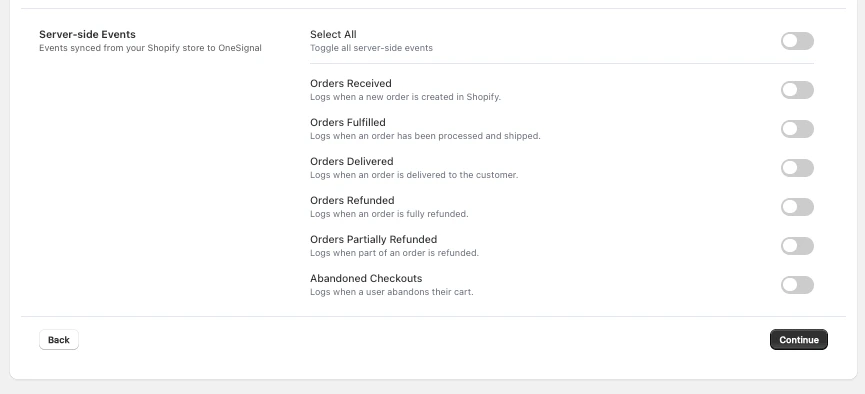
In the Vendo app under OneSignal > Events, enable the client-side and server-side events you want to send to OneSignal. See Tracking below for the full event list.
6
Configure push prompts
Whether each prompt appears on your storefront — and when — is controlled from the Vendo app, not the OneSignal dashboard. In the Vendo app, open OneSignal > Push Settings. You will see four sections, each with its own toggle:
Section
What it does
Subscription Bell
Floating bell icon visitors can click to subscribe at any time
Push Slide Prompt
Branded slide-in banner asking for push permission
Native Browser Prompt
Triggers the browser’s built-in permission dialog directly
Welcome Notification
Push notification sent automatically when a visitor subscribes
For Push Slide and Native prompts, you also set triggers — how many page views and how many seconds to wait before the prompt fires. Sensible defaults are pre-filled.All four prompts are off by default — enable only the ones you want. Save once at the bottom of the page; changes take effect on the next storefront load without a theme redeploy.
Prompt button copy, action message text, icons, and advanced options like A/B tests and localization are configured in the OneSignal dashboard. From Vendo’s Push Settings, click Open OneSignal Dashboard to jump directly to the Permission Prompt Setup page. If a prompt is configured in OneSignal’s dashboard but its Vendo toggle is off, it will not render — Vendo’s toggle is the source of truth for visibility.
7
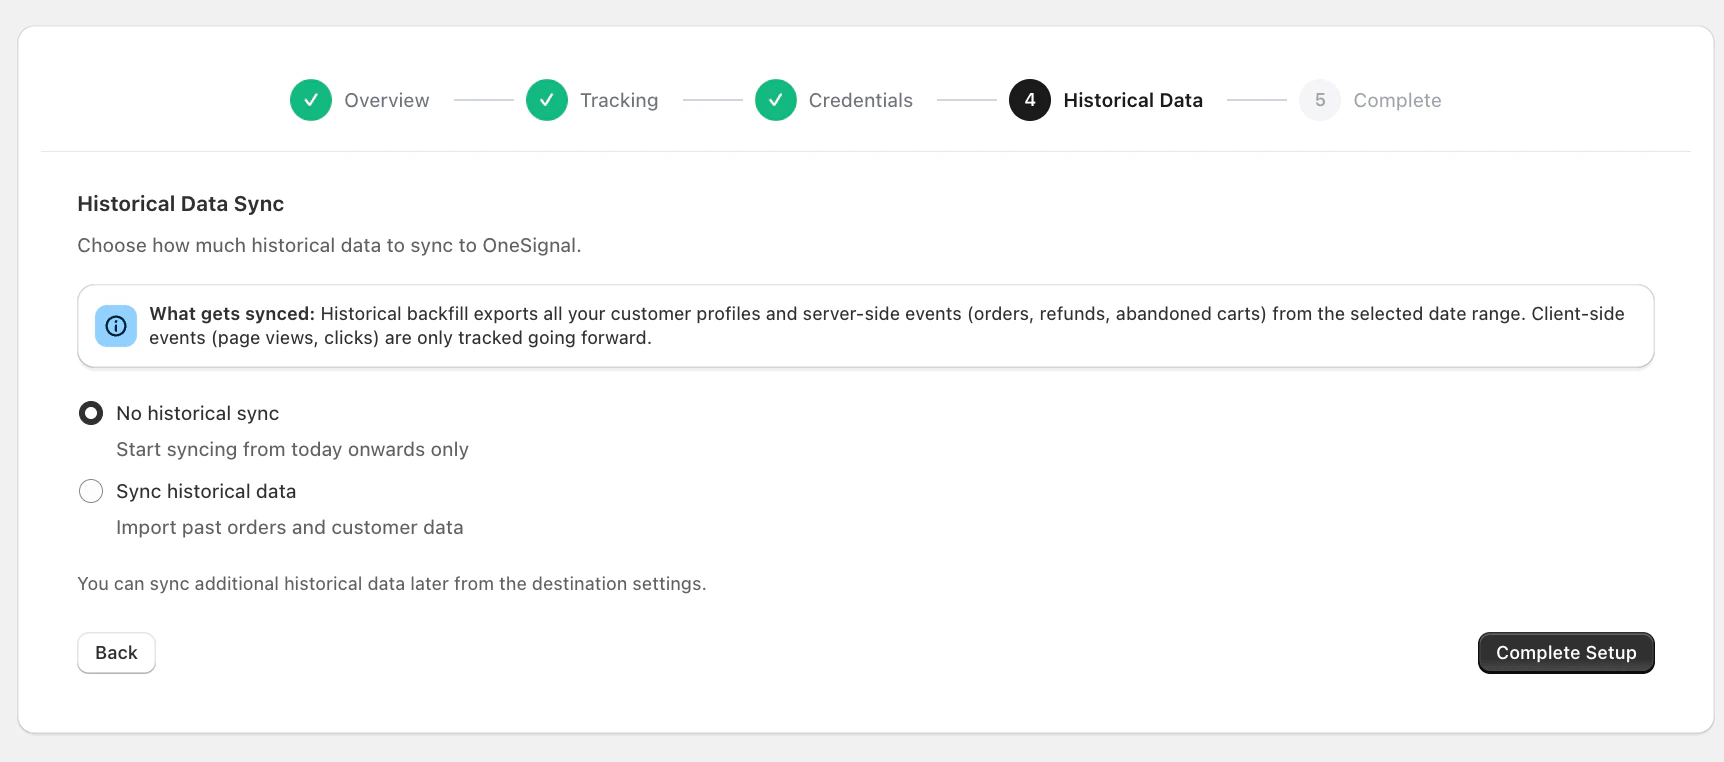
Historical data sync (optional)
Vendo can backfill existing customers and recent order history to OneSignal. This happens automatically in the background after you save your credentials.
Vendo uses an identified-only approach — anonymous visitors are not tracked in OneSignal. Users must be identified through one of four methods before events are sent. This prevents duplicate users and ensures clean, actionable data.
Method
How it works
Identifier used
Web push subscription
Visitor clicks “Allow” on the push prompt. OneSignal creates a user automatically and Vendo captures the OneSignal ID.
OneSignal ID
Newsletter signup
Visitor submits a newsletter or email form. Vendo captures the email and calls OneSignal.login(email).
Email
Customer login
Customer logs into their Shopify account. Vendo detects this and calls OneSignal.login() with the configured identifier.
Shopify Customer ID or Email
Checkout completed
Customer completes a purchase. Vendo stores the identifier and calls OneSignal.login().
Shopify Customer ID or Email
If you have a mobile app or third-party connections, select the identifier (Shopify Customer ID vs. Email) that matches your other tools so user profiles stay consistent across platforms. Configure this in the Vendo app under Settings > Customer Identifier.
If a push subscriber (identified by OneSignal ID) later logs in or completes a purchase, Vendo calls OneSignal.login() with their Shopify Customer ID or email. OneSignal links the push subscription to the identified user — no duplicate users are created. All past push subscriptions are preserved, and server-side events (orders, fulfillments) reach the correct user profile.
Vendo captures UTM parameters and click IDs at checkout and syncs them as tags. Last-touch values are overwritten on each checkout; first-touch values (initial_utm_*) are written only once.
Vendo can sync Shopify segment membership as tags in the format shopify_segment_{segment_id} with a value of "true". See Vendo’s Events & Properties reference for details on running the sync.
Vendo tracks client-side custom events on your storefront via the Shopify Web Pixel and sends them to OneSignal. These events are only sent after a user is identified.
Event
Description
page_viewed
Customer visits a page (storefront, checkout, or order status)
Shopify commerce events are exported and forwarded to OneSignal through the Vendo pipeline. These always use the Shopify Customer ID as the external_id.
Create a Journey triggered by the cart_abandoned event. Wait 1 hour after abandonment, then send a push notification with the recovery link using the checkout_url property.
Visit https://yourstore.myshopify.com/apps/vendo/OneSignalSDKWorker.js in your browser. You should see JavaScript code. If you get a 404, verify the Vendo app is installed and the theme block is enabled.You can also open browser DevTools (F12), go to Application > Service Workers, and confirm OneSignalSDKWorker.js is registered with a scope of /apps/vendo/.
2
Test the push prompt
Open your storefront in an incognito/private window. You should see the OneSignal notification permission prompt. Click Allow to subscribe.
3
Send a test notification
In the OneSignal dashboard, go to Messages > New Push. Send a test notification to your subscriber and verify it appears.
4
Verify user data in OneSignal
Go to Audience > All Users and confirm your test user appears. Check that user tags (email, name, etc.) are syncing for identified users.
5
Trigger a test event
Browse a product or complete a test checkout on your store. Confirm the event appears in the user’s activity in the OneSignal dashboard.
The service worker must be at /apps/vendo/OneSignalSDKWorker.js. If you see a 404 error at the root path (/OneSignalSDKWorker.js), the service worker path is not configured in OneSignal — follow the service worker configuration step. If the 404 is at the /apps/vendo/ path, verify the Vendo app is installed and the theme block is enabled.
”Typical Site” was selected during OneSignal setup
Vendo requires the Custom Code integration type. Typical Site does not expose the service worker path settings, so the SDK will try to load /OneSignalSDKWorker.js from your store root — Shopify blocks that and push subscriptions will silently fail.Fix: in the OneSignal dashboard, either switch the app’s integration type to Custom Code under Settings > Platforms > Web, or delete the app and recreate it using Custom Code from the start.
Check that the Vendo theme block is enabled in App embeds.
In the Vendo app under OneSignal > Push Settings, confirm at least one prompt toggle (Subscription Bell, Push Slide Prompt, or Native Browser Prompt) is turned on — all four are off by default.
Check the trigger delay — a Push Slide set to multiple page views won’t fire on the first page load.
Verify your browser allows notifications (click the lock icon in the address bar).
Try an incognito/private window in case the prompt was previously dismissed.
Tags only sync for identified users — anonymous visitors are not tracked. Ensure the user has been identified via push subscription, login, newsletter signup, or checkout. Initial tag syncs can take several hours.
Verify events are enabled in the Vendo app under OneSignal > Events. Client-side events require the Shopify Web Pixel to be active and the user to be identified. Server-side events require the REST API Key to be configured.
The integration is working — the issue is with your browser or OS notification settings. Check your OS notification settings for your browser, ensure Do Not Disturb / Focus mode is off, and verify browser-level notification permissions.
Yes. Update the setting in the Vendo app under Settings > Customer Identifier. Changing the identifier may create separate user profiles if existing users were already identified with the previous method.
The Vendo integration focuses on Shopify storefronts and web push. If you also have a mobile app, ensure the identifier you select in Vendo matches the one you use in your mobile app so user profiles stay consistent.
Events from unidentified visitors are not sent to OneSignal. Once the visitor identifies themselves (by subscribing to push, logging in, signing up for a newsletter, or completing checkout), Vendo begins sending events. This identified-only approach prevents duplicate users and ensures clean data.
Tracking anonymous visitors creates duplicate OneSignal users that can never be properly merged, leading to inflated user counts and fragmented data. The identified-only approach ensures every OneSignal user is real and actionable.